Add a Workflow Rule
Create a new configuration or modify an existing one.
Under Add Workflow Rules, click Add Rule.
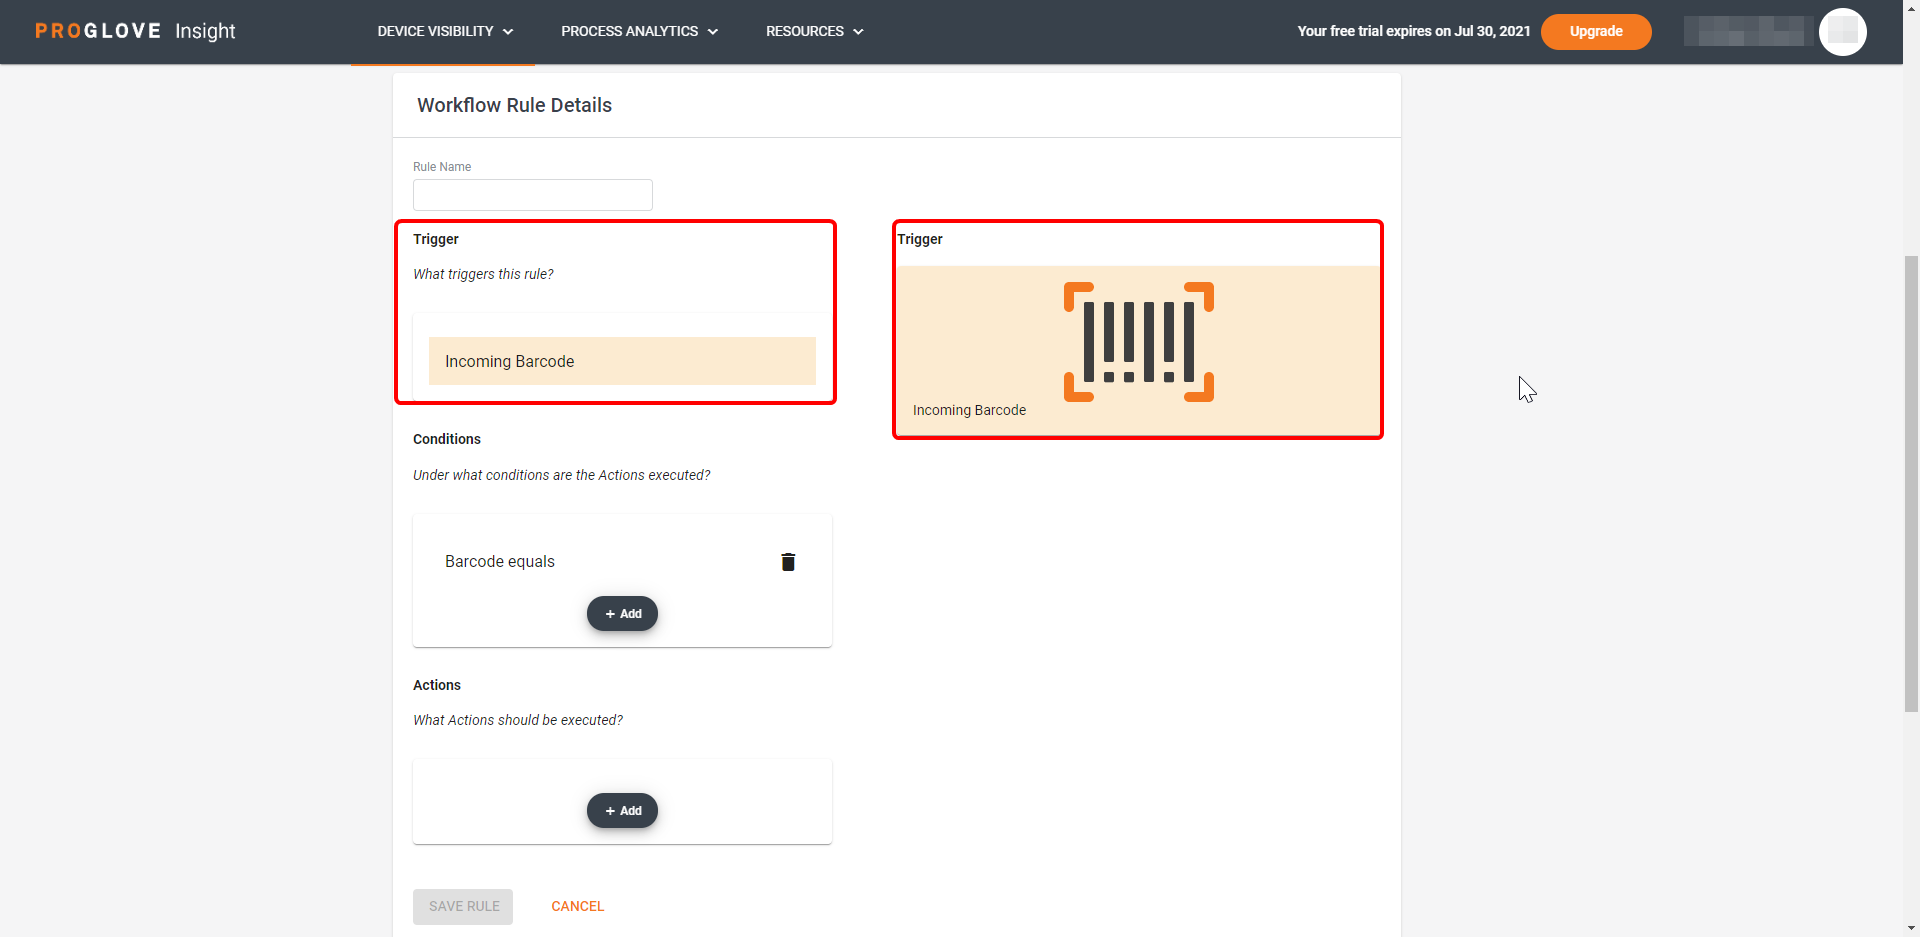
Workflow Rule Details section displays.
Under Rule Name, type in the name of your rule.
The default Trigger is Incoming Barcode.
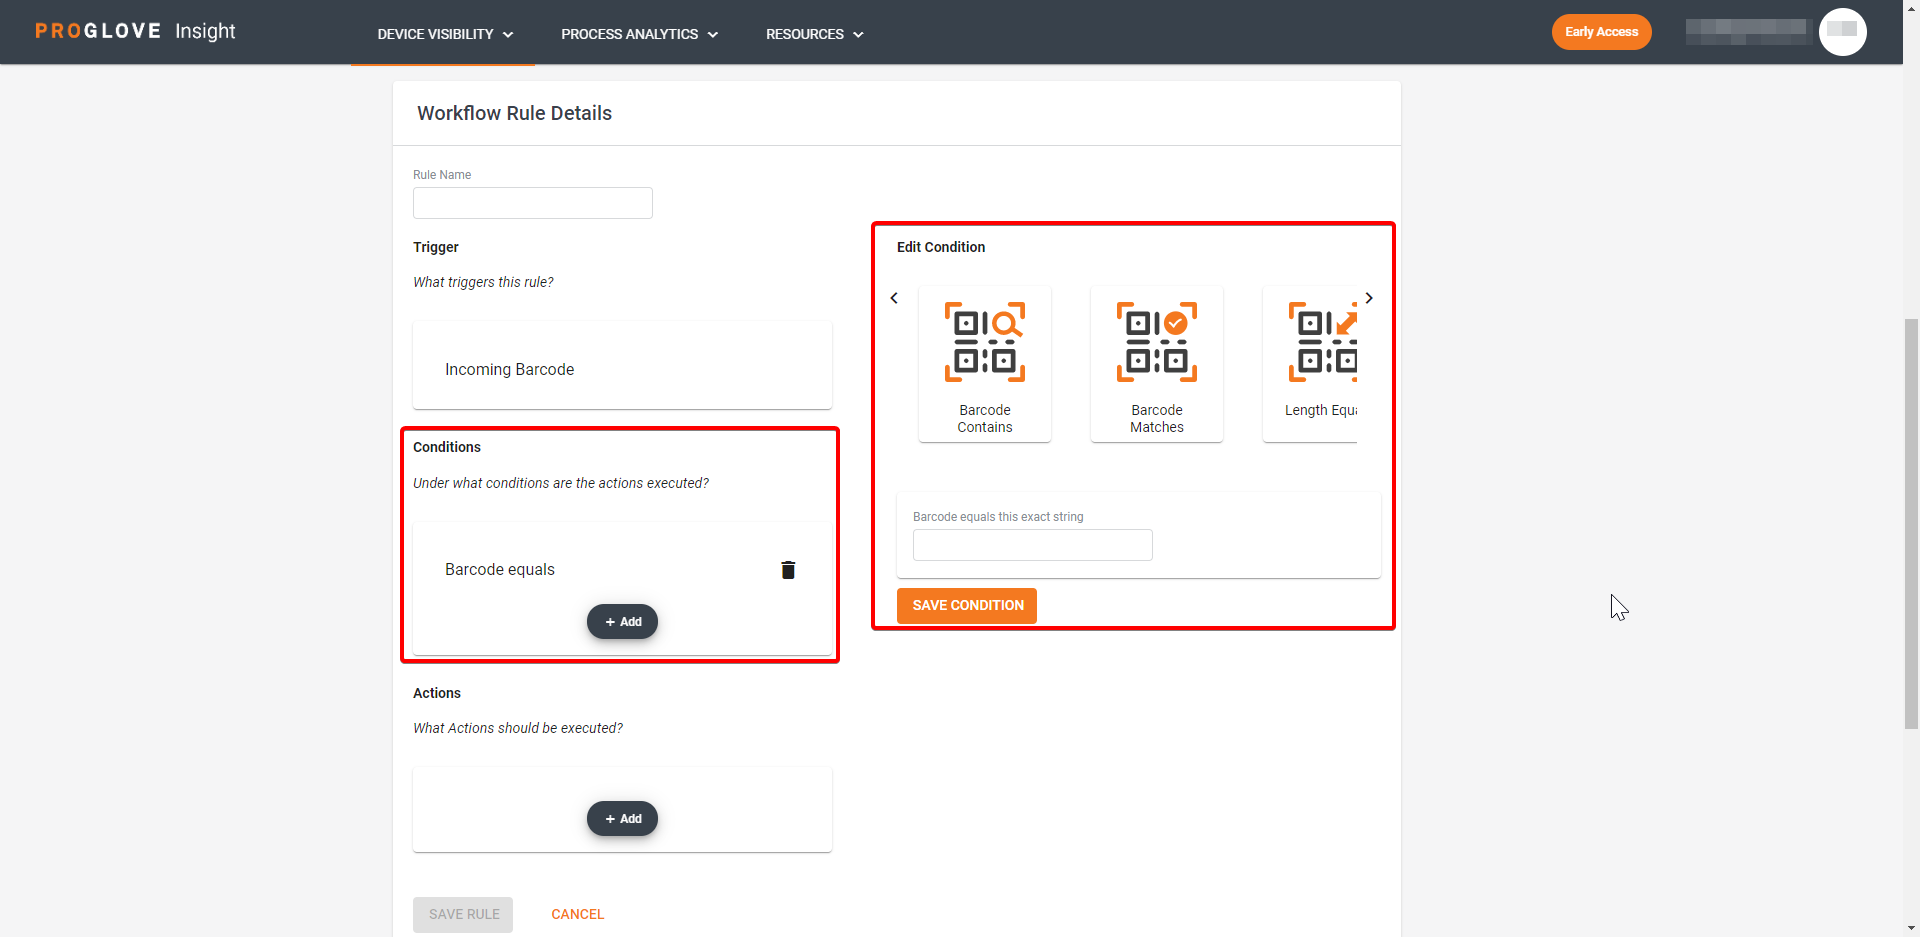
Under Conditions, click Add and select a specific barcode condition from the displayed Edit Condition section.
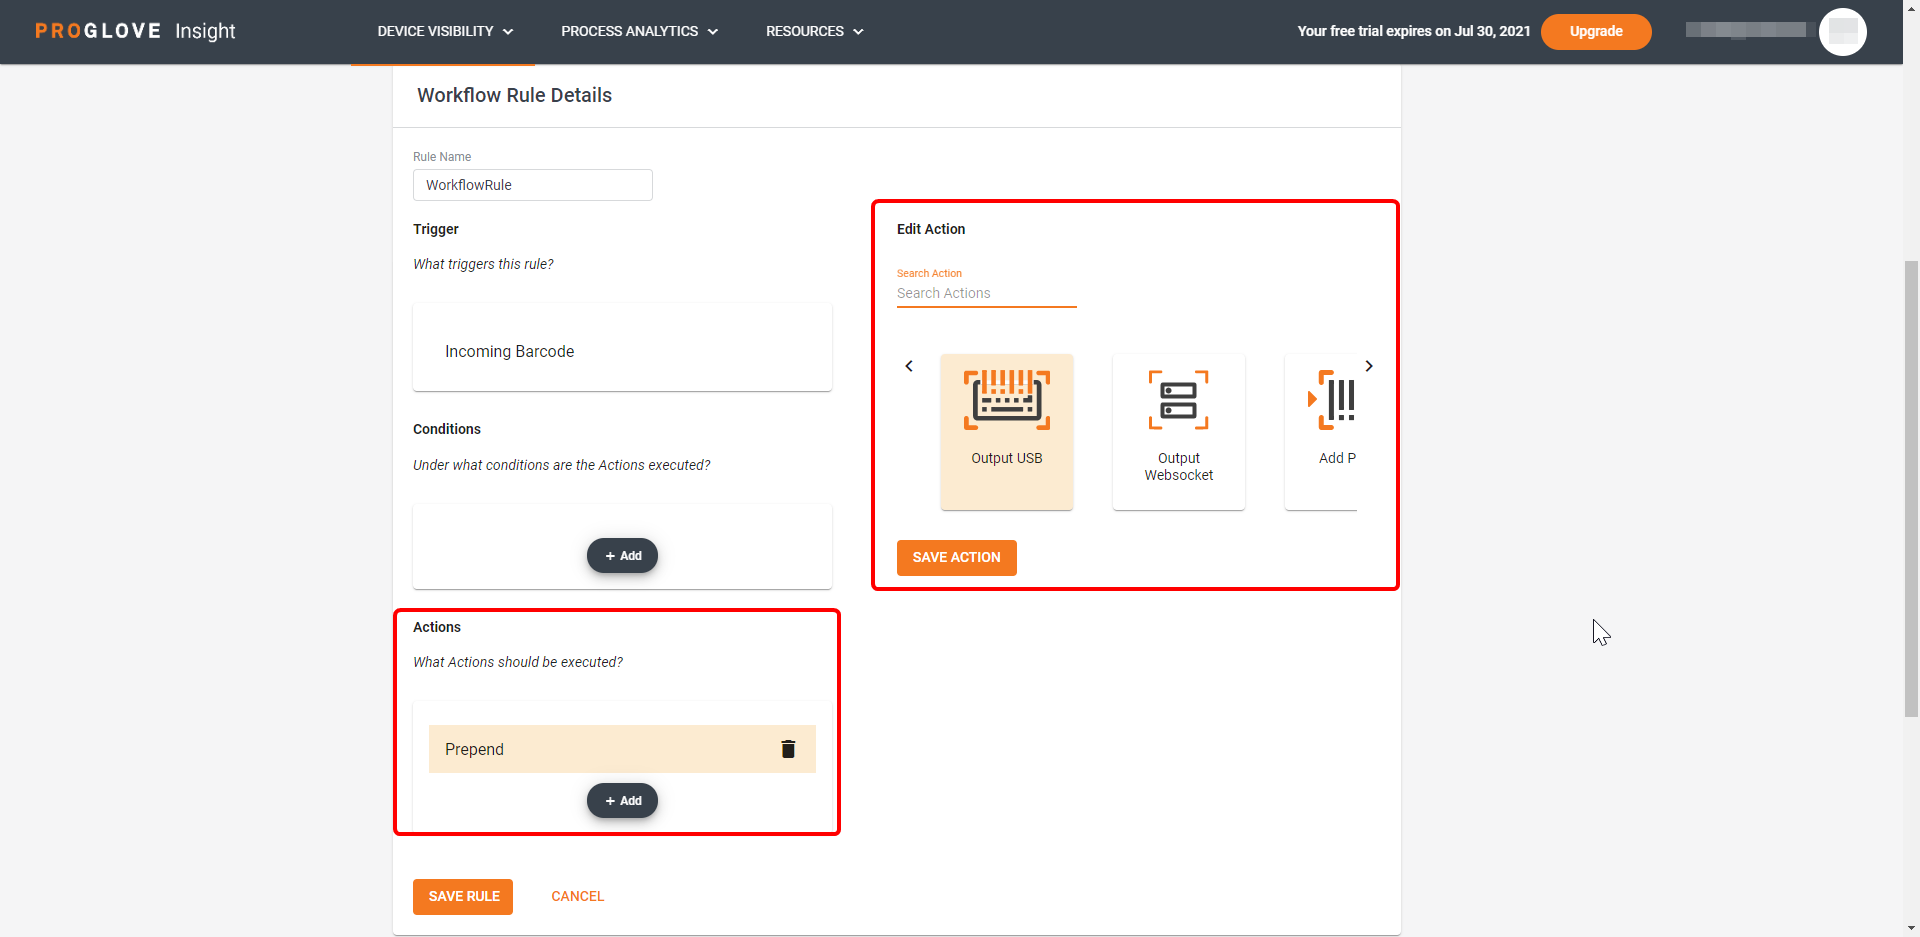
Under Actions, click Add and select what happens to the scanned barcode upon meeting the Condition.
At the bottom, click Save Rule.
The rule is now saved to the configuration.
Trigger
When creating a rule for the Gateway custom integration path, the default Trigger is the Incoming Barcode, which applies the Workflow Rule upon receiving the scanned barcode data.

Conditions
For the Incoming Barcode Trigger, the Conditions section displays. Use it to designate the specific instance when the rule is applied:
Barcode Equals - the barcode is equal to the exact string you entered
Barcode Contains - the barcode contains the string you entered
Barcode Matches - the barcode matches the exact Regular Expression you entered
Length Equals - the barcode has the exact character length you entered
Symbology is one of - the barcode belongs to the Symbology type you selected
Symbology is not one of - the barcode does not belongs to any of the Symbology type you selected

Actions
After you selected the Trigger and the Condition, you can designate what happens when they are met:
Add Prefix - the entered string is inserted as the prefix of the barcode
Add Suffix - the entered string is inserted as the suffix of the barcode
Replace with Regex - you can enter a Regular Expression and replace it with the designated Replacement Text (To learn more, see Regular Expressions)
Output USB - sent the barcode content via one of the USB integration paths selected in the Connectivity Settings
Output WebSocket - send the barcode content via WebSocket by specifying the port number in the Connectivity Settings section
Insert String at a position - inserts the specified string at the selected position (e.g. third character)
Replace Range - replaces the characters between the two specified character positions with the entered Replacement Text
