Apply the configuration
There are two ways to apply a device configuration to your Gateway:
Apply the configuration using the generated barcode - convenient if you have a small number of devices and up to 10 workflow rules per configuration
Apply the configuration by downloading the file, copying it manually onto the Gateway Mass storage device and ejecting - convenient if you have a large number of devices and in case you also want to provision the Gateway with your network credentials in a .json file
Apply configuration via barcode
On INSIGHT webportal, select Configurations, then Device Configurations.
In the top-right corner, click New configuration to add a configuration.
Select Gateway.
Type in the name of your configuration and select Next.
Create your configuration file.
At the bottom of the left navigation menu, click Save.
The Apply configuration modal window displays where you can select File transfer or Barcode scan.
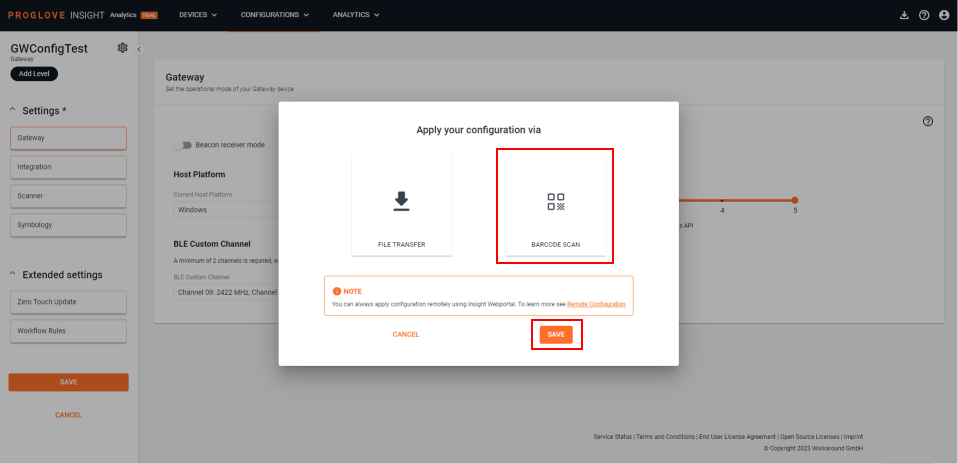
Select Barcode scan to apply the configuration by scanning the configuration barcode.
The configuration barcode is displayed.
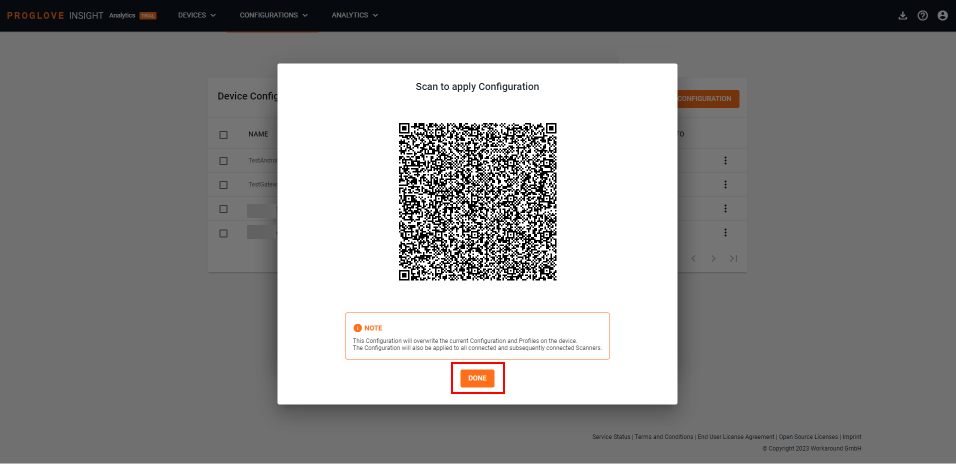
Click DONE.
Your configuration displays in the list of Configurations.
Note
In case you want to save the configuration barcode for later use, be aware that it expires after two hours. After that, you need to go back to your configuration and generate a new one.
Only configurations with up to 10 Workflow Rules can be applied using a Configuration barcode, due to the size limitation of the configuration content.
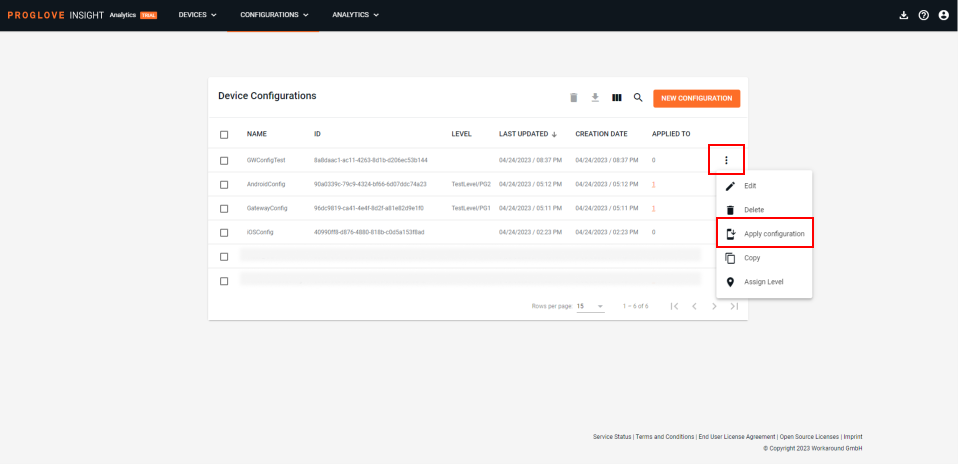
Apply an existing configuration via barcode
In the Configurations list, click on the menu button next to your configuration.
Click on Apply configuration.
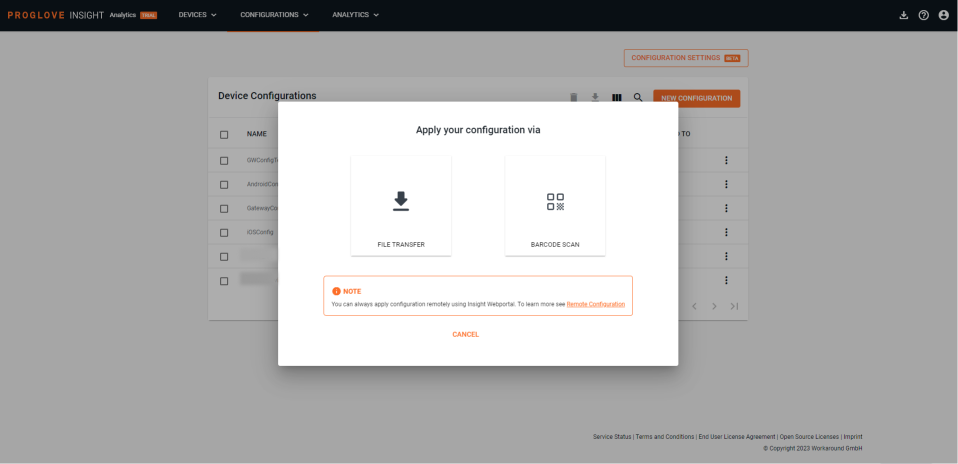
The modal Apply configuration via window displays.
Select Barcode Scan.
The configuration barcode is displayed.
Click Done.
Note
If you click Cancel in the Apply configuration window, modify the configuration and click Save again, the configuration barcode will change to include the changes you made.
Apply the configuration manually
Within the Configurations menu, select Device Configurations.
Click the three-dot menu icon next to your configuration and select Apply configuration.
The Apply configuration modal window displays where you can select File transfer or Barcode scan.
Select File transfer to download the configuration file.
A
.proconfigfile downloads to your desktop with the selected configuration.Connect the Gateway to your desktop via USB cable.
The Gateway boots up in about one minute and LED 1 (USB) glows green.
Scan the pairing barcode on your Gateway with your scanner.
The scanner connects to the Gateway and LED 2 (Scanner) glows green.
Scan the barcode below to enable the Gateway as a Mass storage device.

The Gateway displays as a Mass storage device on your desktop.
Copy the downloaded configuration file to your Gateway Mass storage device.
Eject the Gateway Mass storage device to apply the configuration.
The configuration update takes a few seconds. The Gateway flashes green when done.
Note
Ejecting the Mass storage device may vary depending on your operating system.
Make sure to Safely Remove / Eject the Mass storage device on your desktop but do NOT disconnect the Gateway’s USB cable during upload.
Note
The configuration is applied to every scanner that connects to the Gateway. A Gateway can have only one configuration at a time.
Apply your configuration remotely
On INSIGHT webportal, select Devices
From the defined structure within My Organization, select the level/sublevel to which you want to link and apply the configuration.
After you have selected a level, open the three-dot menu next to the level name or click the More button in the top-right corner, and select Settings.
Switch to the Remote Config tab and click Add Configuration to select it from the drop down menu to assign it to the selected level. In case there are no previously created configurations, you can use the button located below the menu to go directly to the Configuration tool and create one. Once you create the configuration, you will need to return to this screen to apply the configuration to the level/sublevel.
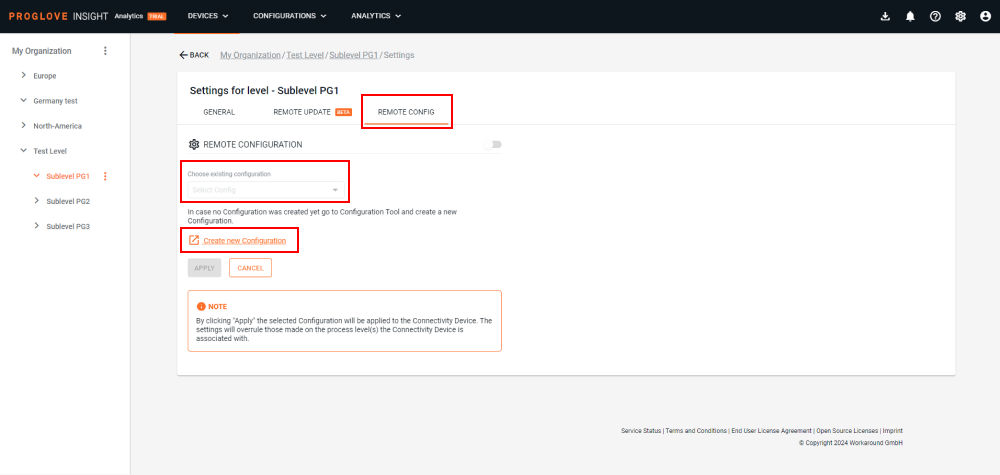
Once you've completed the setup, click Apply at the bottom of the page.
The configuration is then applied to the selected level, its sublevels, and all associated Connectivity devices will receive the configuration next time they become active.
Note
In case Connectivity devices are linked with a hierarchy of levels with sublevels, the level most specific (or closest) to the Connectivity device overrules all other levels.
Only one configuration can be a applied to a level or sublevel (1:1).
Levels within My Organization should have a single type of Connectivity device (e.g. INSIGHT Mobile or Gateway and Gateway Plus).
In case you are using older configuration files created before the release of the Remote Configuration functionality make sure you edit and save them once before you are able to link them to levels and/or sublevels.
Check if the configuration was successfully applied
Prerequisite: Connectivity device has the status of Connected in the Connectivity device list
In the Devices list, find the Connectivity device and click to open its details.
The Configuration section shows the configuration which is currently deployed on the Connectivity device.
Go to the Scanners list and repeat the same steps to see the scanner details and its current configuration.