Connect to
To send scanner and other data to , you need to connect your iOS devices to your account. Connect each device separately or multiple devices at the same, using either a single file or by simply scanning a QR code with your .
Connect a single device by scanning a QR code
An iOS device can be connected to at any point in time by scanning a QR code from a particular level in the Devices section. The QR code resembles the staging certificate used by an iOS device to connect to a level (or sublevel) within the hierarchy on .
Important
This feature is available from version 2.0.0.
Prerequisite: hierarchy defined with at least one level.
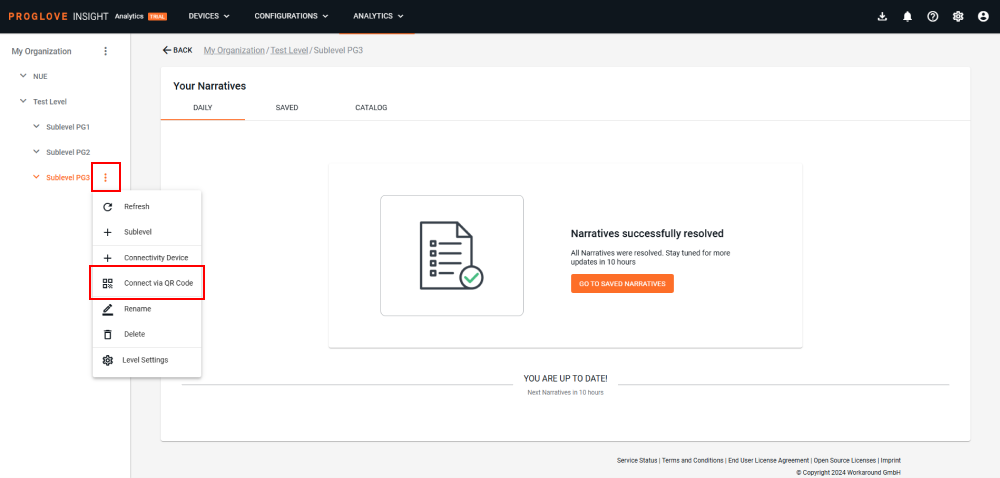
After setting up your hierarchy in the panel, select the level or sublevel to which you want to connect your iOS devices by clicking it.
Open its action menu by clicking the three dots appearing directly on the desired (sub)level and select Connect via QR Code.
A modal displaying a QR Code will open. Scan the QR Code with your scanner, then wait a few seconds and refresh the Connectivity Devices list.
→ The iOS device connects to the automatically and will be visible in the list of Connectivity devices under the selected level.
Connect multiple devices by scanning a QR code
Multiple iOS devices can be connected to at any time by scanning a QR code from a particular (sub)level in the Devices section. The QR code resembles the staging certificate used by iOS devices to connect to a level (or sublevel) within the hierarchy on .
Prerequisite: hierarchy defined with at least one Level.
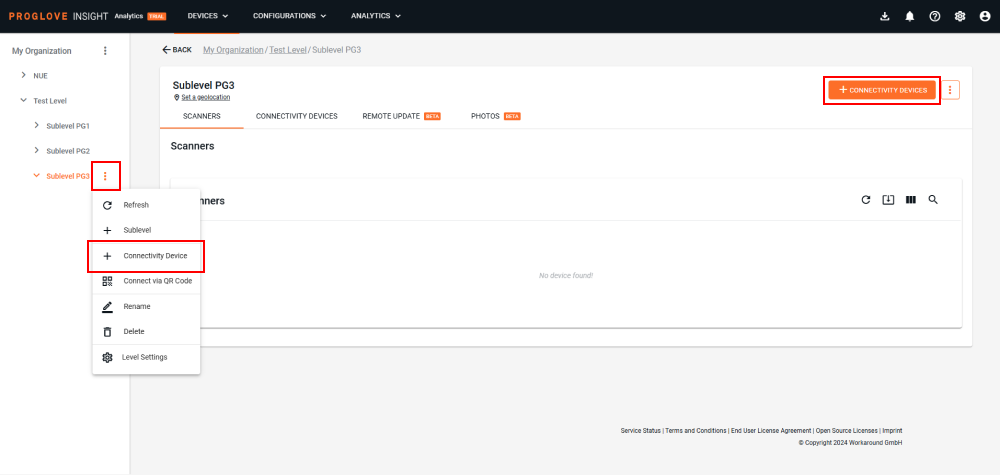
Select the level or sublevel to which you want to connect your iOS devices by clicking it, then click the + Connectivity Devices button in the upper-right corner of the screen or the three dots next to the desired (sub)level and select + Connectivity Device.
Select and click Next.

The modal window displays offering to Connect with one file for multiple devices and use a single staging certificate file across multiple devices. Click Next.
Note
If necessary, here you can switch and select Connect via individual files by clicking the button in the low left-hand corner.
Here you can select between generating a QR code or downloading the staging certificate. Click Scan QR to connect.
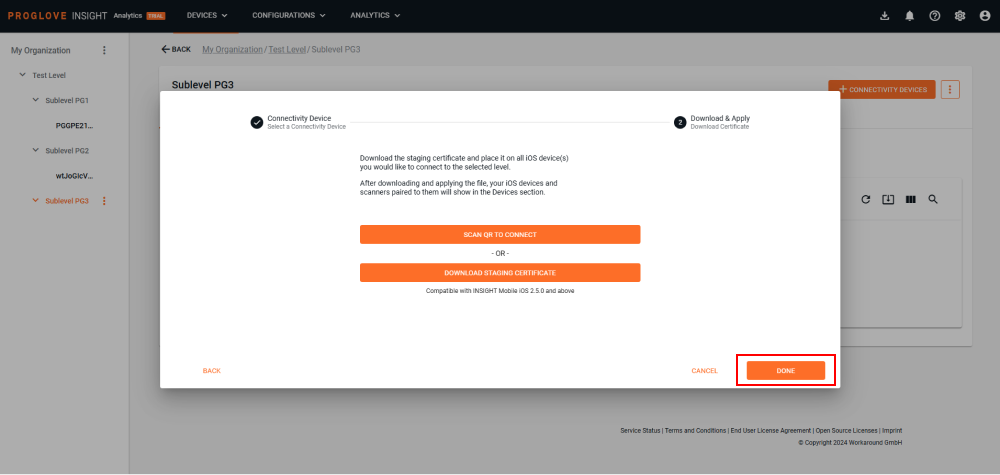
A modal window displaying a QR Code opens. Scan the QR Code with your scanner.
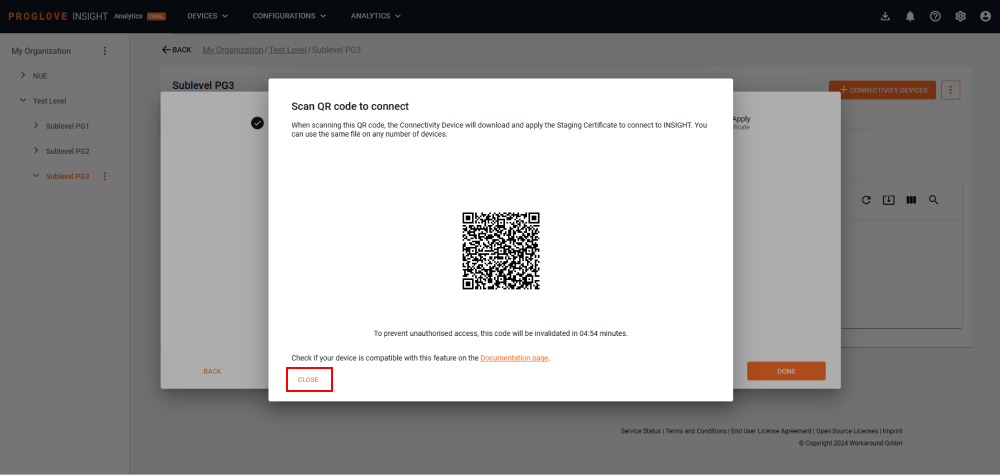
Click Close and then Done to complete the process.
→ The iOS devices connect to the automatically and will be visible in the list of Connectivity devices under the selected level.
Connect multiple devices with a single file
Connect an entire fleet of iOS devices using a single file. The file represents a staging certificate and connects your devices to a selected level (or sublevel) within the hierarchy on .
Prerequisite: hierarchy defined with at least one level.
Important
This feature is available from version 2.5.0.
Select the level or sublevel to which you want to connect your devices by clicking it, then click the + Connectivity Devices button in the upper-right corner of the screen or the three dots next to the desired (sub)level and select + Connectivity Device.
Select and click Next.
The modal window displays offering you to Connect with one file for multiple devices. Click Next.
Note
If necessary, here you can switch and select Connect via individual files by clicking the button in the low left-hand corner.
Here you can select between generating a QR code or downloading the staging certificate. Click Download staging certificate.
A .fleet file is downloaded to your computer.
Click Done to complete the process.
→ The iOS devices connect to the automatically and will be visible in the list of Connectivity devices under the selected level.
Pass the file to the PGCloudManager function in the SDK by using the method provided in the PGCloudManager class. Supply the file path as an input parameter.
Swift
func provision(from: String, completionHandler: (Error?) -> Void)Example Usage in Swift: Use the following code snippet to provision the device locally.
import ConnectSDK ... let centralManager = PGCentralManager(delegate: self, enableRestoration: false) centralManager.cloudManager?.provision(from: "my/path/to/local/provision.fleet") { [weak self] error in if let error = error { print("Failed to load provision file with error \(error.localizedDescription)") } else { print("Provision File loaded and successfully connected to INSIGHT") } }Objetive C
- (void) provisionFrom:(NSString *) localFilePath completionHandler:(void (^)(NSError * )) completionHandler;
Connection status
There are five connection statuses:
Not Registered - The Connectivity device has been created using or API via manual connection but the Provisioning file has not been downloaded or could not be created.
Registering - The Connectivity device has been created using or API via manual connection, and the Provisioning file has been downloaded and placed on the device. The device is now trying to connect.
Disconnected - The Connectivity device has not been sending any messages for the last two hours.
Connected - The Connectivity device has been paired with a scanner at least once and has sent a message within the last two hours.
Unknown - The Connectivity device is in an undefined connection state.
Verify connection status
Always make sure your device is successfully connected to . Follow the instructions listed below to ensure your iOS device has an active connection with ProGlove.
On :
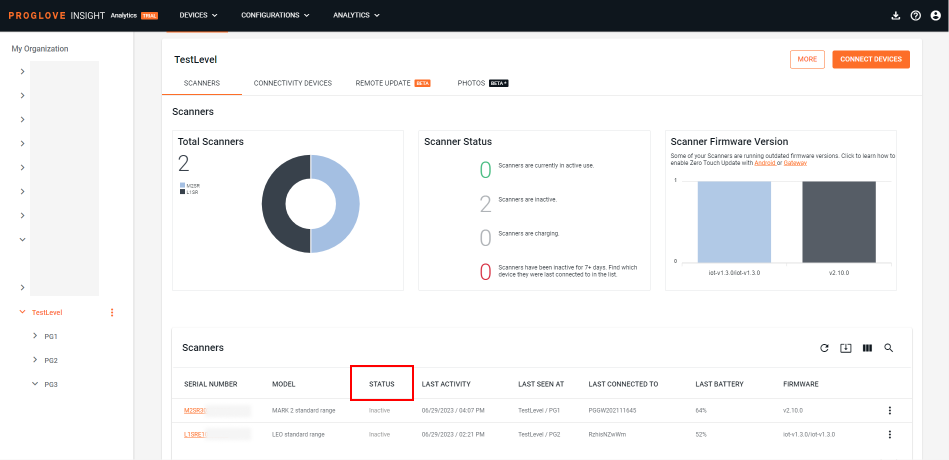
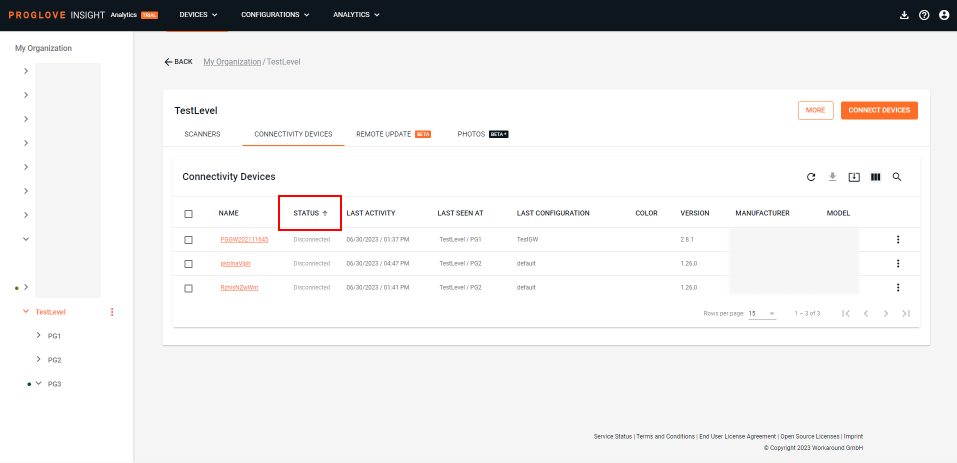
Log in to and select Devices.
The Connectivity Devices list displays.
If registered, your device’s status displays in the Status column.
On :
Connect your scanner to .
Scan a barcode.
Open .
Select Devices.
The connected Scanners list displays.
If connected properly, your scanner’s status displays in the Status column.