Full Demo feature
The Full Demo feature lets you try out a typical sorting use case scenario for parcels in an outbound station of a distribution center using the MARK Display or MAI.
Prerequisites:
MARK Display or MAI connected
Feature Demo app version 1.4.0 installed
Insight Mobile (Android) app installed
Default or custom configuration with the SDK integration path applied
To see the sorting use case in action, take a look at the video below or follow the steps in the sorting use case procedure to test it out yourself.
Sorting use case scenario
Work done in a logistics warehouse
Parcels come in and need to be sorted by the postal code
Regular workflow steps:
Pick a Parcel as shown on your MARK Display or MAI
Scan the parcel barcode and notice the shelf number where you need to place it
Put the parcel in the designated place and scan the shelf barcode for confirmation
Exception case steps:
One Parcel (P3) is damaged and needs special care
Scan the parcel and notice a different feedback message without the shelf number
MARK Display or MAI tells you to take a photo of the parcel
Take the photo by following the instructions on MARK Display or MAI
Accept or re-take photo in the app
Place the parcel on the error shelf and scan it for confirmation
Procedure
Open the Feature Demo app and tap Start Full Demo.
The Trigger twice to start screen displays on MARK Display or MAI.
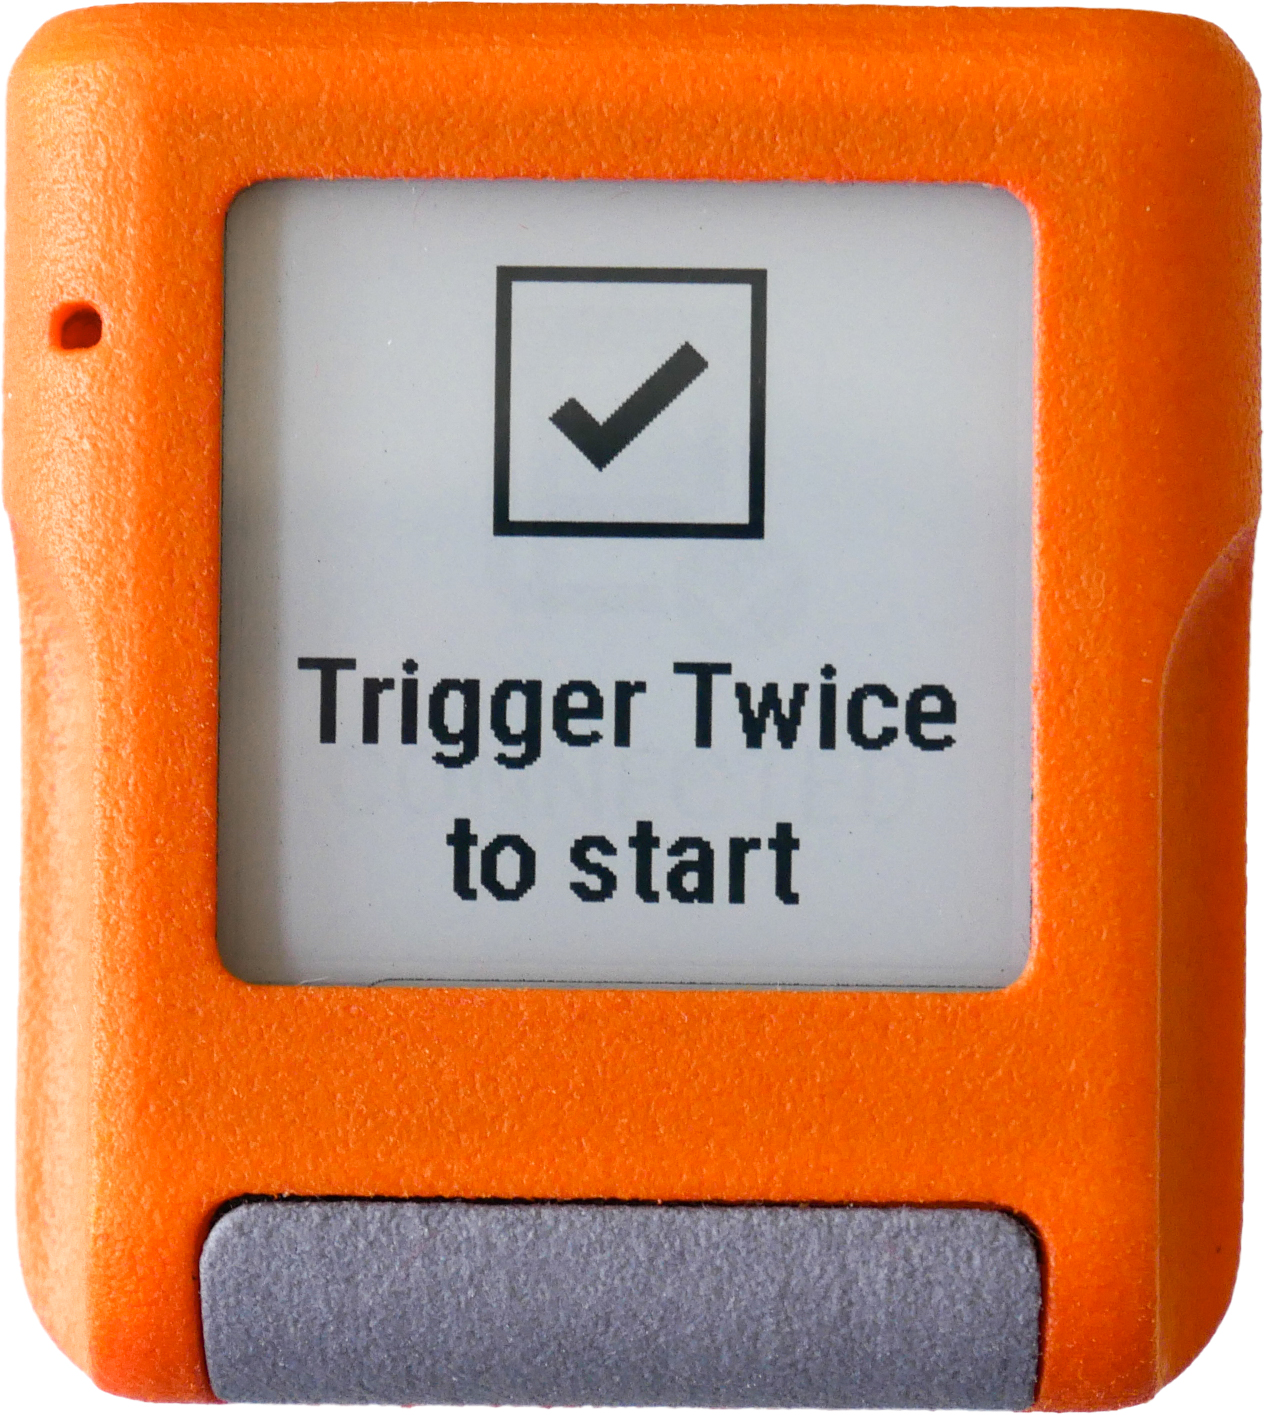
Double-press the button on your MARK Display or MAI.
The first parcel's number displays on the scanner.
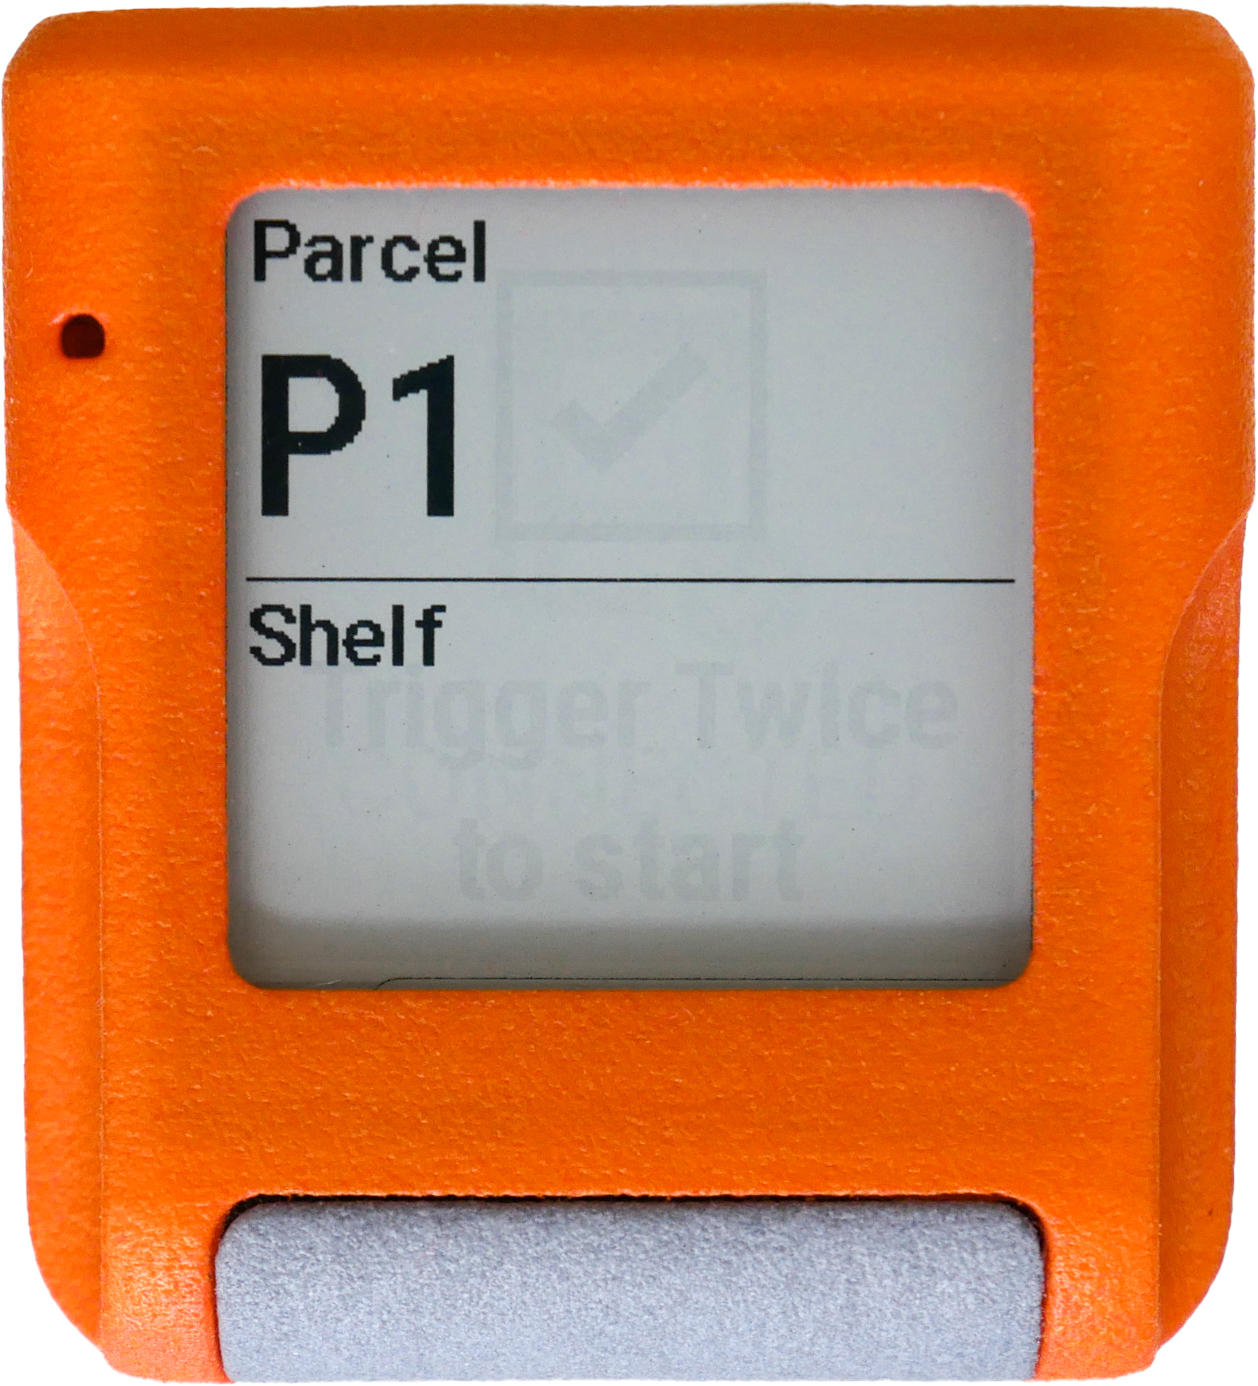
Scan the barcode on parcel P1.
The shelf number displays on the scanner to tell you where to place the P1 parcel.
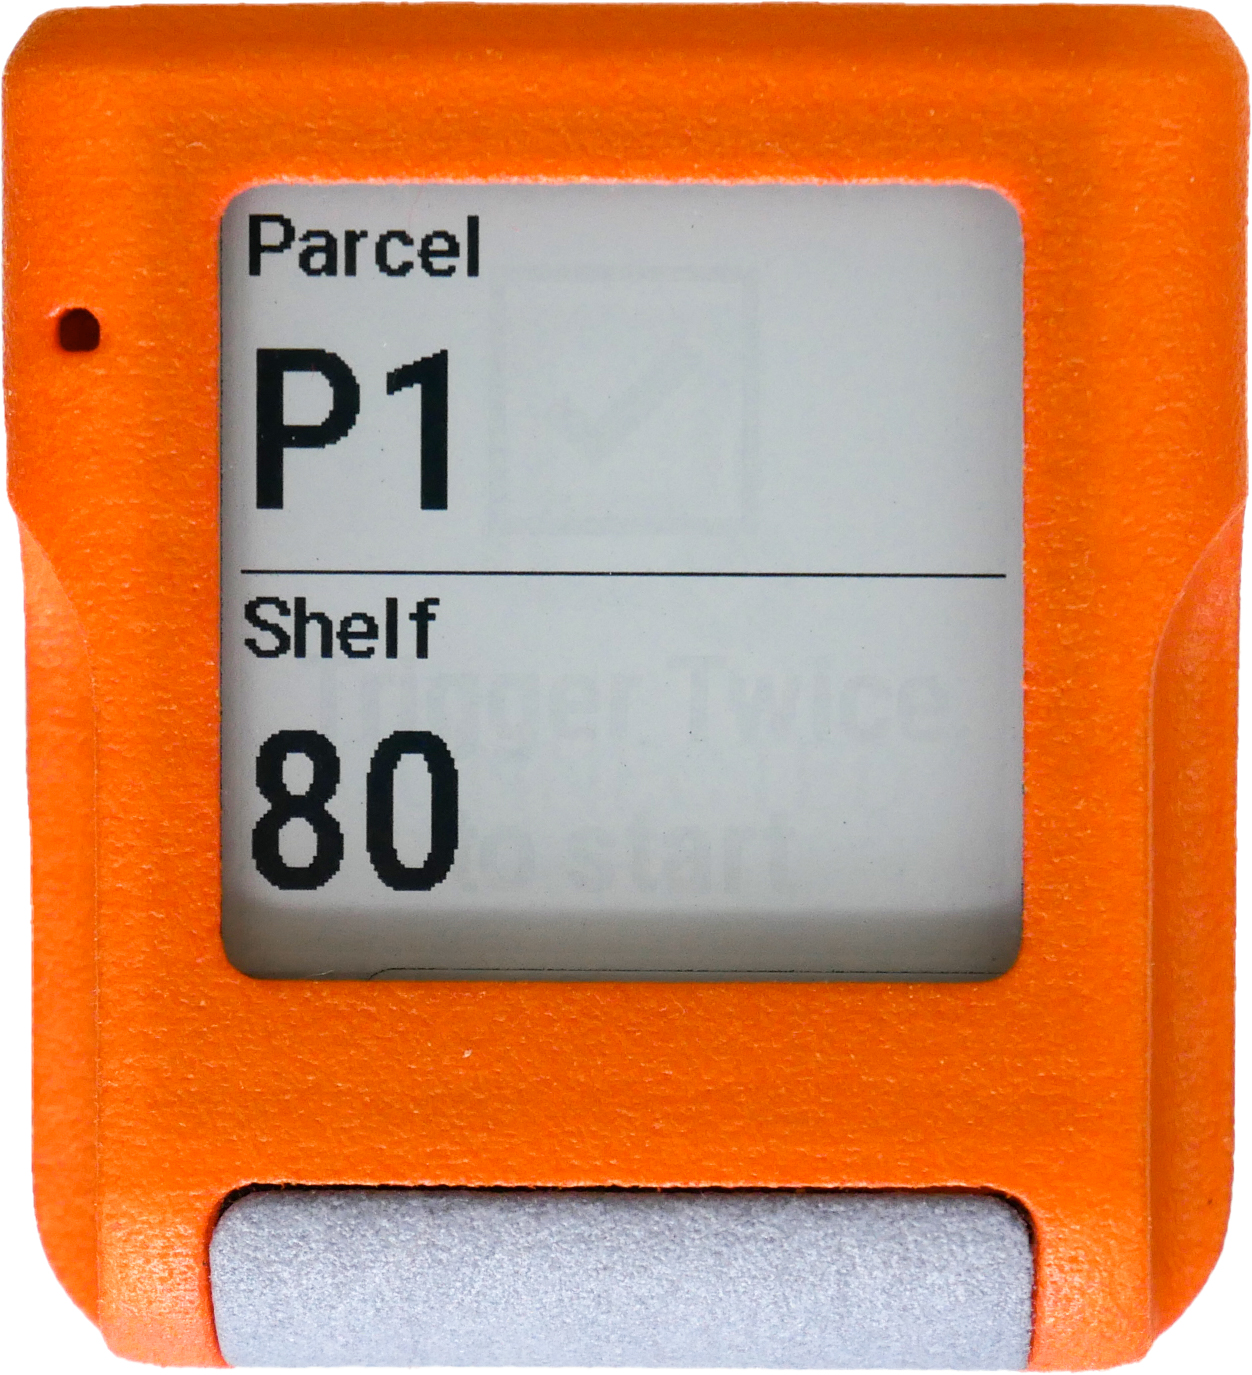
Place the P1 parcel on shelf 80 and scan the barcode on the shelf.

The next parcel's number displays on the scanner.
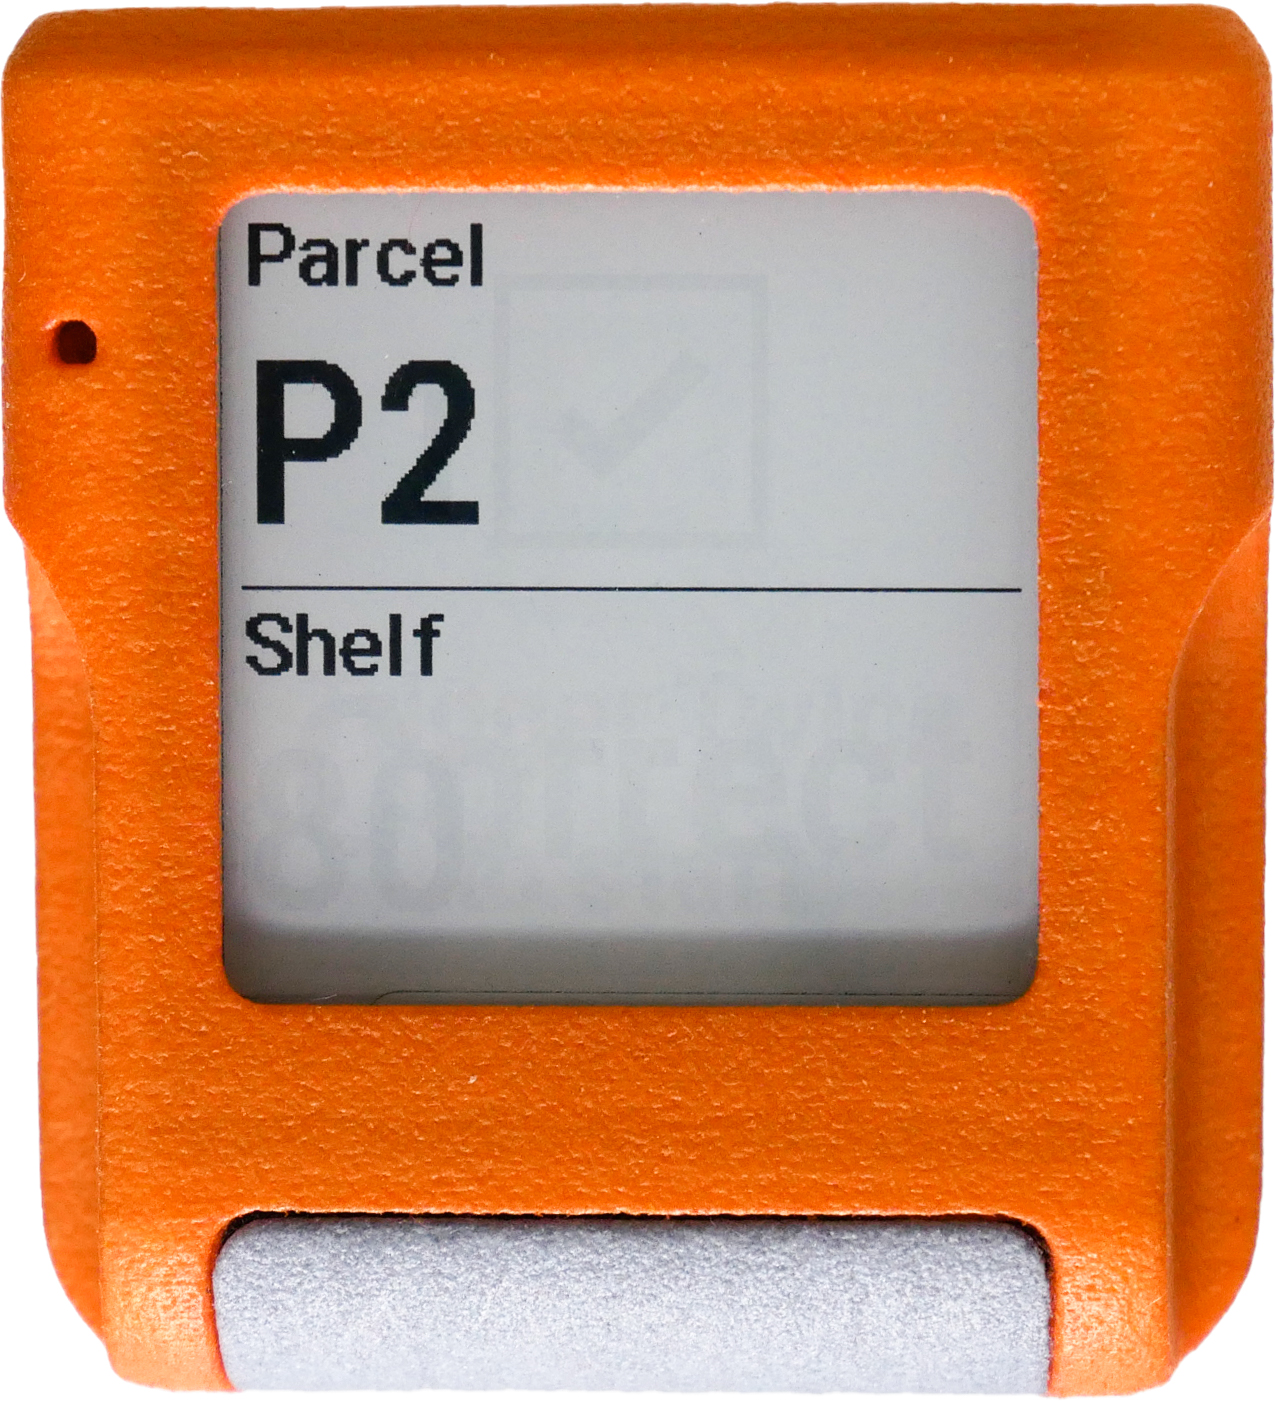
Scan the barcode on parcel P2.

The shelf number displays on the scanner to tell you where to place the P2 parcel.
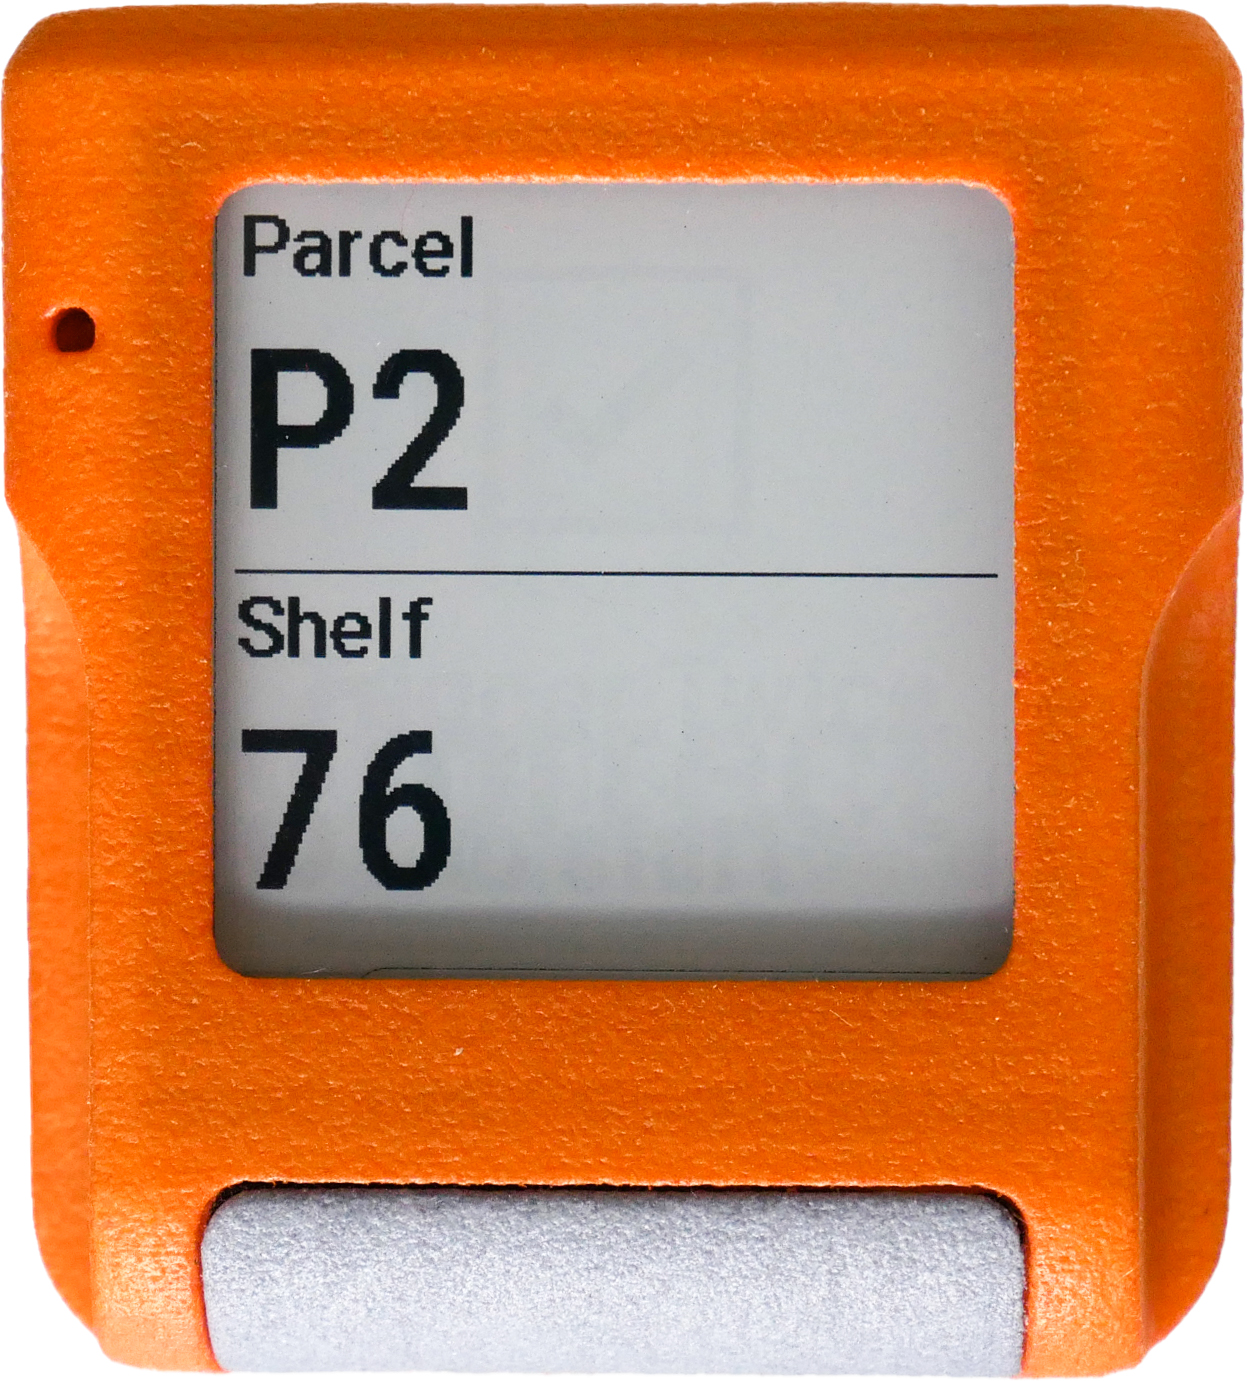
Place the P2 parcel on shelf 76 and scan the barcode on the shelf.
The next parcel's number displays on the scanner.
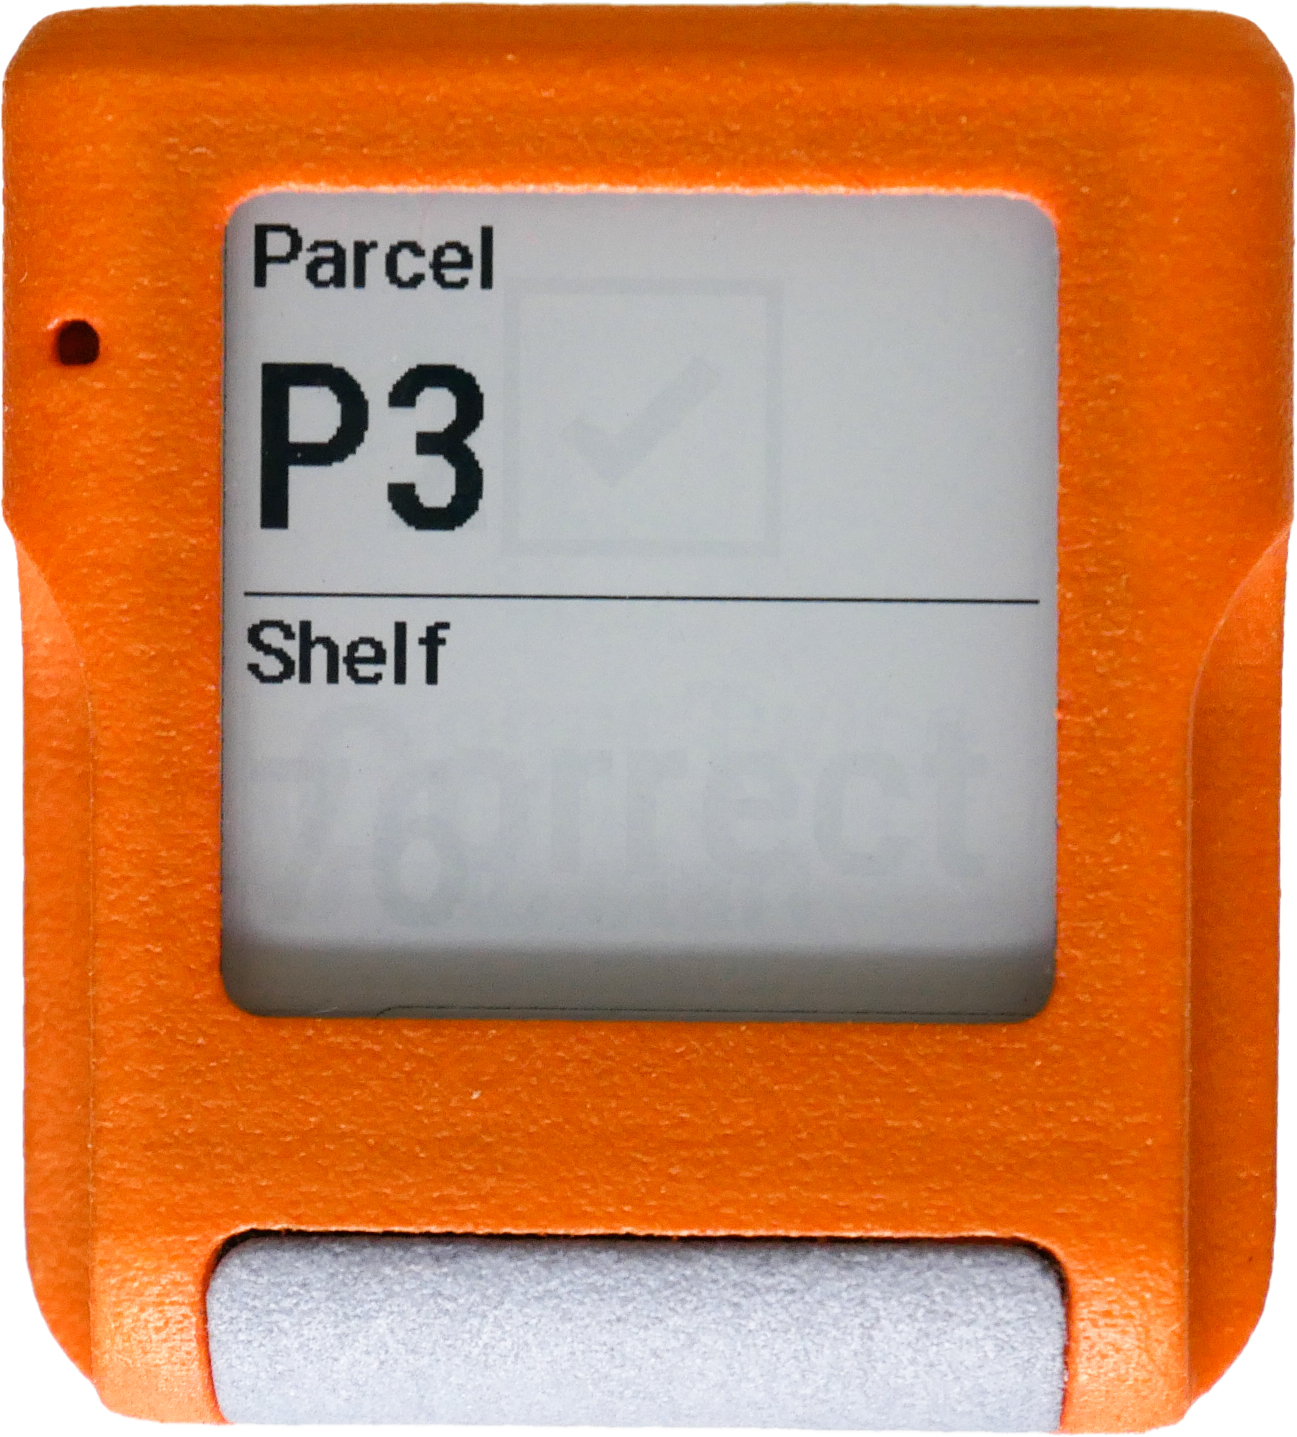
Scan the barcode on parcel P3.
A message displays on the scanner telling you to photograph the barcode because the label is damaged and unreadable.
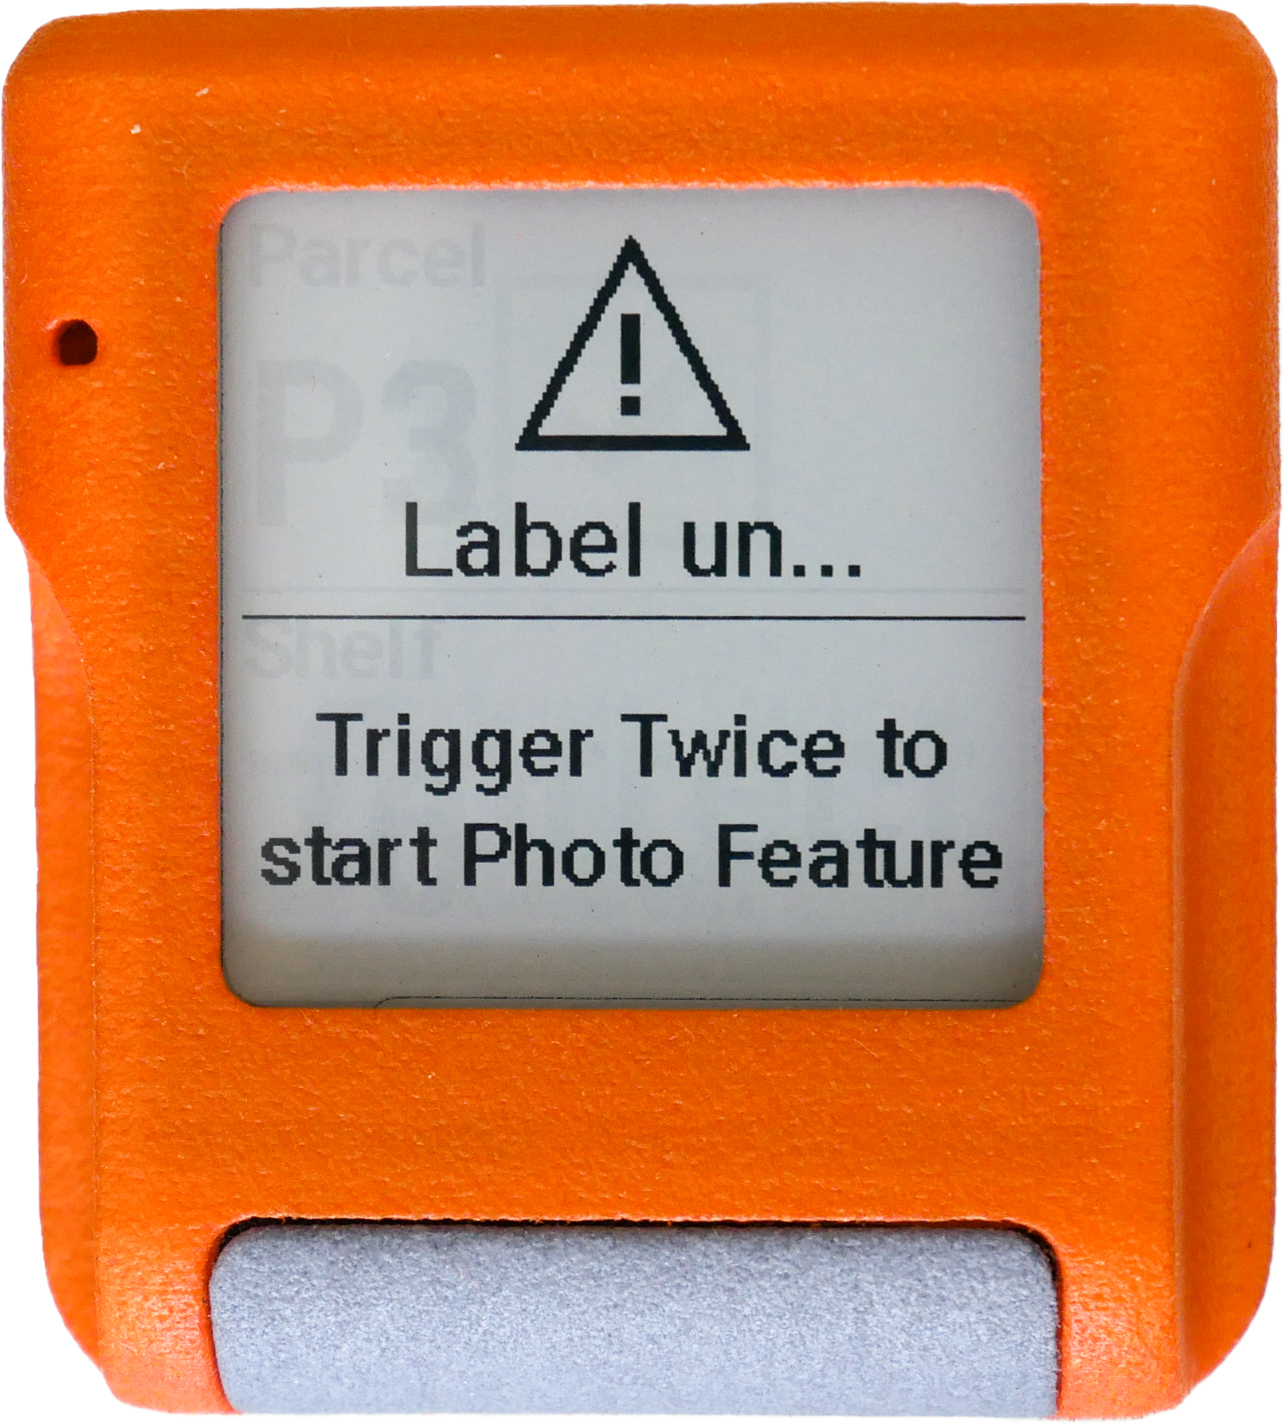
Double-press the button on your the scanner to activate the Photo feature.
Aim at the barcode with your scanner and press the button to take the photo.
The Confirm Photo in the app message displays on the scanner.
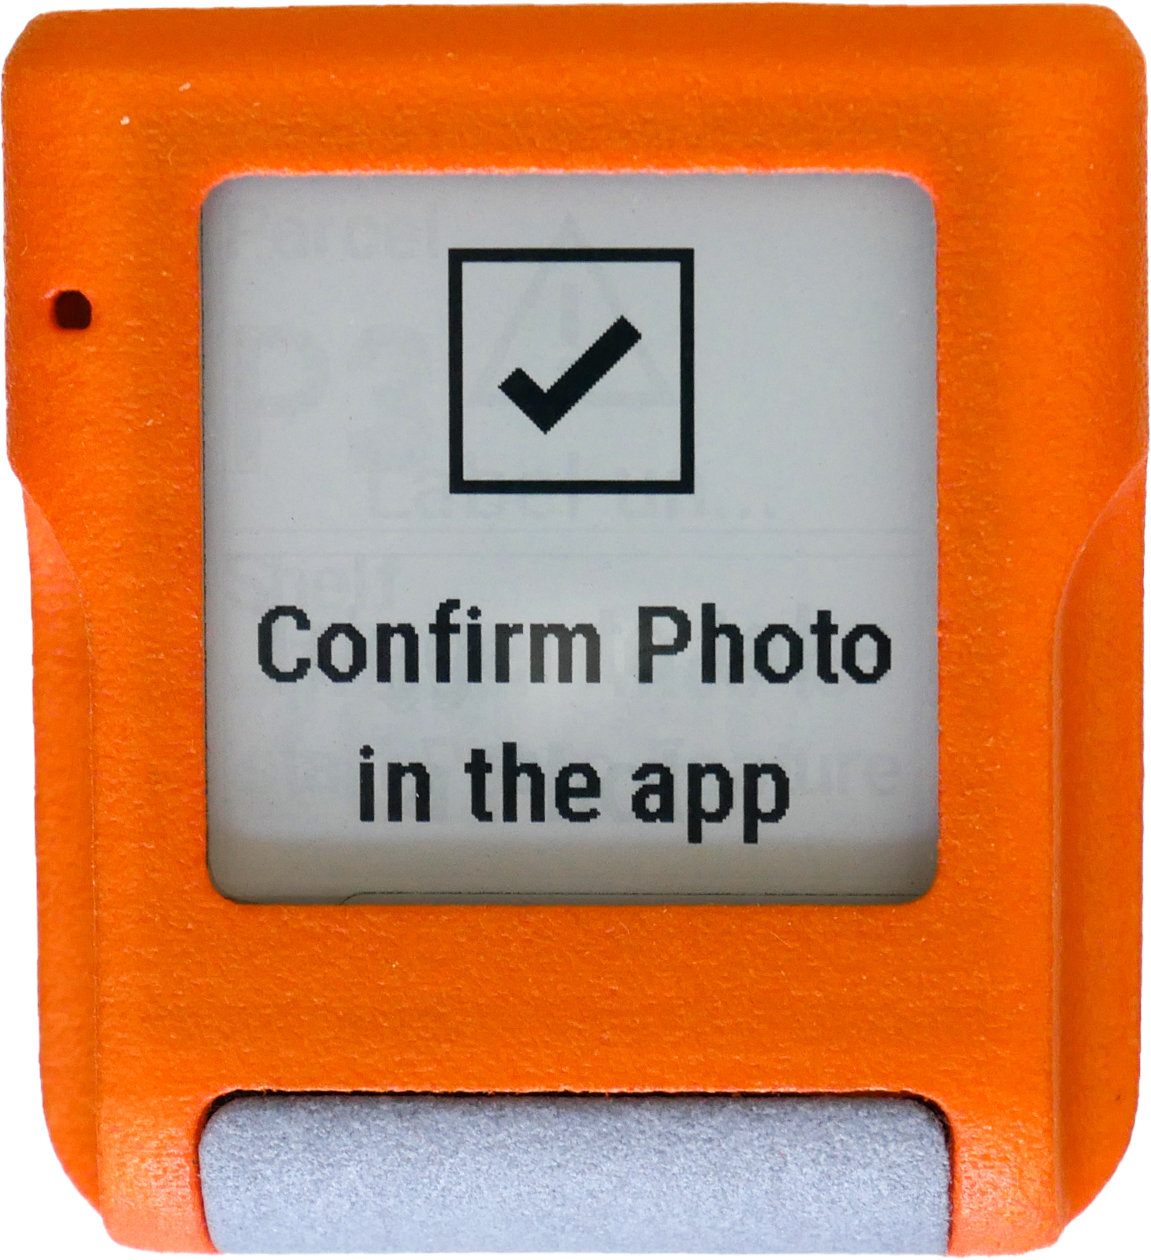
In the Feature Demo app, select Confirm, or tap Retry to take another photo.
After selecting Confirm, the shelf number displays on the scanner to tell you where to place the P3 parcel.
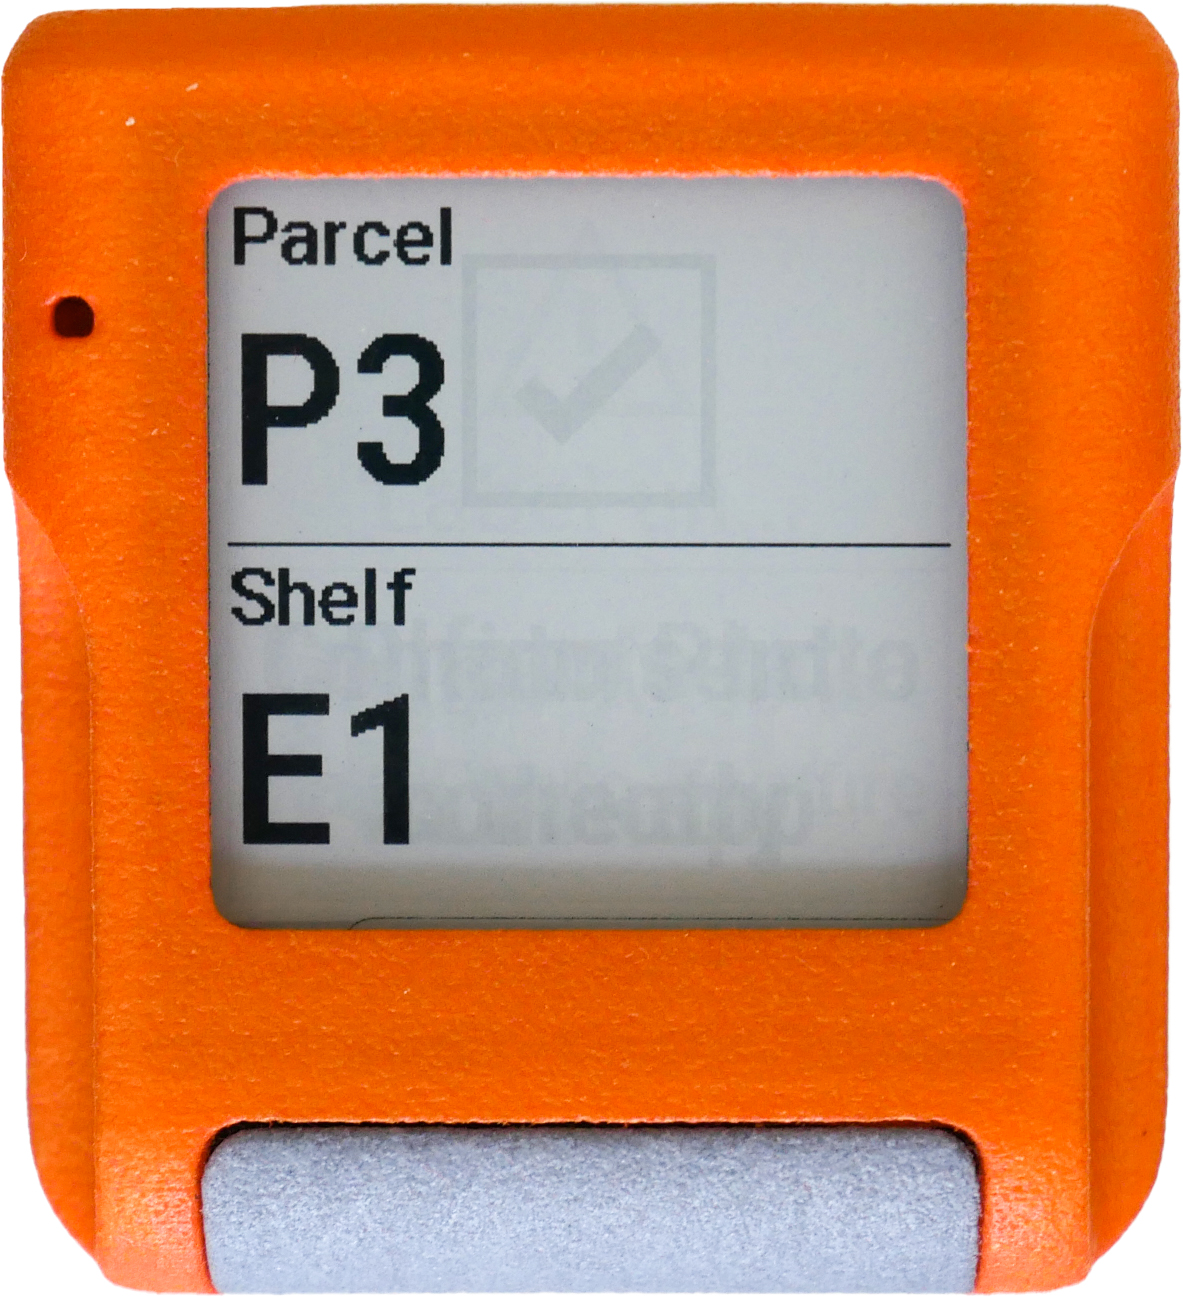
Place the P3 parcel on shelf E1 and scan the barcode on the shelf.

The next parcel's number displays on the scanner.

Scan the barcode on parcel P4.

The shelf number displays on the scanner to tell you where to place the P4 parcel.

Place the P4 parcel on shelf 99 and scan the barcode on the shelf.
The Job done message displays on your scanner.
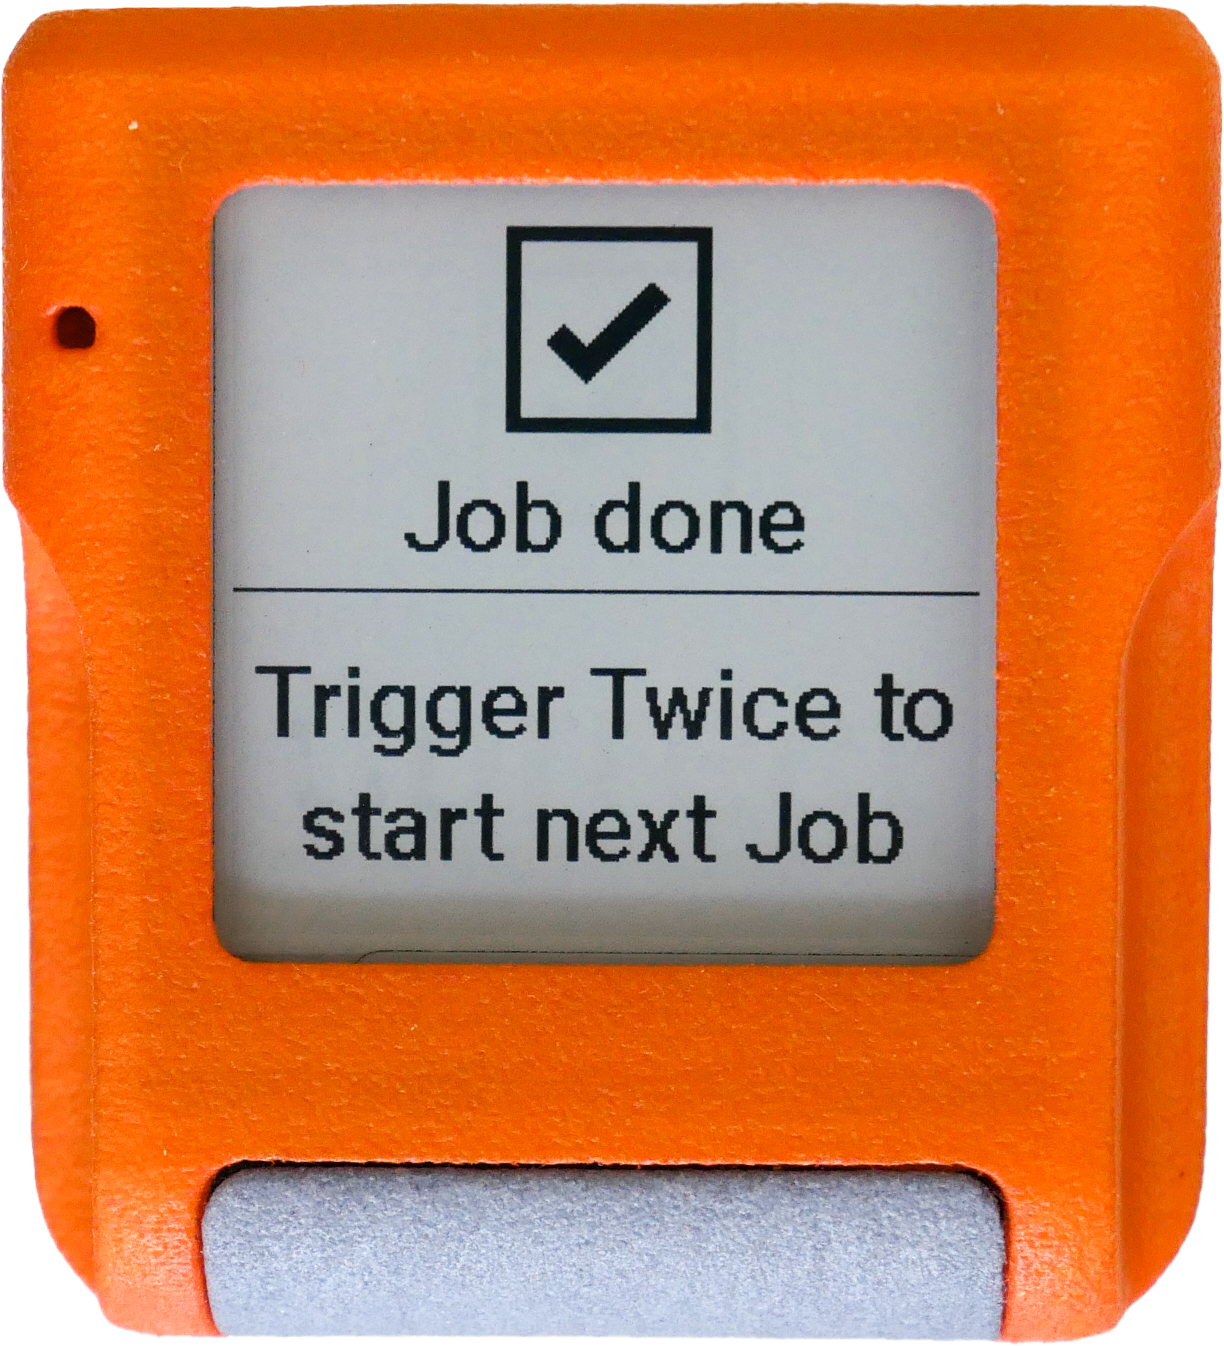
To start the next job, double-press the button on your scanner.