Rule examples
Below, you can find three rule examples to help you understand how to create specific rules.
Example 1: Add the prefix 0
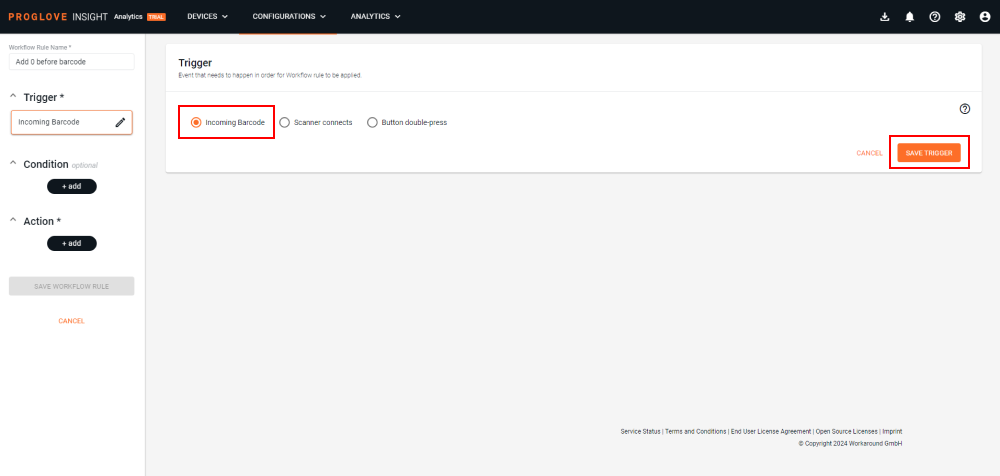
To add a 0 at the beginning of all scanned barcodes:
Type in the Rule Name.
Select Incoming Barcode under the Trigger section and click Save trigger.
Under Action, click Add.
Select Barcode Transformation and then Prepend text from the drop-down menu.
Under Text to prepend, type in
0and select Save Action.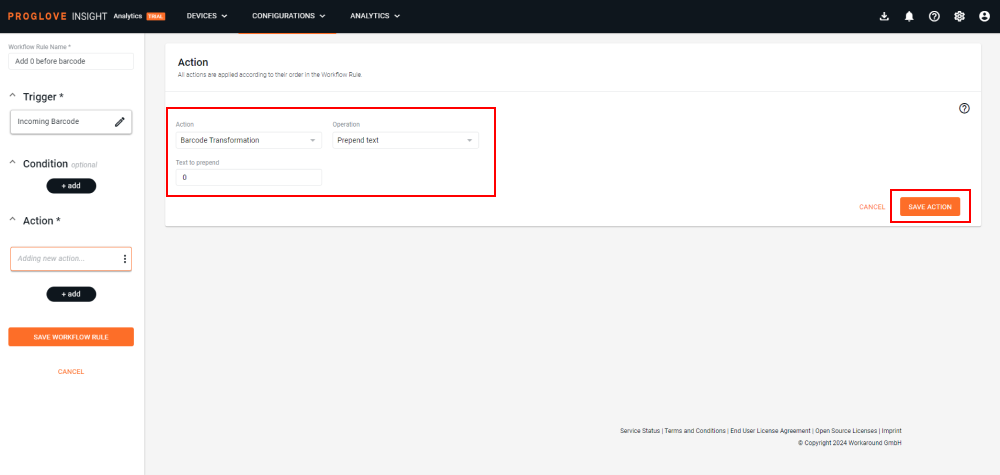
The created Workflow rule action displays under the Action section, and a notification confirms a successful process, offering a quick way to add more actions and/or conditions.
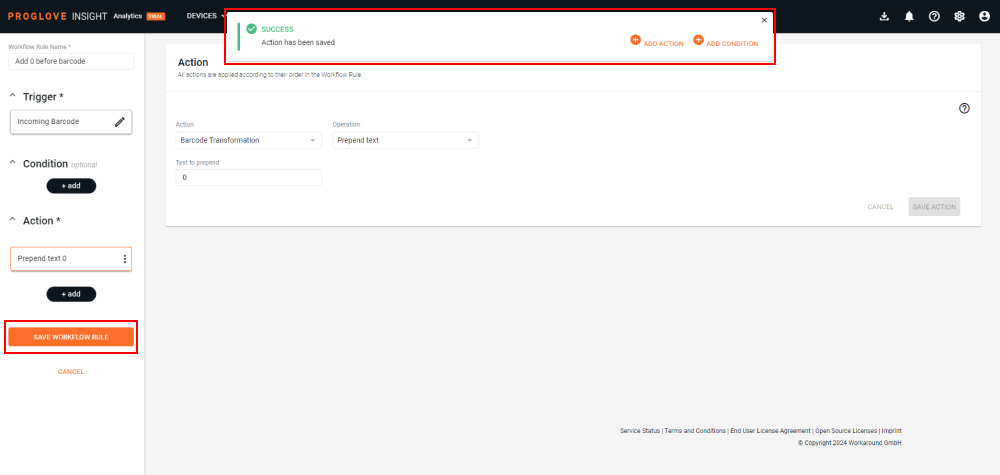
Click Save Workflow Rule.
The rule displays in the list. Once you save and apply the configuration to your Android device, you will see a
0in front of all your scanned barcodes.
Example 2: Add the prefix 0 for 12-digit barcodes
This rule will only affect the 12-digit barcodes. All other barcodes will be scanned and sent without modification.
To add a 0 at the beginning of 12-digit barcodes:
Select Incoming Barcode under the Trigger section and click Save trigger.
Under Condition, select Barcode length and is equal, then type in 12 as the barcode length value.
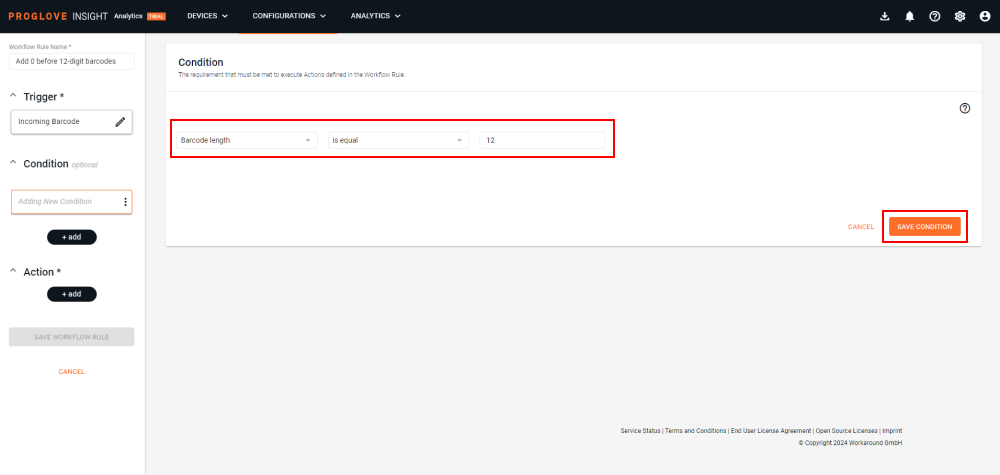
Select Save Condition.
Under Action, click Add.
Select Barcode Transformation and then Prepend text from the drop-down menu.
Under Text to prepend, type in
0and click Save Action.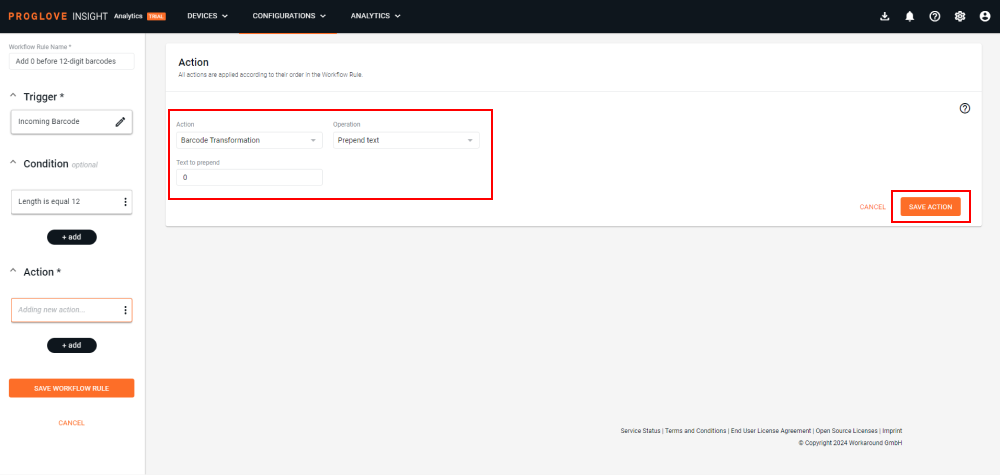
Select Save Workflow Rule.
The rule displays in the list. Once you save and apply the configuration to your Android device, all scanned 12-digit barcodes will have the prefix
0.
Example 3: Replace FNC1 with [
The FNC1 character (group separator) is a non-printable character with the HEX value of 1D. This rule will replace all instances of FNC1 with the [ character. All other barcodes will be scanned and sent without modification.
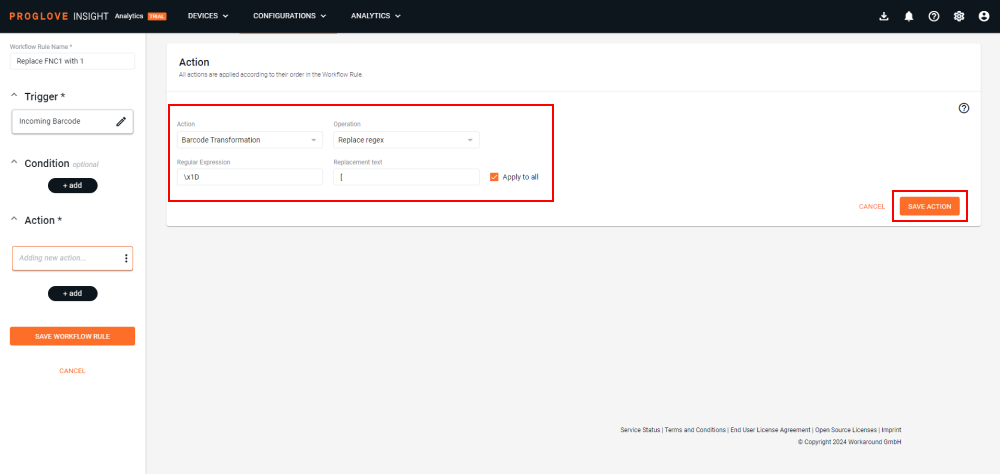
Type in the Rule Name.
Select Incoming Barcode under the Trigger section and click Save trigger.
Under Action, click Add.
Select Barcode Transformation and then Replace regex from the drop-down menus.
Under Regular Expression type
\x1D, and under Replacement Text type[. Make sure to select Apply to All so that all instances are modified.Select Save Action.
Select Save Workflow Rule.
The rule displays in the list.
After you apply the configuration to your Android device, the FNC1 character in all scanned barcodes will be replaced with [.
Note
You can use this rule to replace other non-printable characters (e.g. CR, LF, GS, RS, ETX, STX, etc.) by changing the \x1D in the Workflow Rule Action to the desired character's ASCII HEX value.