Apply the configuration
There are two ways to apply the configuration to your Gateway:
Apply the configuration using the generated barcode on Insight Webportal - convenient if you have a small number of devices and up to 10 workflow rules per configuration
Apply the configuration by copying it manually onto the Gateway Mass storage device and ejecting - convenient if you have a large number of devices and in case you also want to provision the Gateway with your network credentials in a .json file
Apply the configuration via barcode
On Insight Webportal, under Device Visibility, select Configurations.
At the top right, click New Configuration to add a configuration.
Select Gateway.
Create your configuration file.
At the bottom of the page, select Next.
Type in the name of your configuration and select Next.
The Configuration barcode modal window displays the generated barcode.
Pair a scanner with your Gateway.
Scan the Configuration barcode.
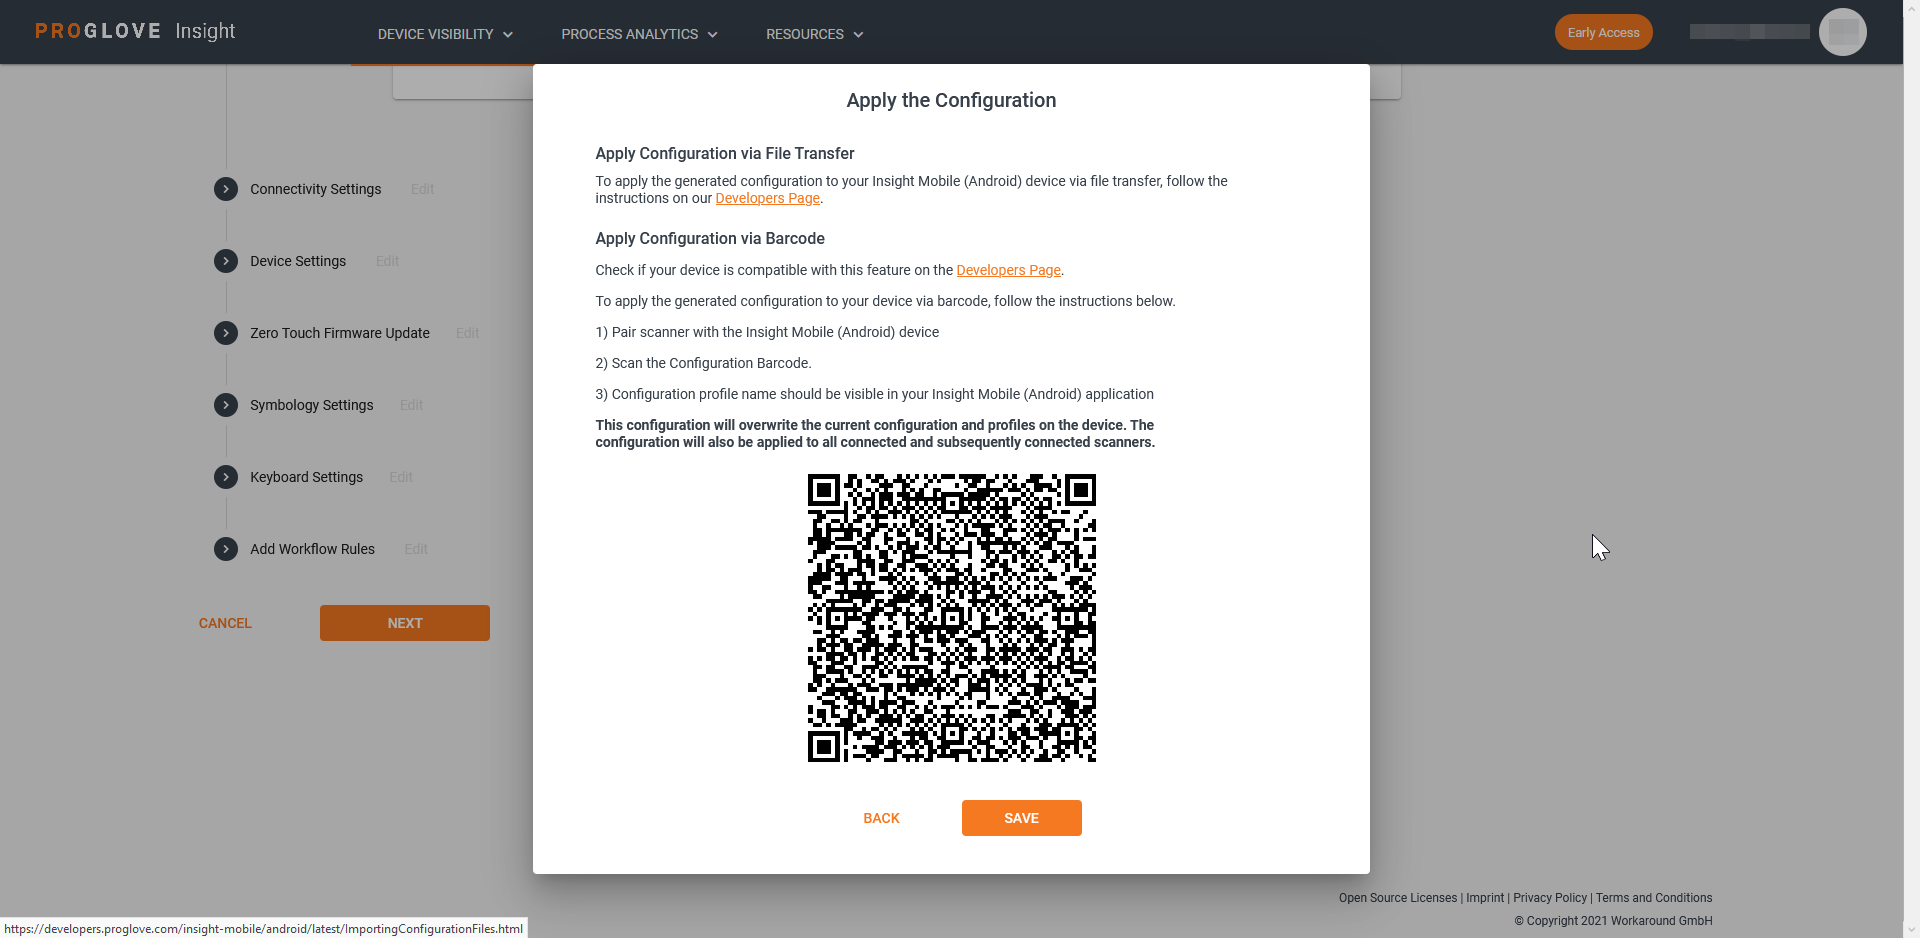
The configuration is applied to the Gateway and all connected scanners.
Note
In case you want to save the configuration barcode for later use, be aware that it expires after two hours. After that, you need to go back to your configuration and generate a new one.
Select Save.
Your configuration displays in the list of Configurations.
Note
Only configurations with approximately up to 10 Workflow Rules can be applied using a Configuration barcode due to the size limitation of the configuration content.
Apply the existing configuration via barcode
In the Configurations list, click the pencil icon next to your configuration.
The Edit Configuration screen displays.
At the bottom, click Next.
The modal Apply Configuration window displays the configuration barcode.
Click Save.
Note
If you click Back in the Apply Configuration window, modify the configuration, and click Next again the configuration barcode will change to include the changes you made.
Apply the configuration manually
On Insight Webportal, under Device Visibility, select Configurations.
Select the desired configuration and click
 or use the menu
The selected configuration downloads to your desktop.
Connect the Gateway to your desktop via USB cable.
The Gateway boots up in about one minute and LED 1 (USB) glows green.
Scan the pairing barcode on your Gateway with your scanner.
The scanner connects to the Gateway and LED 2 (Scanner) glows green.
Scan the barcode below to enable the Gateway as a Mass storage device.

The Gateway displays as a Mass storage device on your desktop.
Copy the downloaded configuration file to your Gateway Mass storage device.
Eject the Gateway Mass storage device to apply the configuration.
The configuration update takes a few seconds. The Gateway flashes green when done.
Note
Ejecting the Mass storage device may vary depending on your operating system.
Make sure to Safely Remove / Eject the Mass storage device on your desktop but do NOT disconnect the Gateway’s USB cable during upload.
Note
The configuration is applied to every scanner that connects to the Gateway. A Gateway can have only one configuration at a time.