Connect multiple devices
Process Layout
Use the Process Layout hierarchy to build out a representation of your physical environment's process structure. Define multiple organizational levels and assign your devices to their respective meaningful groups.
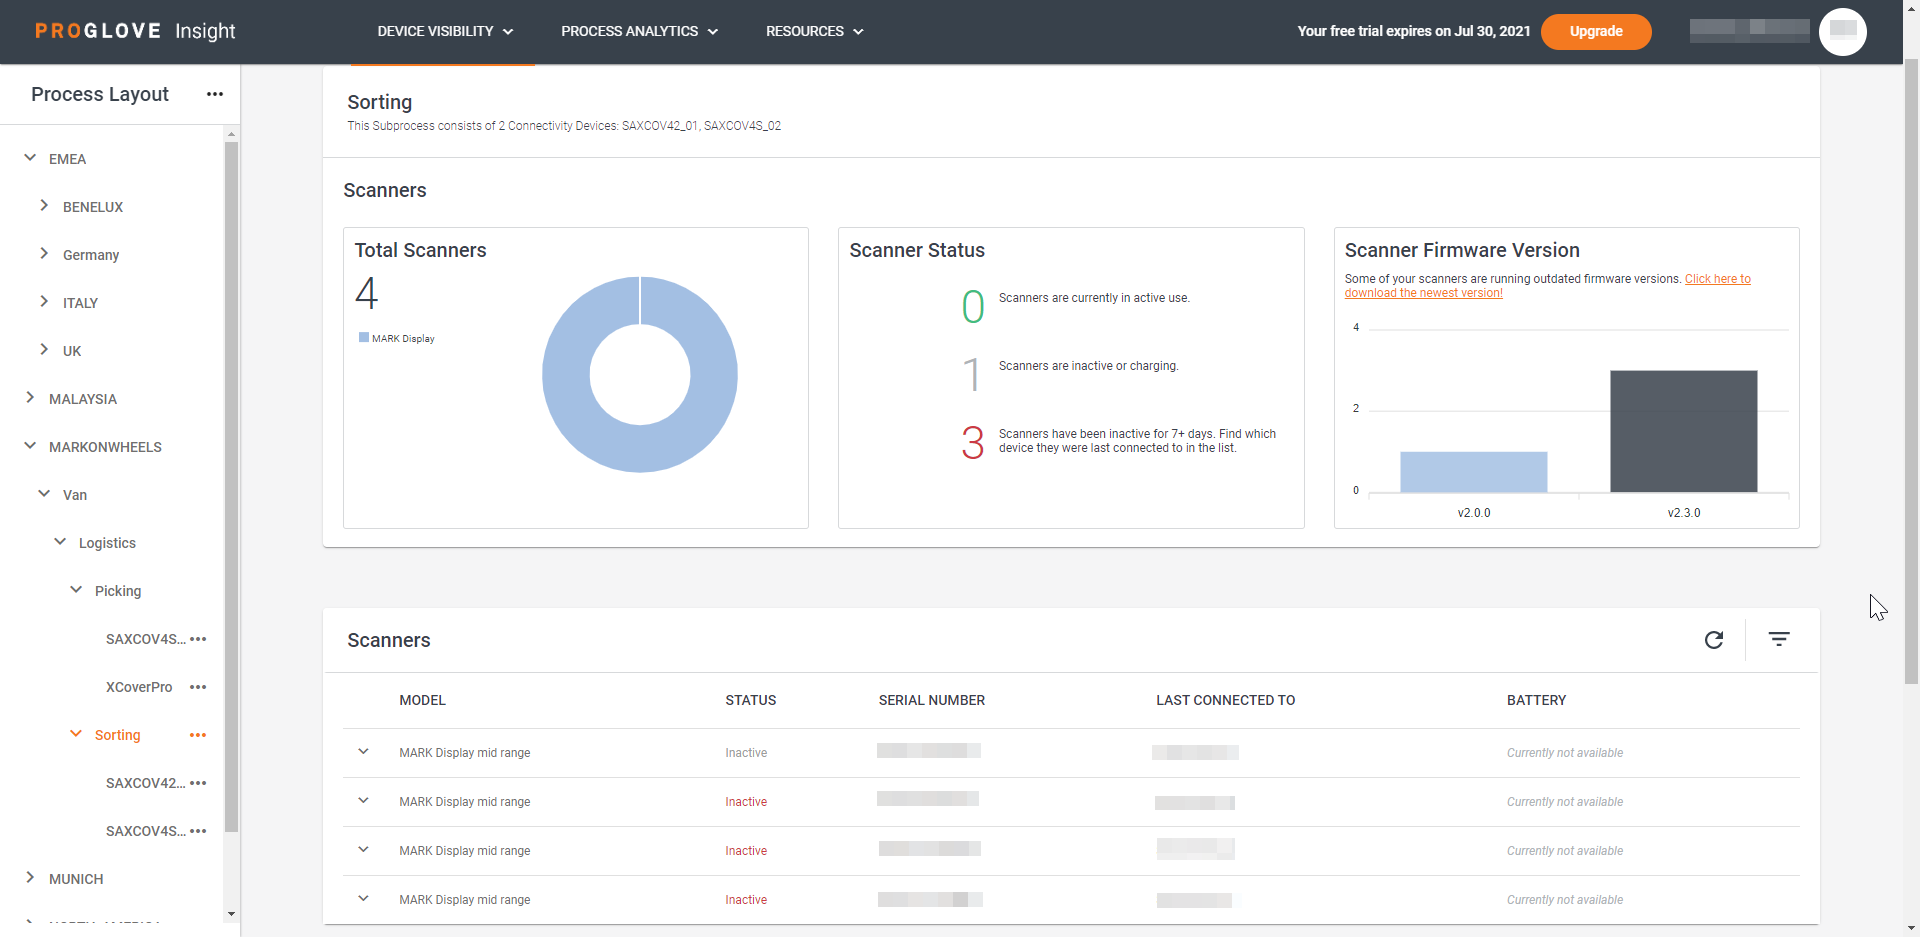
By connecting your devices to Insight Webportal and adding them to a Process Layout level, the data of all the connected scanners and Connectivity Devices is collected under that level. This allows you to analyze and compare data in these different processes over time and with each other in the Performance Analysis section under Process Analytics.
There are four Process Layout levels: Location, Process Group, Process, and Subprocess. Use them to pinpoint the performance and effort of your scanning devices by adding your Connectivity Devices to each level and manage your devices across locations and processes.
Your Process Layout can have:
An unlimited number of Locations, Process Groups, Processes, and Subprocesses.
An unlimited amount of Connectivity Devices per level.
Note
It is recommended to only add a maximum of 10 Connectivity Devices per level to ensure good quality of data. Therefore, consider splitting your levels if the number of devices per level exceeds 10.
In Example 1, we add a level and divide the layout into the Picking, Shipping and Outbound Processes therefore avoiding having more then 5 Processes under one level (PA, PB, SA, SB, SC, OA).
Europe
Munich
Picking
Station PA
Insight mobile 1
Gateway 2
Insight mobile 3
Station PB
Insight mobile 4
Insight mobile 5
Shipping
Station SA
Gateway 6
Station SB
Gateway 7
Station SC
Gateway 8
Outbound
Station OA
Gateway 9
Create Process Layout levels
In the Process Layout panel, click the three dots and select + Location.
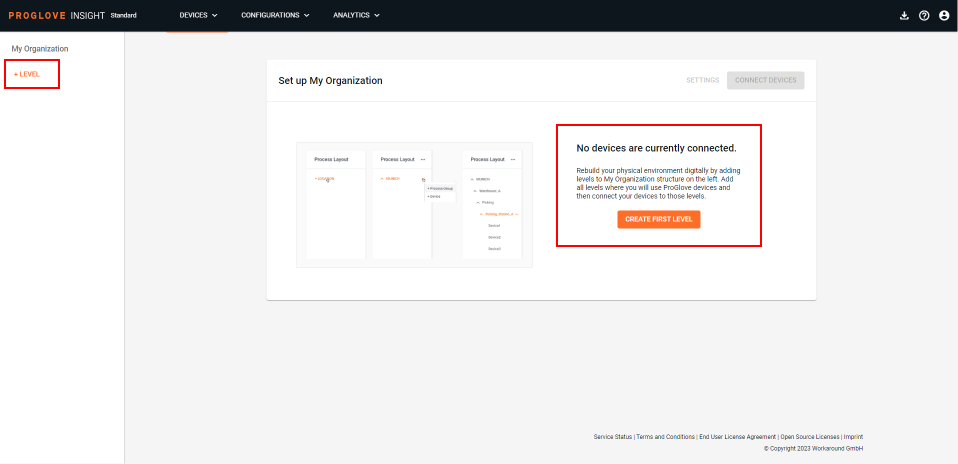
The modal Add Location window displays.
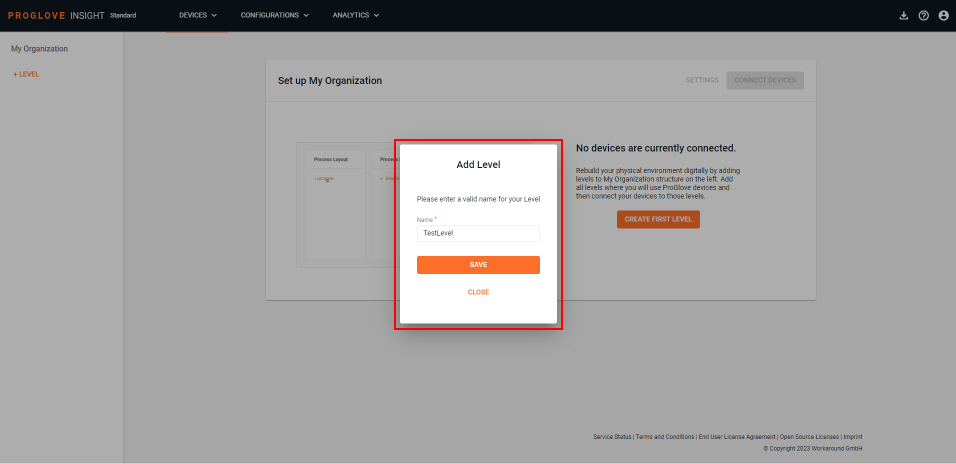
Enter the name of the location where the device will be used and click Save.
The entered location displays in the Process Layout panel.
Click the three dots next to the defined location and select + Process Group.
Enter the name of the process group and click Save.
Click the three dots next to the defined process group and select + Process.
Enter the name of the process and click Save.
Click the three dots next to the defined process and select + Subprocess.
Enter the name of the defined Subprocess and click Save.
Your Process Layout hierarchy is now defined. You can now add Connectivity Devices to the desired levels.
Note
If you make a mistake when creating your layout, you can Rename or every Process Layout level or Move it under any existing level. Use the three dots next to a level to access the drop-down menu. You can also Delete a Process Layout level that has no child levels under it.
For Connectivity Devices, you can Rename, Delete, or Move them to a different level.
Tip
We recommend you set up the complete Process Layout hierarchy before provisioning the Connectivity Devices like Gateway and Insight Mobile (Android).
You can also test a smaller number of devices but you might have to re-provision the devices later when building your complete hierarchy.
Only scanning devices that have scanned at least once are displayed in the Device Visibility's Devices section.
Connect multiple devices manually
On Insight Webportal, under Device Visibility, select Devices.
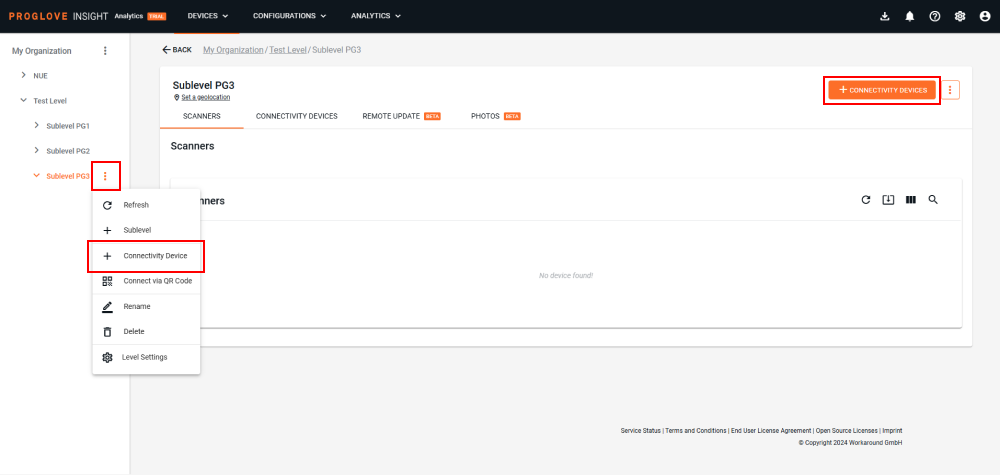
In the Process Layout panel, click the three dots next to the defined Subprocess and select + Device.
A modal Choose your Device window displays.
Note
You can also select a Subprocess and click the
 icon at the top of the Connectivity Devices list.
Select Insight Mobile (Android) and click Next.
In the Name section, click
multiple times to add multiple devices.The Connect Device section displays the defined Process Layout hierarchy.
Note
If you added a device without defining the full hierarchy, you will have to define it in the Connect Device screen before proceeding. You can change all Process Layout hierarchy fields in the Connect Device screen.
For each device, enter the Device Name and click Create Devices.
The Provision section displays.
Click Download.
The provisioned .zip file downloads with a file per each device.
Click Done.
Upload .zip file to your MDM and distribute the provisioning files to your device fleet.
To learn more, see Distributing.
Distributing
The .zip file contains individual certificates for every Android device, with the unique Android device ID in the certificate’s name.
When you upload the provisioned files back into your MDM software, you can push them to their corresponding device in your Android device fleet.
The provisioned files need to be sent to the following path of all Android devices: /sdcard/Android/data/de.proglove.connect/files/.
All your Android devices can now connect to the Insight Webportal platform.
Note
Certificates are specific to a single Android device. Pushing the same certificate to multiple Android devices will not work.
Connection status
There are 5 connection statuses:
Not Registered - The Connectivity Device has been created using Insight Webportal or Insight API but the Registration File has not been downloaded/retrieved or could not be created.
Registering - The Connectivity Device has been created using Insight Webportal or Insight API, and the Registration File has been downloaded.
Inactive - The Connectivity Device has not been sending any messages for the last two hours.
Active - The Connectivity Device has sent a message within the last two hours.
Unknown - The Connectivity Device is in a undefined connection state
Verify connection status
There are three ways to make sure your Android device is connected to Insight Webportal:
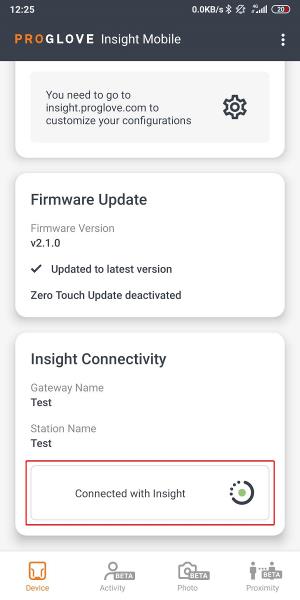
In Insight Mobile:
Connect your scanner.
On the Device homepage, scroll down to Insight Registration.
At the bottom of Insight Registration, the Connection Status displays.
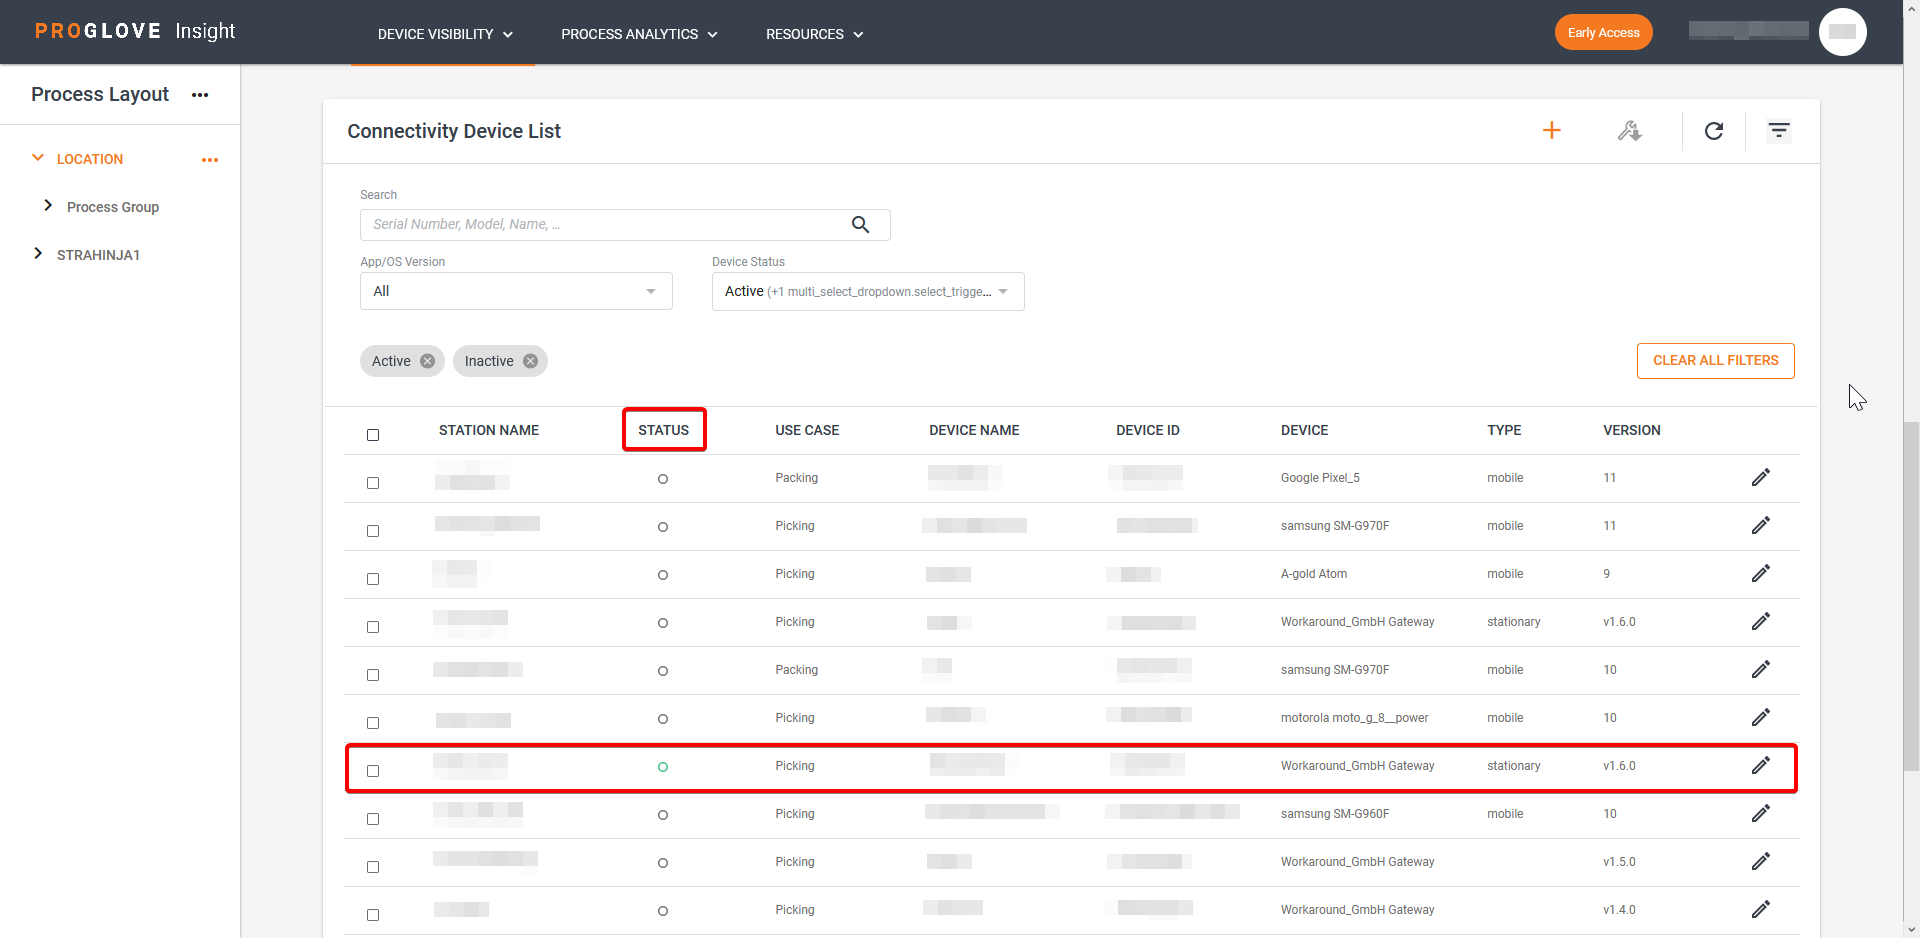
On Insight Webportal:
Under Device Visibility, select Devices.
The Connectivity Device List displays.
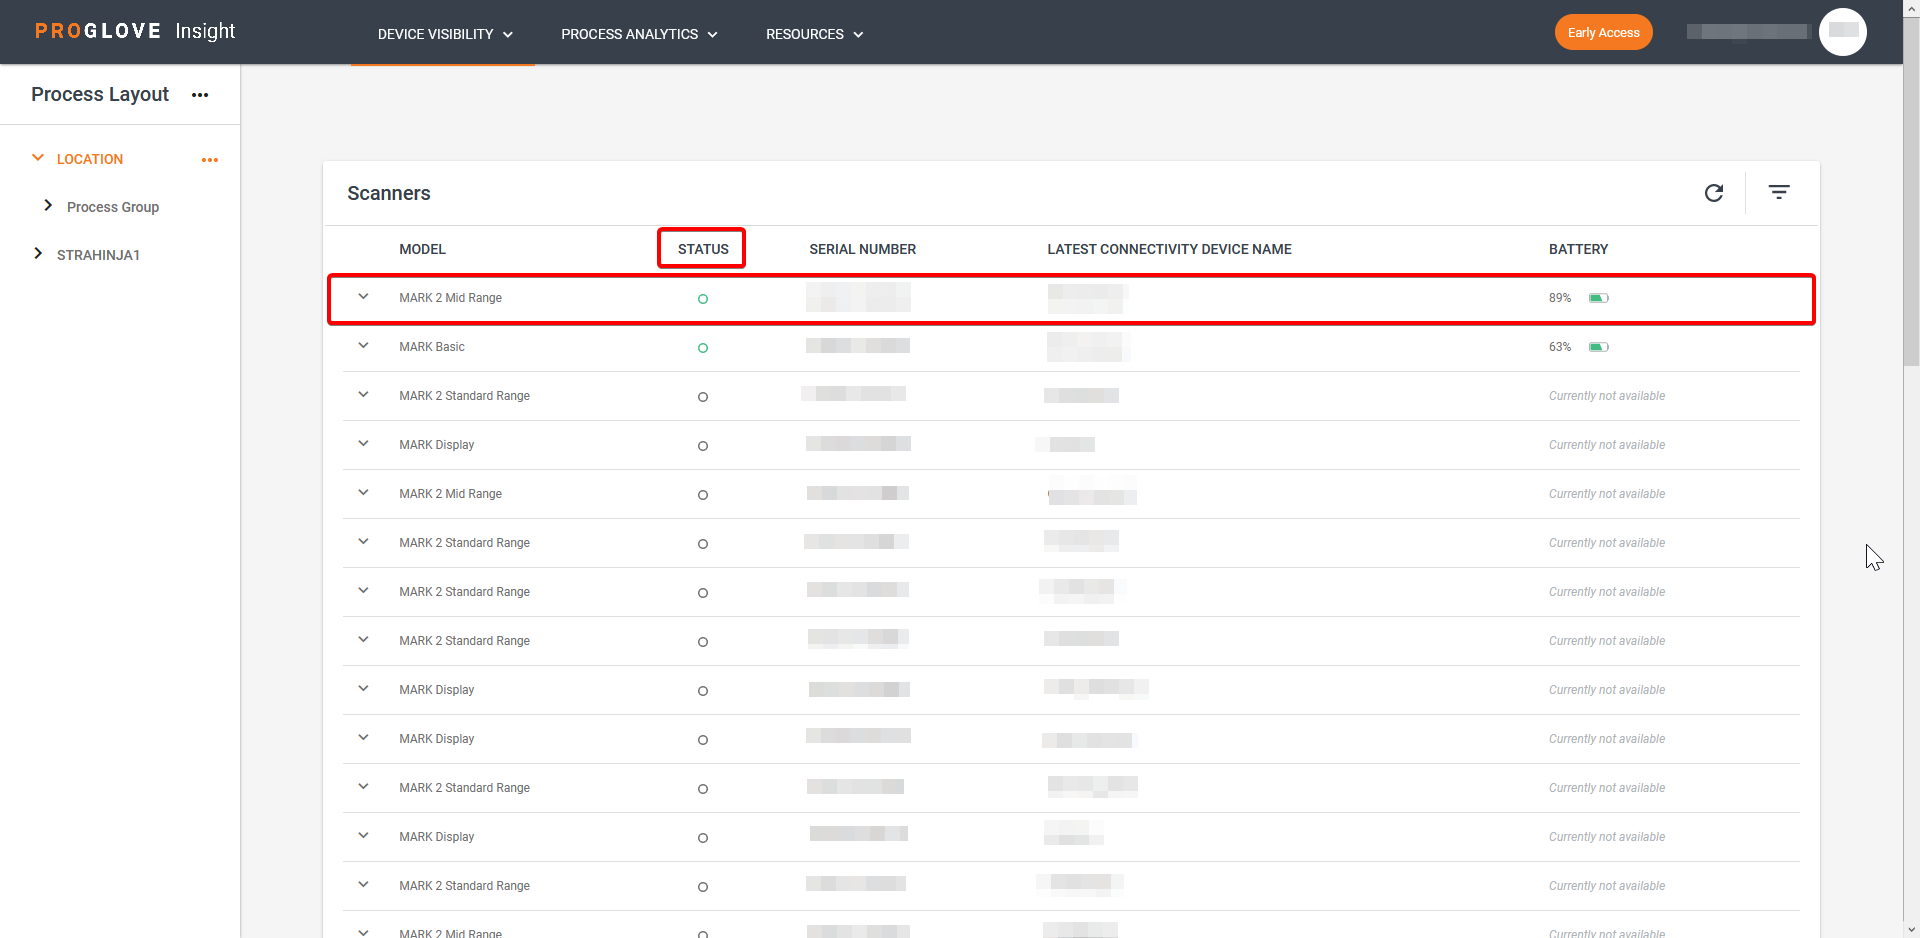
If registered, your device’s status displays in the Status column.
On Insight Webportal:
Connect your scanner to Insight Mobile.
Scan a barcode.
Open Insight Webportal.
Under Device Visibility, select Devices.
The connected Scanners list displays.
If connected properly, your scanner’s status displays in the Status column.