INSIGHT account settings
Account settings provide a complete overview of your INSIGHT account information, allow you to manage users, activate a new subscription plan, and obtain information required to integrate your account with external systems. Access them in INSIGHT by clicking the gear icon  in the top-right corner menu.
Account details
In case you have access to multiple INSIGHT accounts, visit the Account details tab to confirm the one you are currently using. Review your login information, the account and company details, all in a single place.
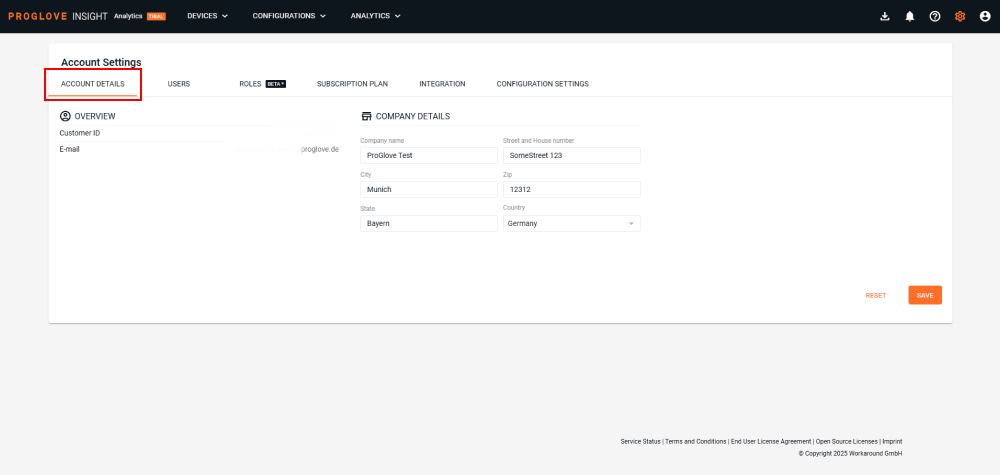
Company details are filled out upon the creation of your account and can be changed here, if needed. Make sure you consult the relevant people at your organization and obtain approval before changing any company information.
Users
This represents a list of all registered users under your company's INSIGHT account. It allows you to create new and delete existing users, as well as assign each one a default or custom role to better reflect your organization's structure and permissions.
Default roles allow default (Admin or User) access across the whole My Organization structure. Custom roles are useful when you want to grant read and/or edit access per individual or multiple levels and sublevels.
Important
INSIGHT webportal processes sensitive information and each company has its own account, so ensure you only invite authorized people from your organization.

Add a user
In the Users tab within Account Settings, click Add User in the top-right corner.
The Add User screen displays.
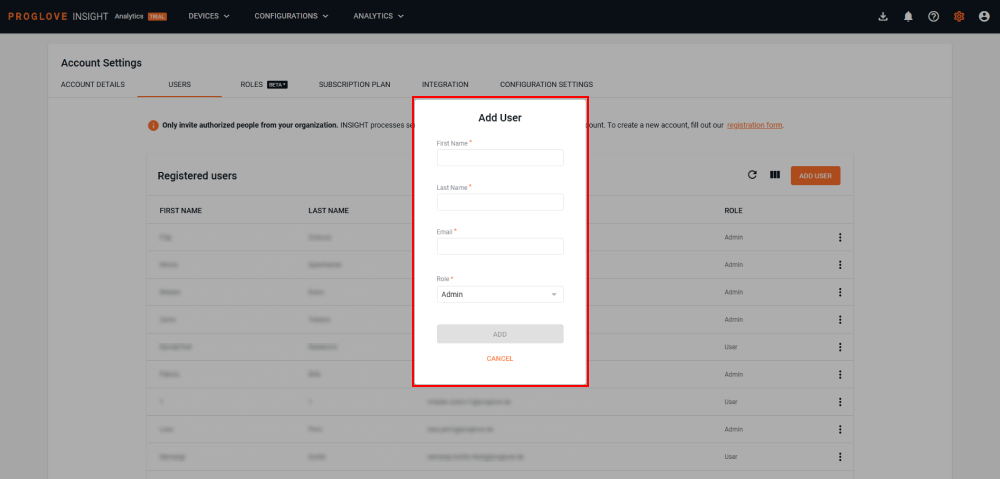
Fill in the new user’s name and email.
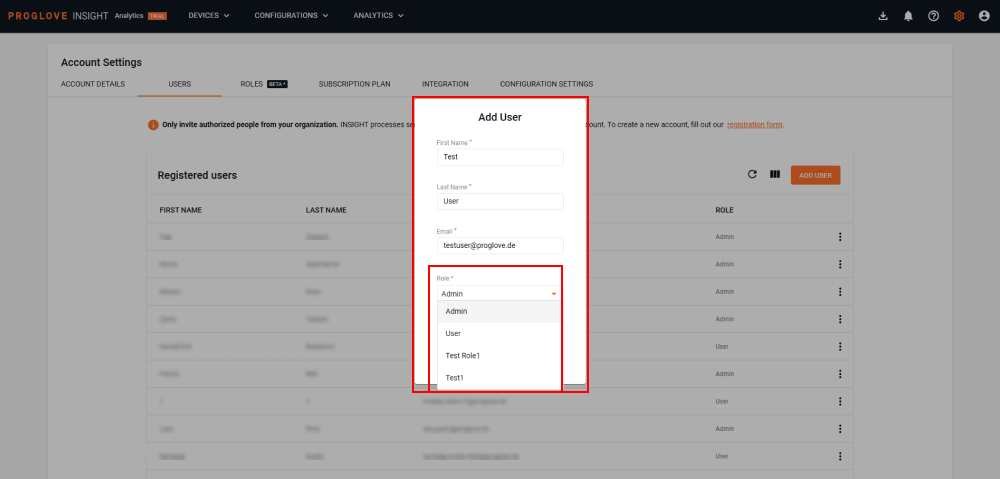
Under Role, click to open the drop-down menu and select the role you wish to assign to the new user.
At the bottom, click Add.
An invitation email is sent to the provided address.
Default roles
Roles determine the rights and access users have within their company's INSIGHT account. Default roles in INSIGHT are Admin and User.
Users with the Admin role can access all sections of INSIGHT. They can also change the role of existing users within that particular INSIGHT account, with the exception of the user they used to log in. Users with a default User role have access to all downloads in INSIGHT but no access to the account data and settings, nor can they see or manage other users.
To change the role for a specific user, find the user on the list and click the pencil icon next to it to edit its details. Reference the table below activities that are allowed for each default role.
Once the popup window opens, select a user role from the drop-down menu and click Save.
The table below lists the features and permissions specific to the roles.
Permission / feature | Admin | User |
|---|---|---|
Read device and connectivity device information | Yes | Yes |
Provision a new connectivity device | Yes | No |
Remove a device from the list of lost/low-battery devices | Yes | No |
Access Scan Analytics (dashboard and scan analytics) | Yes | Yes |
Remote Update of Gateway and Gateway Plus devices (BETA) | Yes | No |
Narratives | Yes | Yes |
Remote Configuration | Yes | No |
Access Analytics | Yes | Yes |
Add a new (device) configuration | Yes | No |
List users | Yes | No |
Add a new Admin or User | Yes | No |
Delete an Admin or a User | Yes | No |
Change profile details | Yes | Yes |
Create and add levels/sublevels to My Organization structure | Yes | No |
Start a Free Trial | Yes | No |
Change role for existing users | Yes | No |
Delete a user
Within the Users tab in Account Settings, a list of registered users will be displayed.
Click the three-dot menu next to the desired user and click Delete.
A modal Delete User window displays asking you to confirm deletion.
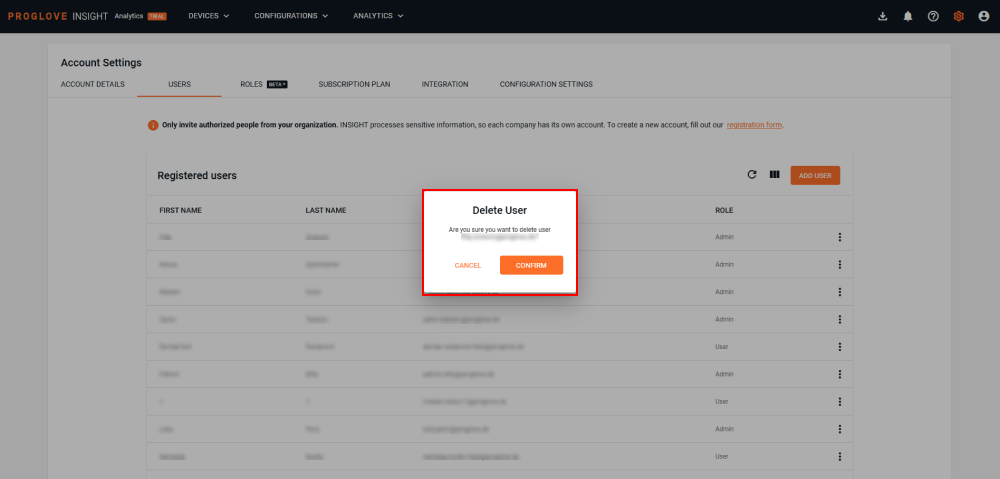
Select Confirm.
The user is now deleted from the account and is no longer visible in the list.
Roles (custom)
Roles determine the rights and access users have within their company's INSIGHT account. With custom roles, you can define users with specific access and restrictions, so they can only see and/or edit what is relevant for them and their role within your company.
Selecting individual levels/sublevels within the My Organization structure and specific read/create/update/delete permissions for your custom roles will help you perfectly match the roles on your shop floor and within your organization. This way you can create and/or assign roles to a single user or multiple users at once.
Customizing roles allows you i.e. to restrict a group of users from editing and viewing information in some levels and sublevels while still allowing them unlimited access and control in their assigned (sub)levels, to create a role that can only access devices and device configurations, or to only see the data but without the possibility of making any changes, etc.
When creating a new role, first you have to select the levels and sublevels to which its users will have access. The next steps takes you through specific permission rights that are easily checked and granted across all sections and functionality within INSIGHT. As required by the role you want to create, here is where you can combine anything from read-only permissions on a single level to full-access permissions across multiple levels and sublevels. The third and final step is to assign the role to existing users. This step is optional, allowing you to pre-define roles and quickly assign them later once you have created the relevant users. See below for details on setting up and managing custom roles.
Note
Ensure required levels and/or sublevels have already been defined within the My Organization structure before defining the role.
Create a role
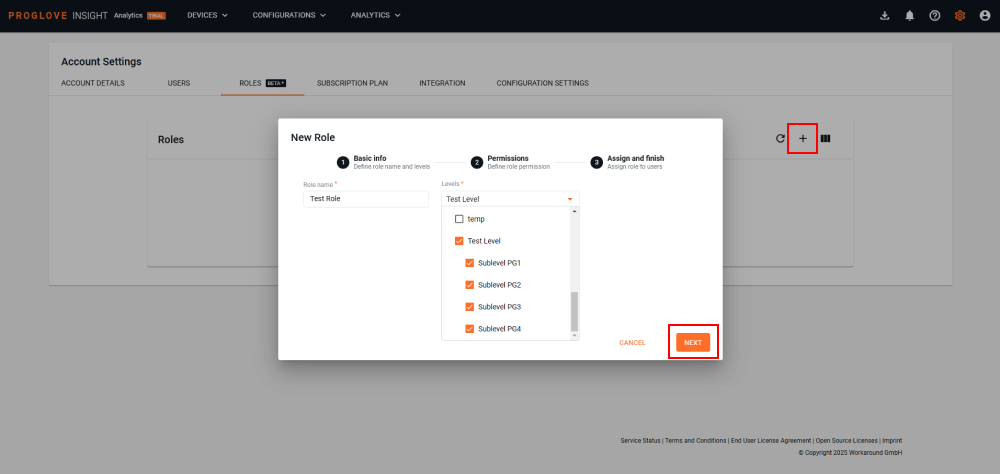
In the Roles tab within Account Settings, click the "+" icon in the top-right corner to add a new role. A popup window will appear.
Enter the name for your new role in the first field on the left, then click the second one to open a drop-down menu and select the levels and sublevels to which your role will apply. Once selected, click Next.
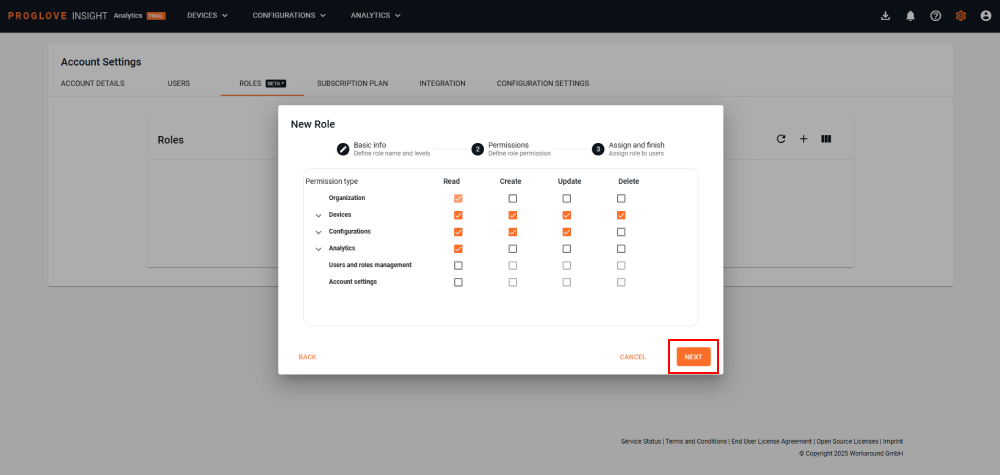
Check the read box in the first column next to any of the listed INSIGHT sections (Devices, Configurations, Analytics, etc.) to allow users with this role to see them when logged in. Additionally, check the boxes across the columns to define the type of permission that is applied, i.e. create, update, and/or delete permissions for each of the INSIGHT sections. Once done, click Next.
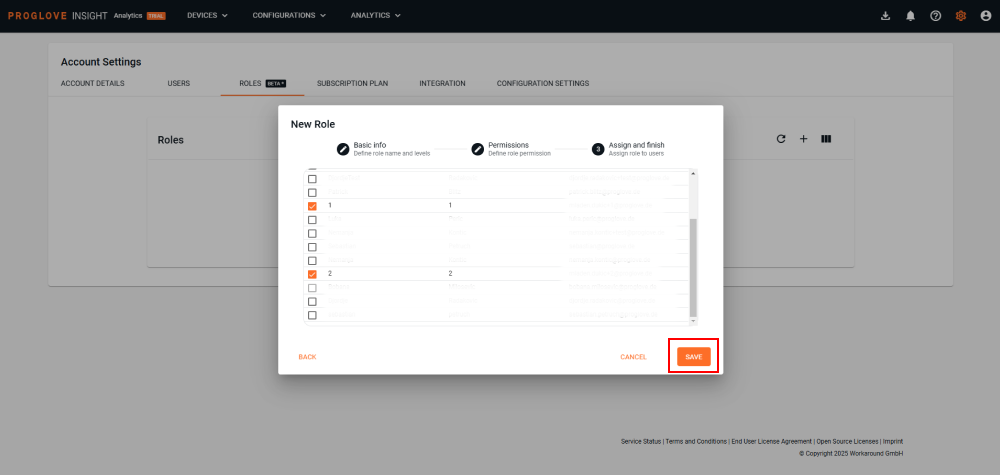
Check the box next to one or multiple users to assign the role. Alternatively, you can save the role without selecting any users, and assign it later at any time. Click Back to go back a step in case you want to make changes or Save to confirm and save the new role. Click Cancel to stop the process and return to the list, if you do not want to save the role at this moment.
Note
Roles can only be assigned to other users, i.e. you cannot assign a role to the user which you used to log in to INSIGHT.
A custom role cannot be assigned to default Admin users.
Default Admin users cannot change roles of other default Admin users.
Manage roles
The Roles list displays the role name, unique ID, time and date of creation and the number of users it was assigned to. If required, you can select or unselect the columns you wish to see by clicking the "Show columns" icon in the top-right corner. Note that the default, Admin and User, roles are not displayed because you can only manage (create, edit and delete) customized roles.
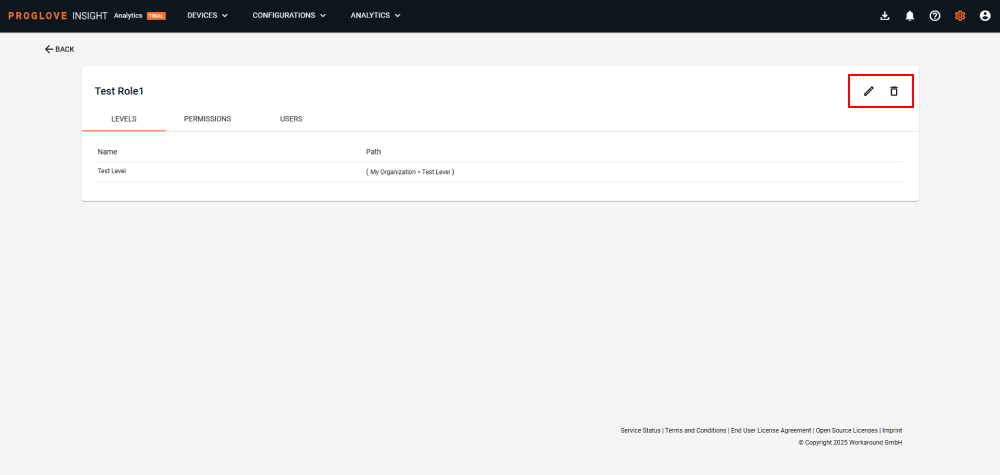
To review the details of each role, either click the name of the role directly from the list or click the three-dot menu on the right and then select Details. This shows all the selected levels and sublevels, all permissions attributed to the role, as well as a list of users to which the role was assigned. Review the details by switching the tabs in the top of the screen.
To make edits to the role, click the "pencil" icon in the top-right corner of the screen. If you no longer need this type of role, click the "bin" icon to delete it. Note that you can only manage roles one by one.
Note
Default User roles remain the same until a custom role is assigned.
A custom role cannot be deleted if it is currently assigned to at least one user. To delete a custom role, you first need to edit it and un-assign all of its users.
If a level or sublevel to which a custom role was assigned is deleted, the role will also be deleted and the users to which the role was assigned will be reverted back to the default User role.
Subscription plan
The Subscription plan tab provides an overview of all available INSIGHT subscription plans, indicating the one that is currently active on your account. Here you can find more information about the Subscriptions Plans.
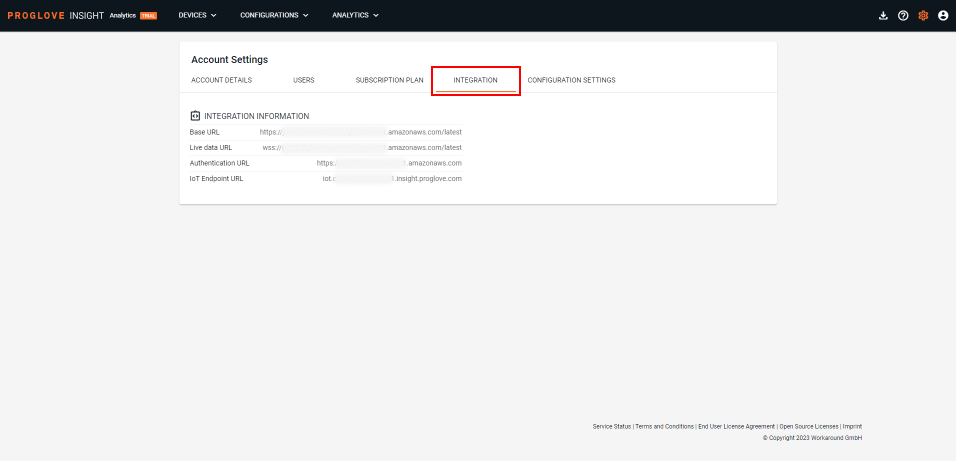
Integration
The Integration tab contains specific URLs related to your INSIGHT account that allow you to integrate your apps with the INSIGHT webportal using ProGlove INSIGHT API.
The tab displays your account's Base URL, Live data URL, Authentication URL and the IoT Endpoint URL in the following formats:
Base URL: - https://xxxxxxxxxxxxxx.eu-west-1.amazonaws.com/latest
Live data URL: - wss://xxxxxxxxxxxxxxxxx.eu-west-1.amazonaws.com/latest
Authentication URL: - https://xxxxxxx.eu-west-1.amazonaws.com
IoT Endpoint URL: - iot.xxxxxxxx.eu-west-1.insight.proglove.com
Note
Our API uses two main methods of communication, REST and WebSocket, to serve data and create or modify resources.
INSIGHT IoT connectivity
Use your account's IoT URL to allow IoT traffic to pass your network's firewalls. Make sure to enable traffic to and from that address to avoid potential IoT connectivity issues when integrating your Gateway or INSIGHT Mobile (Android) and (iOS) apps.
Steps to get your account's unique IoT endpoint URL and immediately check if it is reachable:
Log in to your INSIGHT webportal account and find your IoT URL in Account settings → Integration, as described in the section above.
Check if the URL can be reached from the network to which a Gateway or INSIGHT Mobile are connected by calling the endpoint URL via https (for example via browser). If the call is successful, IoT traffic is most likely not being blocked by the firewall.
If the call is unsuccessful and you see an error message, configure the firewall to allow MQTT traffic to and from that endpoint URL address.
Important
In case your infrastructure’s firewall prevents you from allowing FQDNs (Fully Qualified Domain Name), you need to allow IP address ranges used by AWS for a specific region. Contact your ProGlove representative to get a list of those IP addresses.
You can also add an entire AWS space for the relevant region to a trusted list on port 443 (TCP), as well as port 8443, if your firewall supports it.
*.eu-west-1.compute.amazonaws.com
*.eu-east-1.compute.amazonaws.com
To learn more, see: Device communication protocols.
Configuration settings
Introduction
Configuration settings allow you to store integration authentication details in INSIGHT and use them to remotely configure your scanners via MQTT or WebSocket integrations.
Storing your credentials in INSIGHT enables you to keep your workflows simple with minimum manual work required and within a single integration path. Creating a single configuration file and pushing it to all your devices, no matter where they are, will save time and effort, reduce workflow disruptions and your shop floor managers don't need any new knowledge or training to perform remote configurations.
Since the data is kept securely, according to the latest globally-accepted standards, and handled exclusively for this purpose, this also allows for additional security. By not sharing your credentials and setting up fully-functional configurations remotely, you can significantly reduce the risk of breaches to your company data.
Storing and deleting credentials
Log in to INSIGHT webportal and click the gear icon in the top-right corner and select Configuration settings.
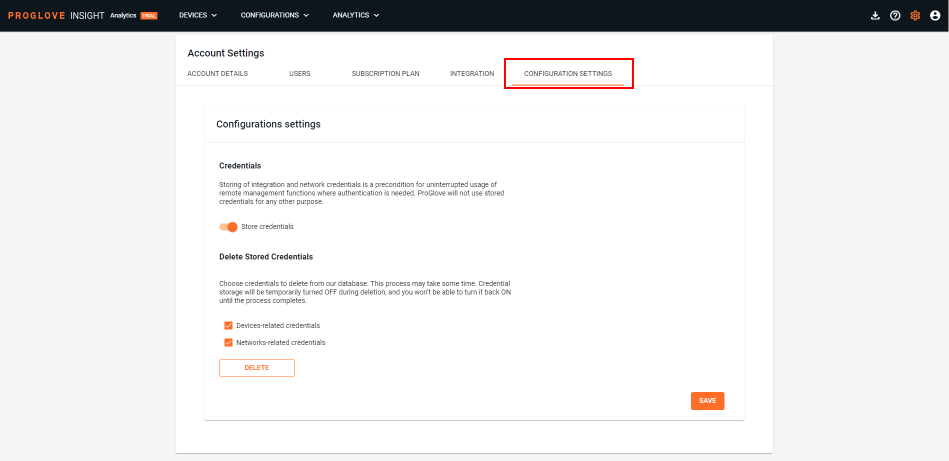
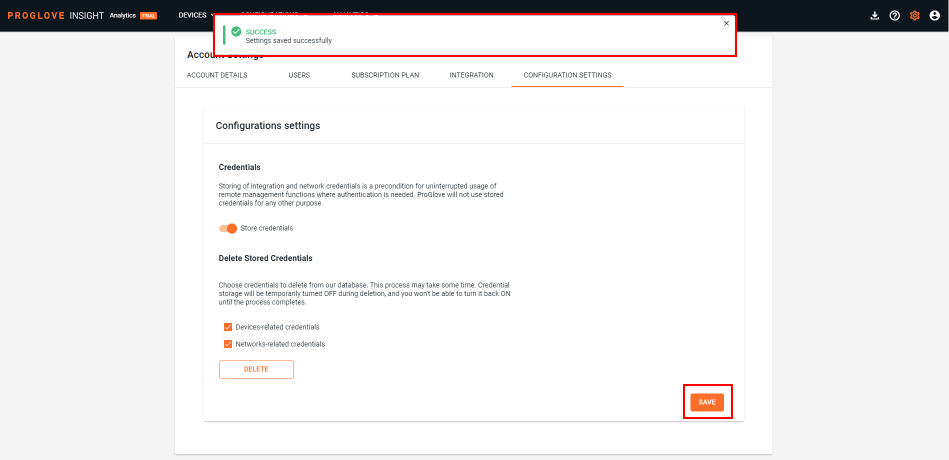
Both processes of storing and deleting the credentials are quick and as simple as it gets. You just need to click to toggle the button next to the required action and click Save.
Once saved, INSIGHT will prompt a notification confirming a successful completion. From that point on, any new device and network credentials added to INSIGHT will be safely stored.
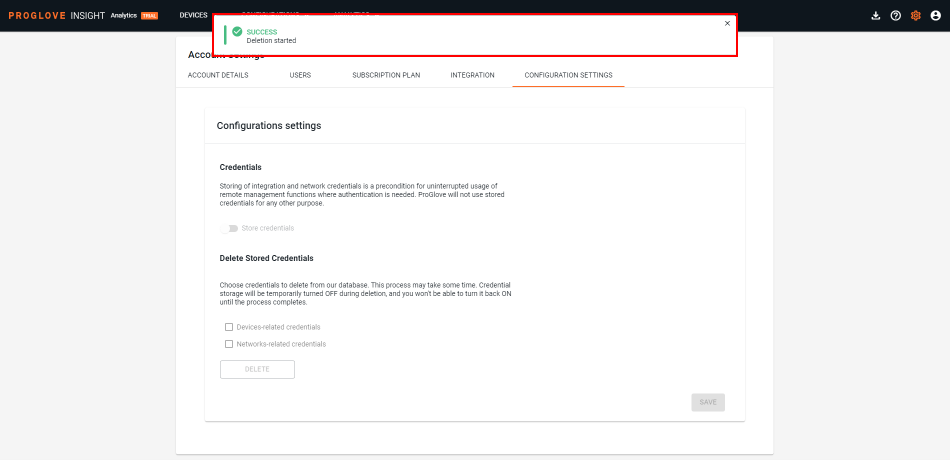
If you no longer need to store your device and/or network authentication details, you can choose to keep some of the data, either related to your devices or the network, or delete all of it. Simply toggle the button next to the selected option and click Delete, as shown below.
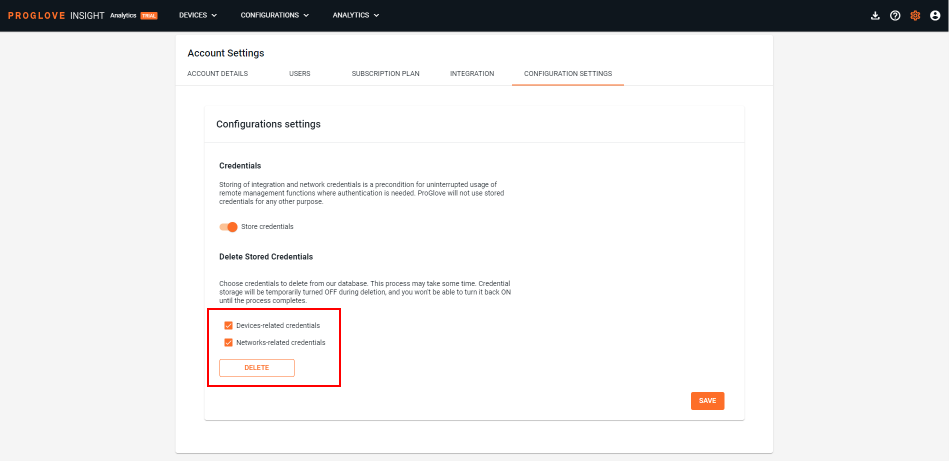
After clicking the Delete button, a popup window will appear asking you to confirm deletion of stored data. Once confirmed, INSIGHT will display a prompt informing you that the process has started.
Additional information
The processes of enabling Storing credentials and deleting them can be repeated and do not incur any additional costs.
While we are working on enabling user notifications of a completed deletion process, this is still not available. Check if you can activate the Store credentials toggle again to confirm the deletion process was completed.