My Organization
Use the My Organization hierarchy in the INSIGHT webportal to build out a representation of your physical environment's process structure. Create multiple organizational levels within and then assign your devices to their respective meaningful sublevels.
By connecting your scanners and Connectivity devices to INSIGHT and adding them to a certain level, the data retrieved from all the connected devices is collected and recorded under that level. This allows you to analyze and compare data between different processes over time, and to each other, within the Analytics section → Performance.
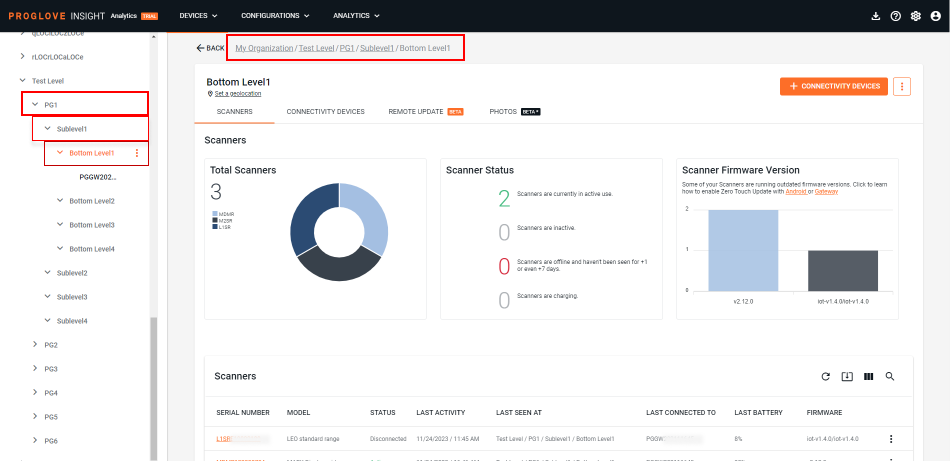
When creating your hierarchy, you can add as many levels and sublevels as you need, with a maximum of 3 levels "in depth" for each created level. Use the levels to pinpoint the performance and effort of your scanners by assigning your Connectivity Devices to the most specific level. Note that you first have to create the levels and sublevels before adding your devices. Once the structure is defined, you can use the breadcrumbs on top of the screen for easier navigation between levels, as shown in the image below.
My Organization supports:
An unlimited number of levels (each one allowing additional 3 levels further down in its hierarchy)
An unlimited amount of Connectivity Devices per level
Note
We recommend adding a maximum of 10 Connectivity Devices per level because the data on performance will be presented in graphs within the Process Analytics section, and each device will be assigned a different color. With more than 10 devices, it can be hard to differentiate specific data at a glance and without pulling a report, so you might want to consider splitting your levels if the number of devices per level exceeds 10.
Example 1 is showing Europe as a level, Munich as a sublevel, and then the structure is divided into sublevels for Picking, Shipping and Outbound processes.
Europe
Munich
Picking
Station PA
INSIGHT Mobile 1
Gateway 2
INSIGHT Mobile 3
Station PB
INSIGHT Mobile 4
INSIGHT Mobile 5
Shipping
Station SA
Gateway 6
Station SB
Gateway 7
Station SC
Gateway 8
Outbound
Station OA
Gateway 9
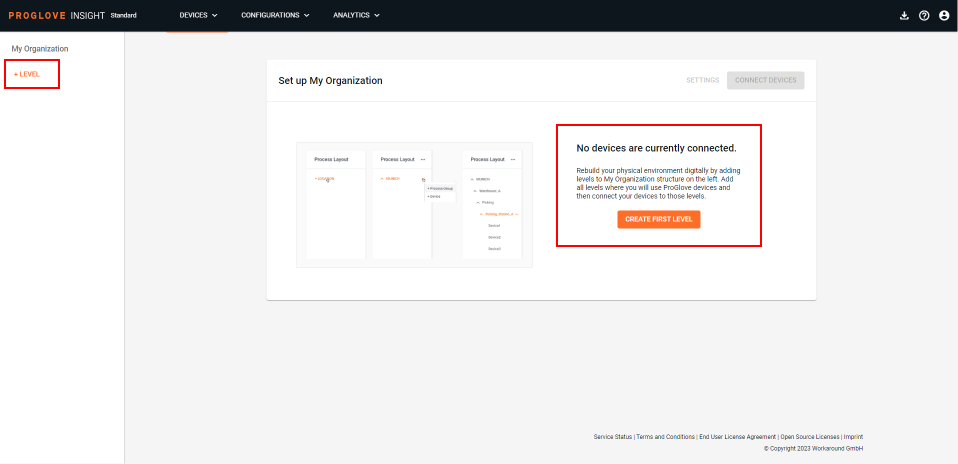
Create My Organization levels
In the My Organization panel, click + Level or Create First Level button to start.
The modal Add Level window displays.
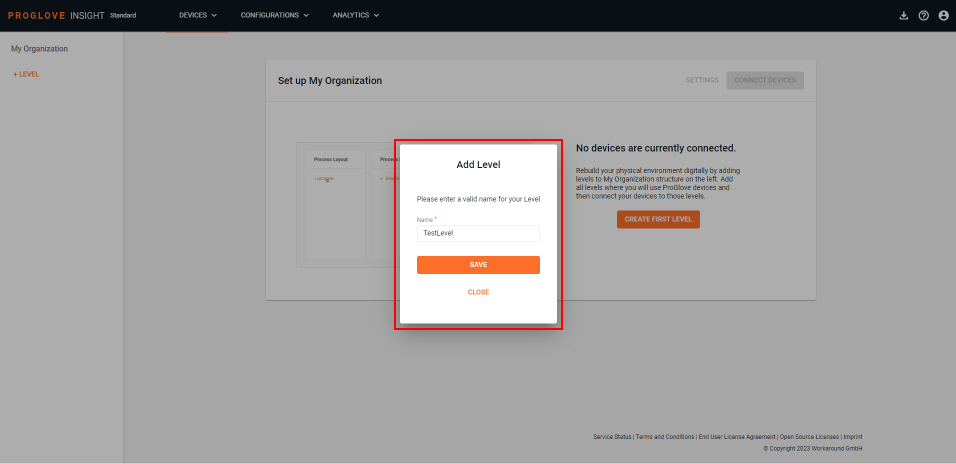
Enter a name for the level where the Connectivity device will be used and click Save.
The entered level displays in the My Organization panel.
Click the three dots next to the defined level and select + Sublevel.
The modal Add Sublevel window displays.
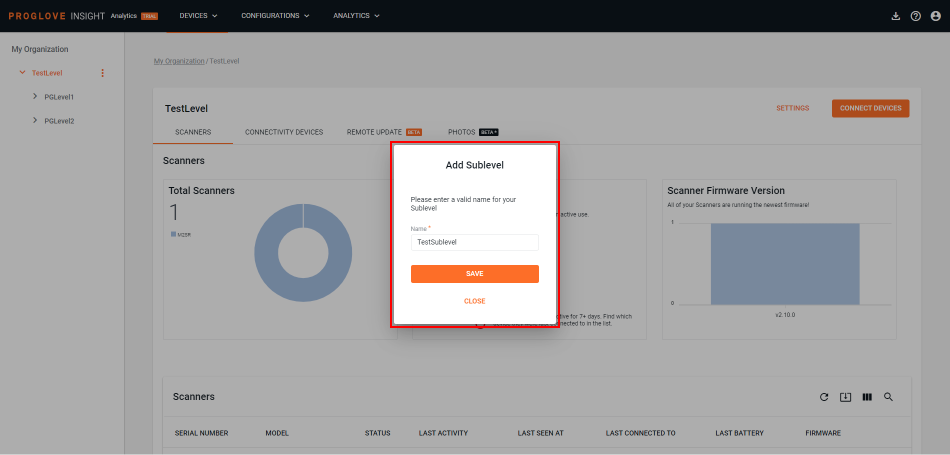
Enter a name for the Sublevel and click Save.
You can add two more sublevels in the same fashion.
Once you complete defining the hierarchy, you can add your Connectivity Devices to the desired level(s).
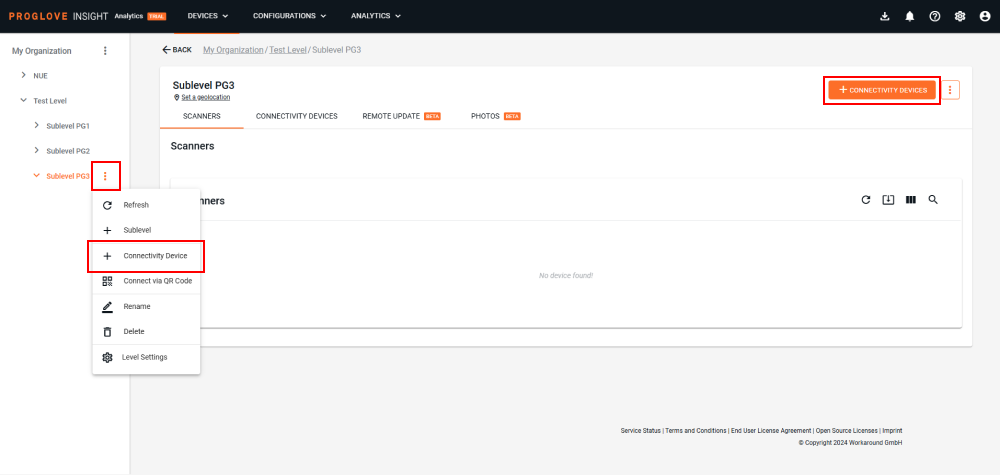
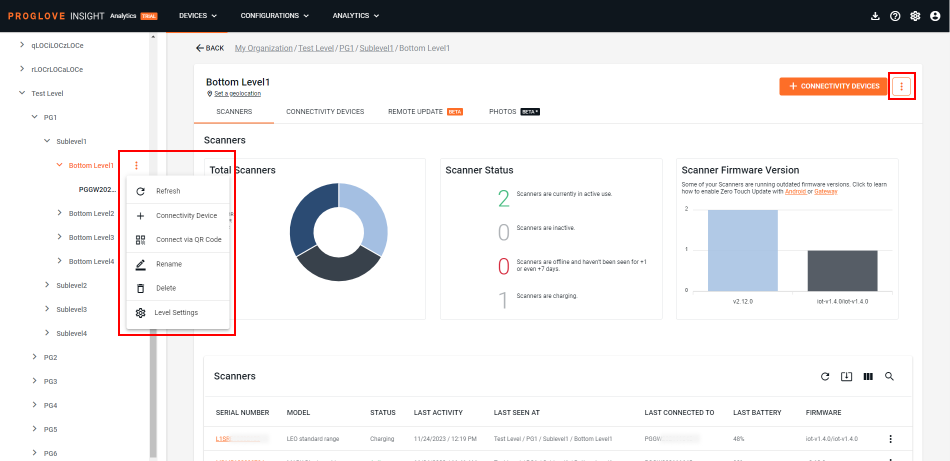
If you make a mistake when creating your hierarchy, you can Rename every level or Move it to another, existing level. Use the three dots next to each level to access a drop-down menu with these options. You can also Delete a level that has no child levels under it.
Tip
Setting up the complete My Organization hierarchy before enrolling Connectivity devices like Gateway and INSIGHT Mobile (Android) is highly recommended. Make sure it resembles your organizational structure and has the hierarchy levels you need before connecting your devices. This will make it easier for you to manage the devices. You can test a smaller number of devices but you might have to re-enroll the devices later when building your complete hierarchy.
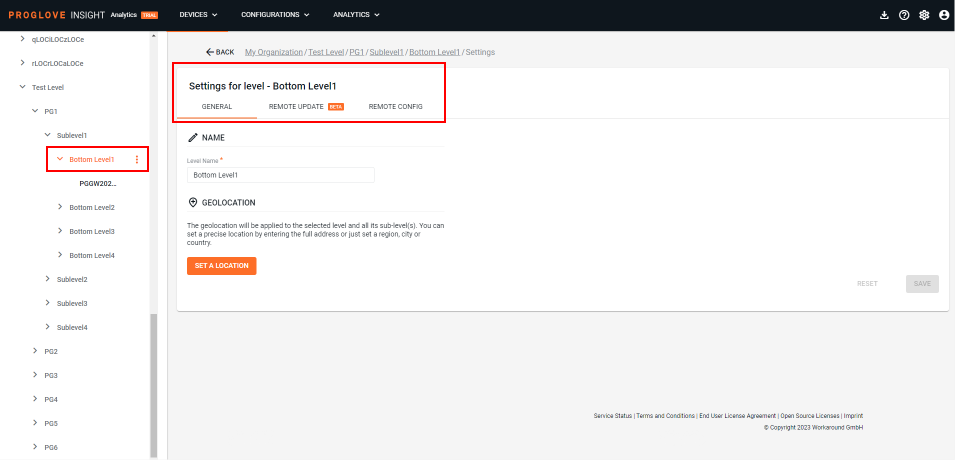
Level settings
Level settings allow you to manage details related to a particular level and/or sublevel within the My Organization structure.
Each of the levels and sublevels within the My Organization structure can have different settings applied. You can access the settings either via the three-dot menu next to the desired level or sublevel, or by selecting the desired (sub)level and then the Level settings from the three-dot menu in the top-right corner.
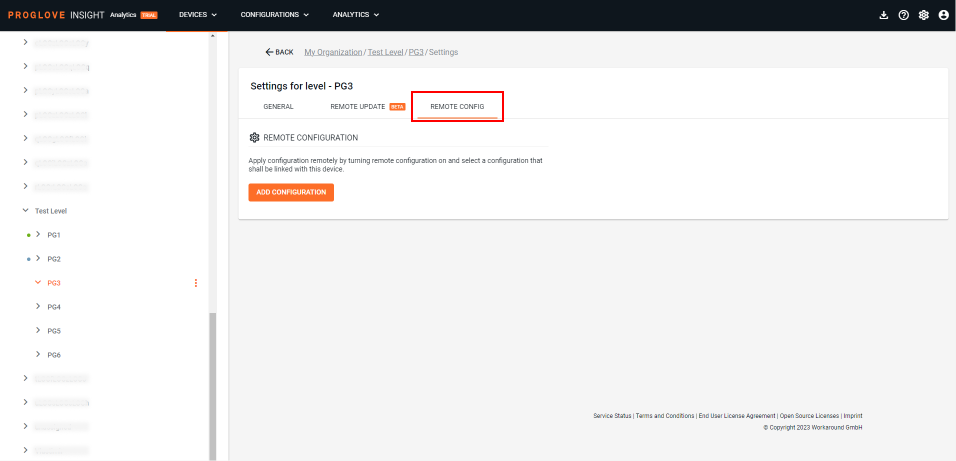
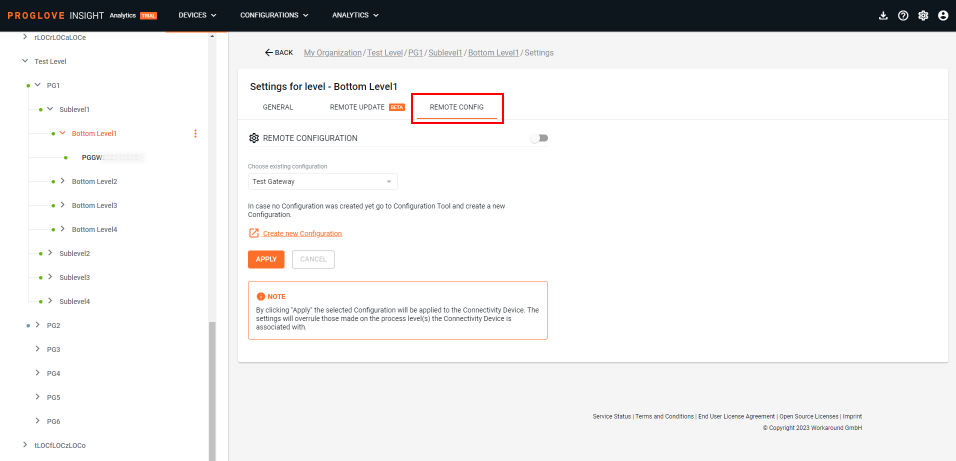
You will find three tabs when accessing any level or sublevel settings. Within the General tab, you can edit the name of a (sub)level and assign a specific geolocation and time zone. The Remote Update and Remote Config tabs allow access to remote, over-the-air features where you can set up and remotely apply different settings to all your devices under a specific level/sublevel at once. Additionally, the two remote features can be set up at the top level (My Organization) and applied to all levels and devices within the structure in just a few clicks.
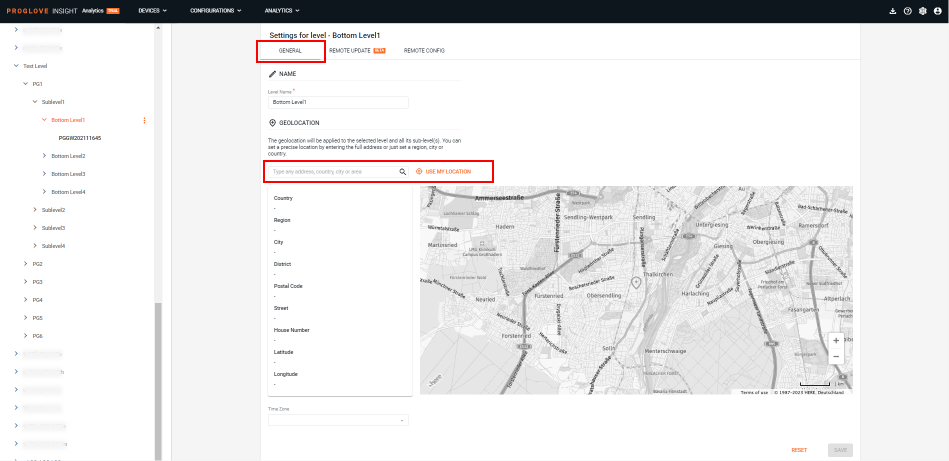
To assign a geolocation to your level/sublevel, click the Set a Location button. Enter the name of a desired location in the field and select it from the drop-down menu once it displays, or allow your browser to forward the location to INSIGHT by selecting Use my location. Time zone will automatically populate according to the selected location. This can be changed manually, if necessary.
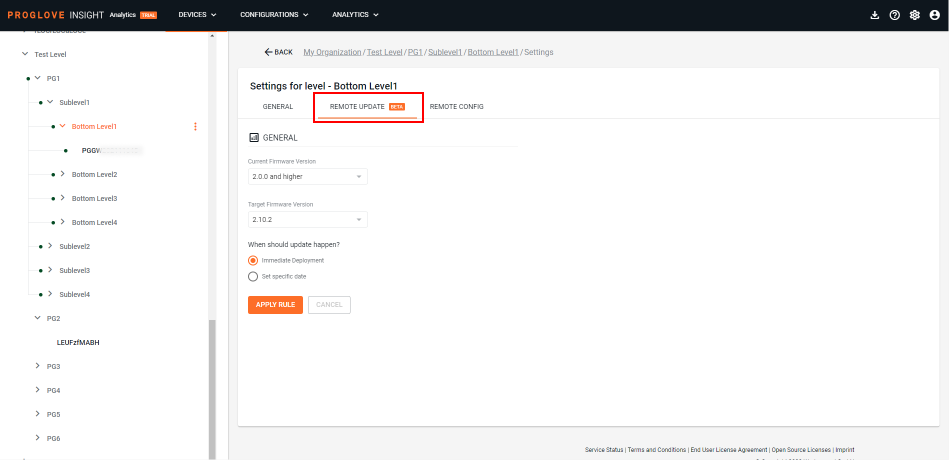
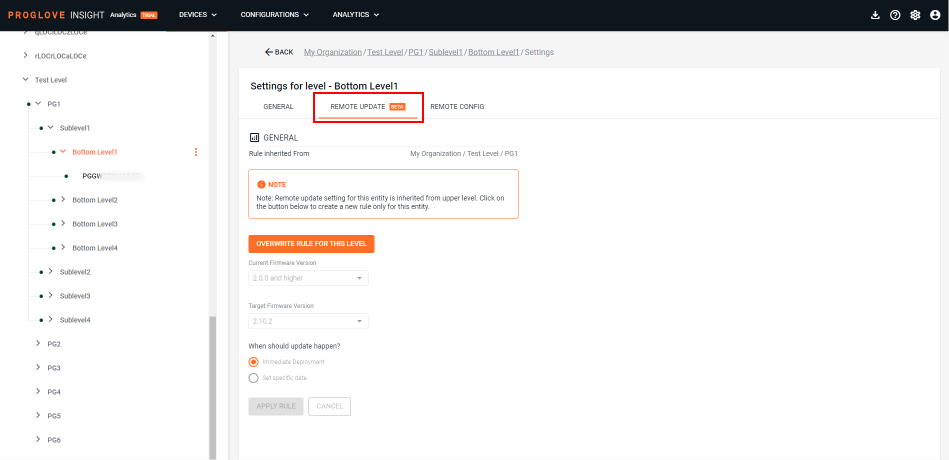
Switch to the Remote Update tab to set up rules and automatically update all Gateway devices under one level. While setting up different Remote Update rules for each of the (sub)levels is possible, the rules are inherited and can be passed down from the higher level or directly from the main level (My Organization) to all the associated levels and sublevels. This way you can update all your devices at once and with just a few simple clicks. The colored line in the left navigation menu, connecting the levels and its sublevels, display the inheritance line. If necessary, you can create a new rule and override any rules that are already applied.
Remote Config tab allows you to apply a single configuration to all connected devices and scanners. Apply it to a specific level and pass it down to its sublevels, or apply it directly on the main level (My Organization) and apply it to the whole structure. If a configuration was already applied, the colored line in the left navigation menu, connecting the levels and its sublevels, will display the inheritance line.