Create a configuration
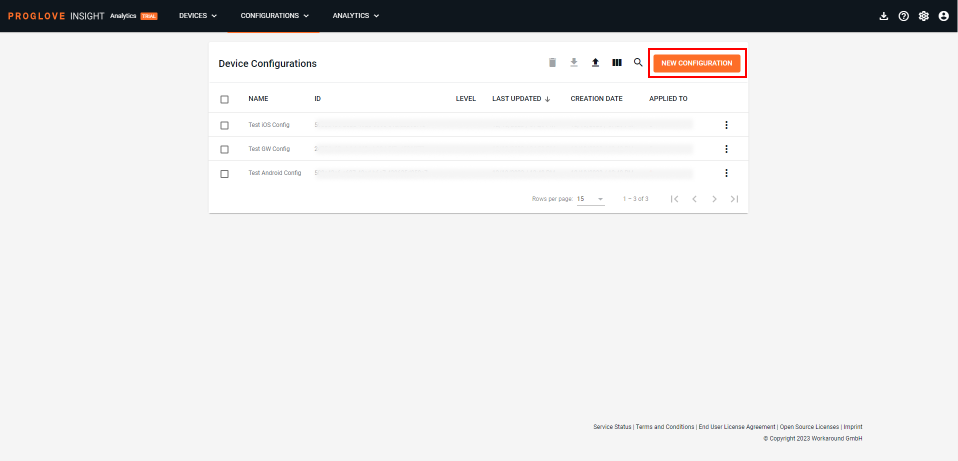
Log in to INSIGHT webportal and select Configurations → Device Configurations.
Click the New Configuration button in the top-right corner of the list to add a configuration.
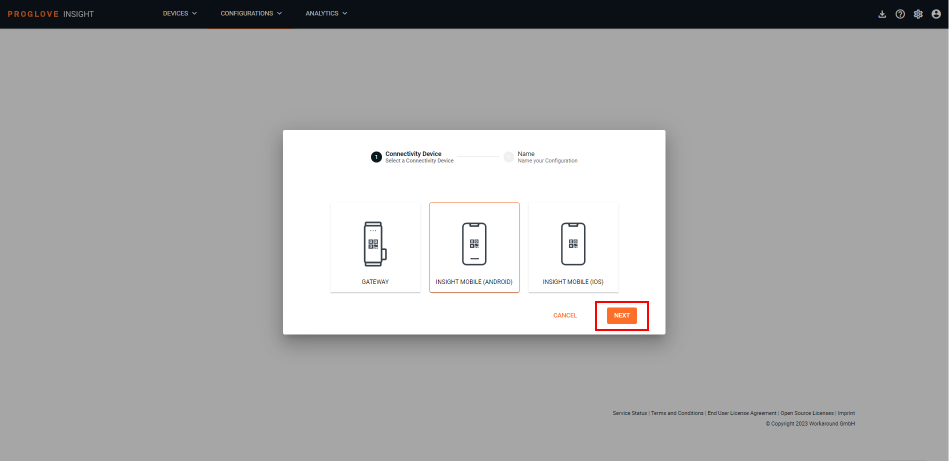
Select INSIGHT Mobile (Android) and click Next.
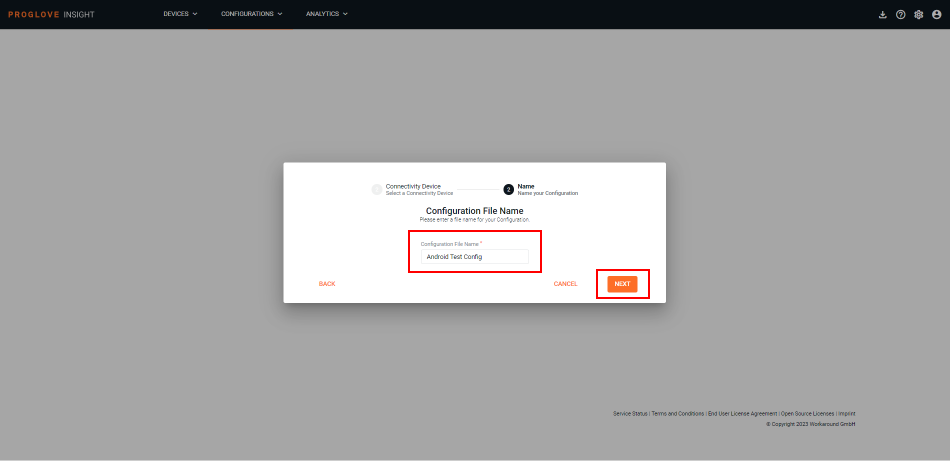
Type in a unique name for your configuration and click Next.
You can change the defined name at any time within the General configurations settings found right next to the configuration name in the upper-left corner of the screen. General configuration settings apply to all profiles within a configuration. You can also apply QR restrictions to the configuration you are creating, and disable any future configurations or staging settings from being applied to your devices via QR codes.
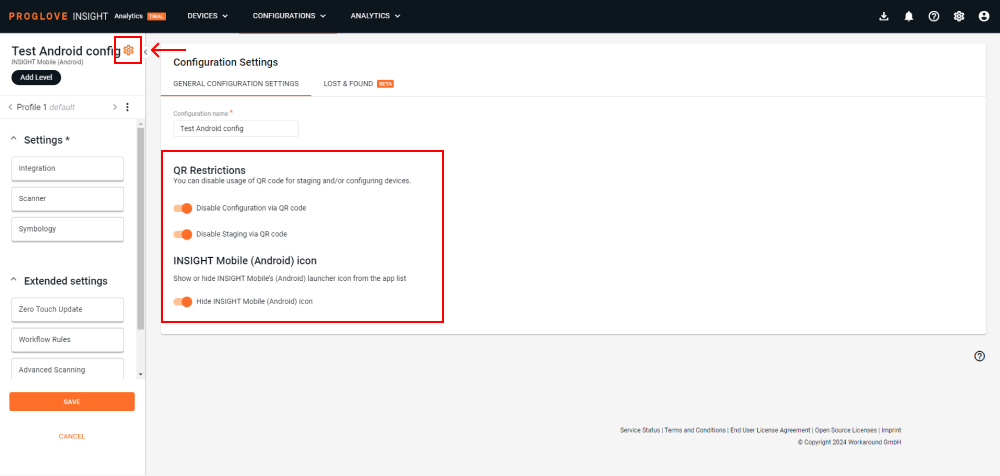
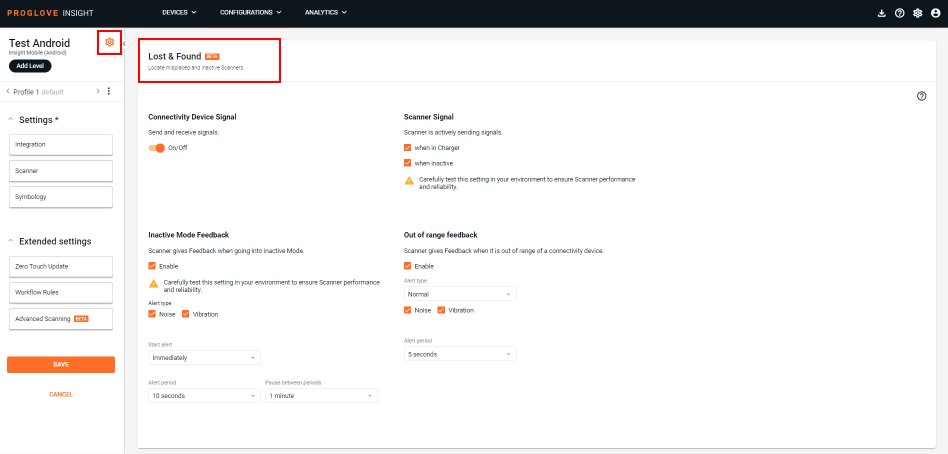
Additionally, if you have an active Lost & Found solution on your INSIGHT account, you can show/hide the launcher icon for the INSIGHT Mobile app, as well as enable settings listed below that support better monitoring of your devices and keeping track of them when they are not in use.
Note
For more details about the Lost & Found solution, see here.
Connectivity Device Signal - activate this toggle button to enable signal exchange between your scanners and Connectivity devices. This will enable your Android devices to receive the scanner signals and send them to INSIGHT where you can see their status.
When you activate this setting, the Scanner Signal settings listed below get enabled and will appear on the right.
Scanner Signal - select if your scanners should send signals when charging or when they are inactive, or keep both. Be sure to test the settings in your live environment to ensure performance, as Lost & Found is still a Beta feature.
Inactive mode feedback - make your ProGlove scanners beep and/or vibrate when they're not in use (i.e. they have been taken out of the wearable, but not returned to charger). Select at least one Alert type (noise or vibration) and the time in which you want the feedback to repeat. The default is for the Noise to start Immediately, last 10 seconds and repeat every minute.
Out of range feedback - set your scanners to alert their users when out of range from the defined network. To enable the feature, select at least one Alert type (noise or vibration) and then the type of feedback and time in which you want it to repeat. The defaults are Noise and Normal sound type, with a 5-second alert period.
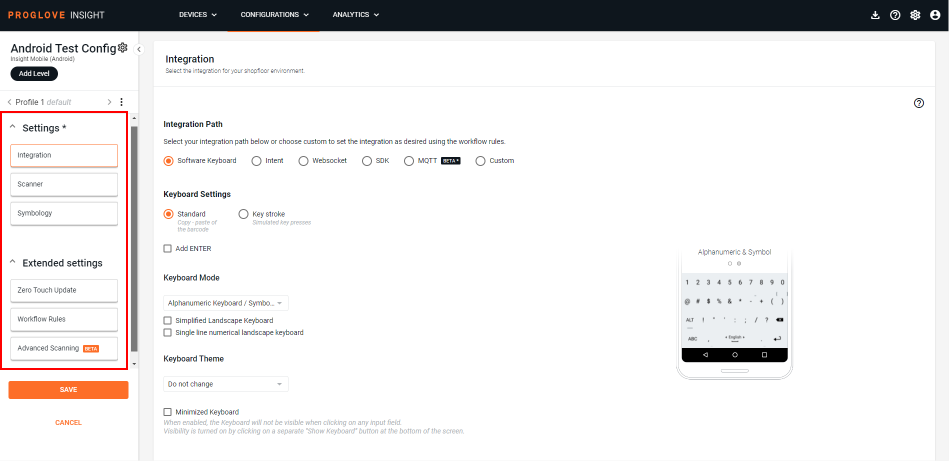
Define your settings using the Integration, Scanner and Symbology tabs in the left menu. You can also set up Advanced Scanning settings, and use the Zero-touch Update feature to update your scanners as soon as they are connected, as well as create your own Workflow rules.
At the bottom of the left navigation pane, click SAVE.
The modal Apply your configuration via window displays.
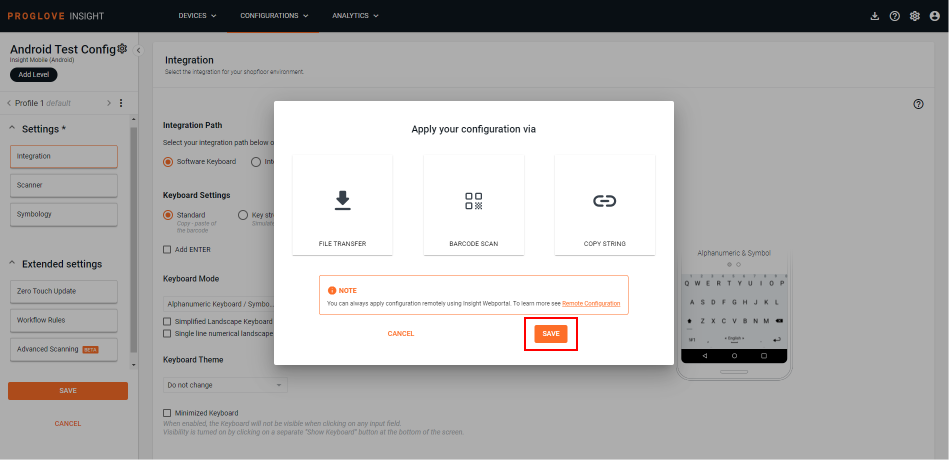
To apply the configuration to the connected device, select BARCODE SCAN to apply it by simply scanning the configuration barcode, FILE TRANSFER to apply it manually, or COPY STRING to apply it using an MDM solution and/or Base64 String.
Click SAVE.
Your configuration displays in the Device Configurations list.
Note
If you want to transfer the
ProGlove.proconfigfile manually to your device or distribute it using an MDM solution, find your configuration on the list and select Apply configuration from the menu. Then select FILE TRANSFER to download the configuration file.Select Edit from the menu button right next to your configuration to edit the existing configurations or use Copy to save it as a new configuration.
Important
The
ProGlove.proconfigconfiguration file consists of one default profile and up to 6 custom profiles.The
ProGlove.proconfigconfiguration file is not compatible with the .pgconf file from AutoConfig.The
ProGlove.proconfigconfiguration identifies a profile with a unique profile name (ID).