Network configurations
Enter your network credentials, including IP and DNS settings, directly in the INSIGHT webportal UI by creating configurations. You can also create multiple profiles for multiple Wi-Fi networks to have as an alternative.
With many ways to connect Gateway devices to your network, and the requirements for enterprise environments sometimes needing specific settings, you can now save steps instead of having to enter these manually later, as described here.
Important
Minimum firmware version 2.2.0 installed on your Gateway.
Setup
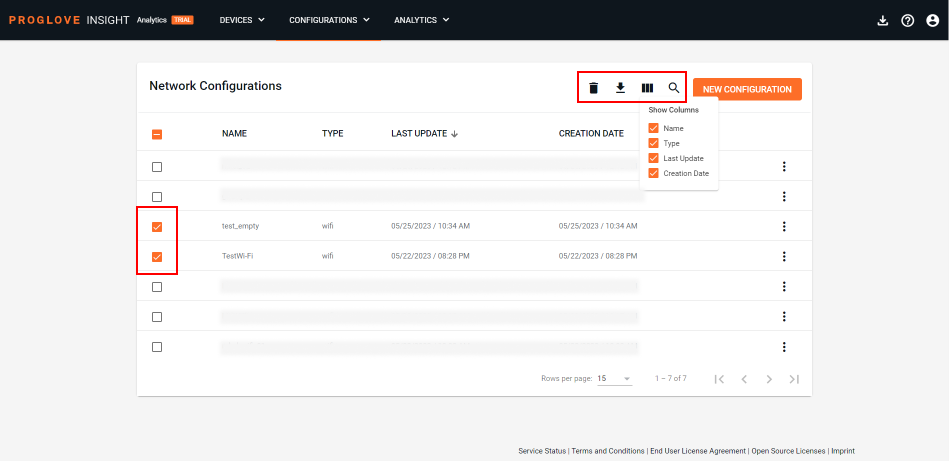
Log in to INSIGHT webportal and select Configurations → Network Configurations.
Select one or more configurations from the of the list to enable more options in the top menu, such as filters, sorting of columns, etc. Click the three-dot menu on the right to Edit, Copy, or Delete a specific configuration. Additionally, you can Download the file and manage it offline.
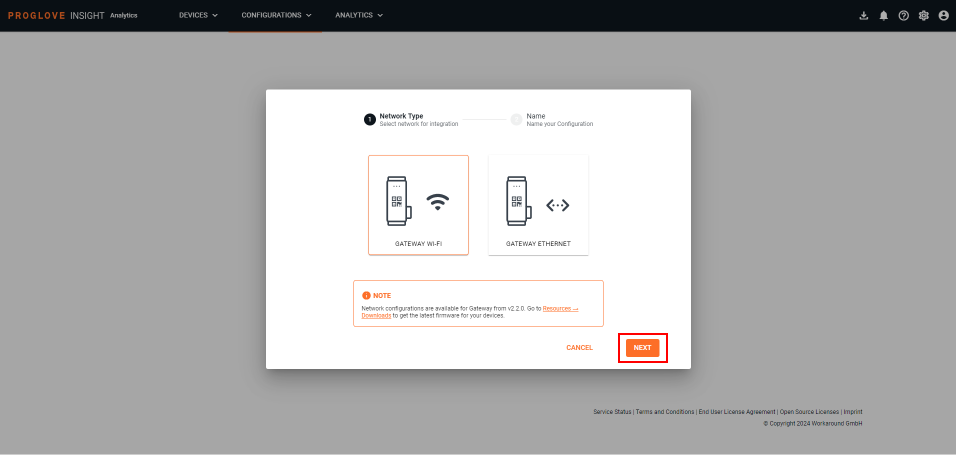
Click New Configuration and follow the instructions below, according to your required network type.
Wi-Fi
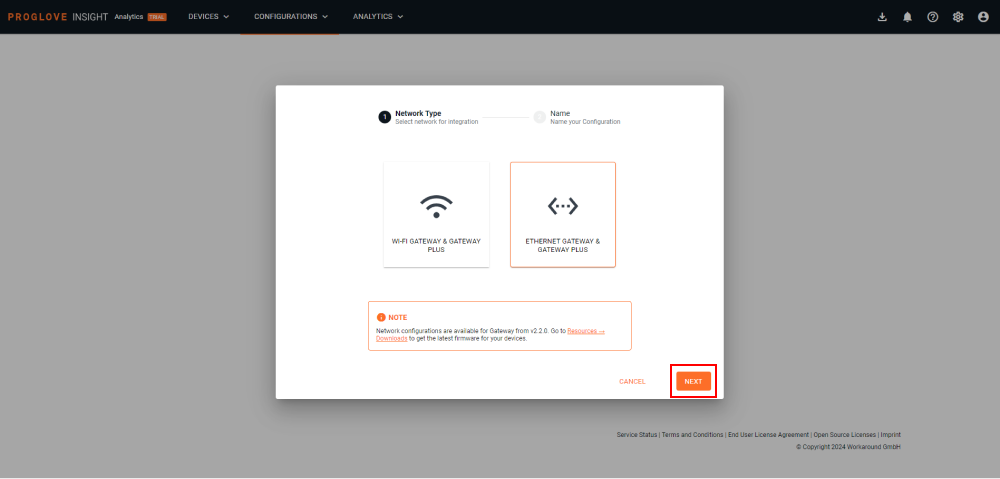
For Network type, select Wi-Fi Gateway & Gateway Plus and click Next.
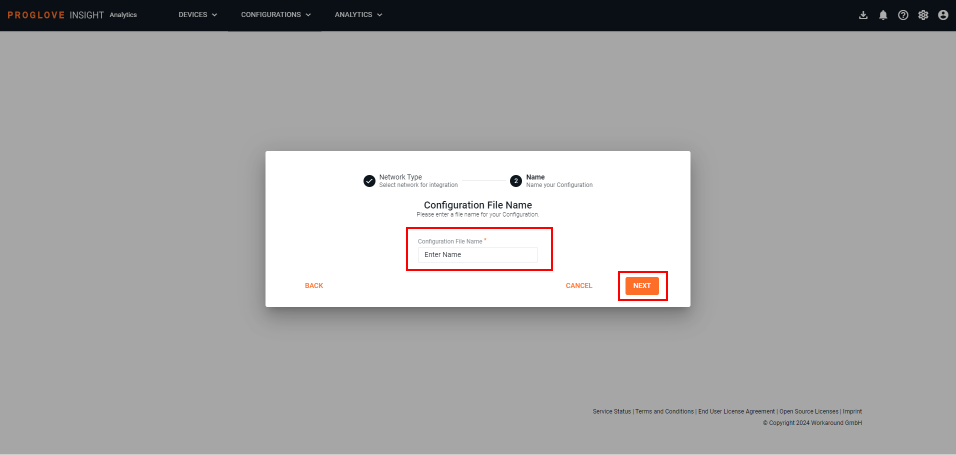
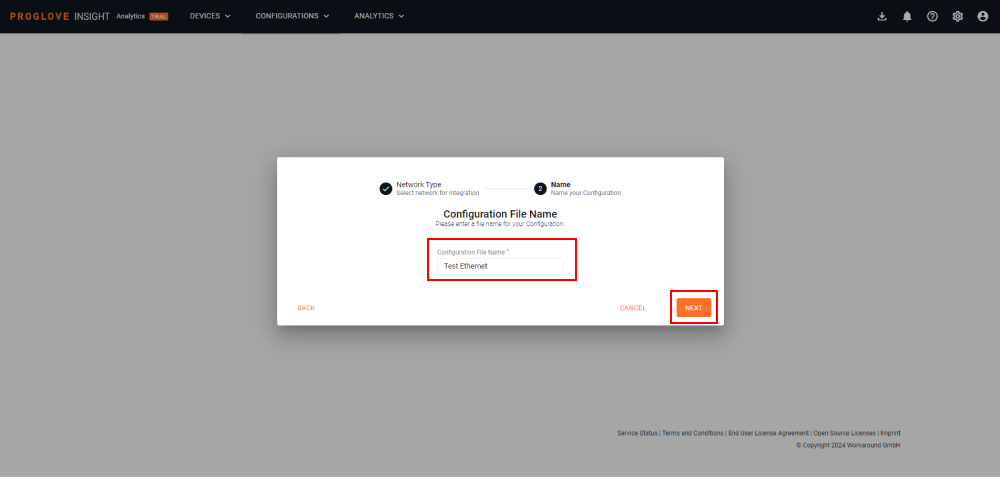
Enter a name for your configuration. The same name will be used to name your Configuration file when downloading.
For a typical Wi-Fi connection, that does not require any special setup and/or authorization, simply fill in the SSID (name) and the Password for your network and click Save settings in the bottom-right corner.
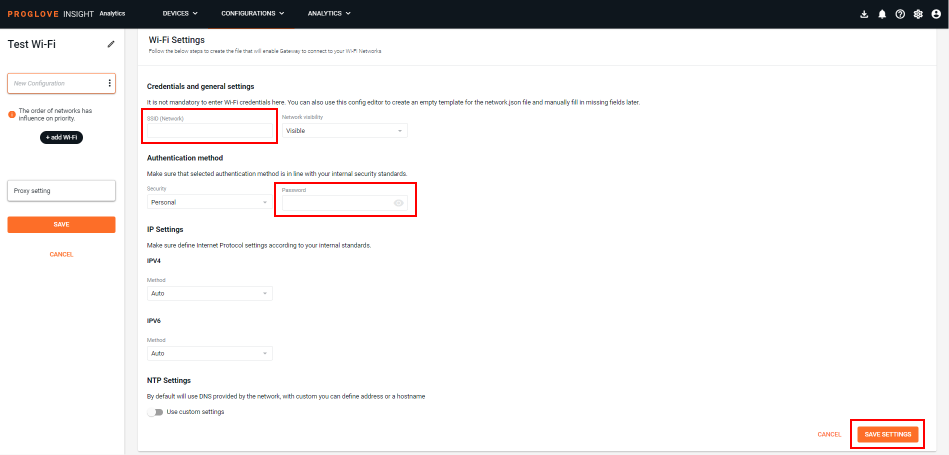
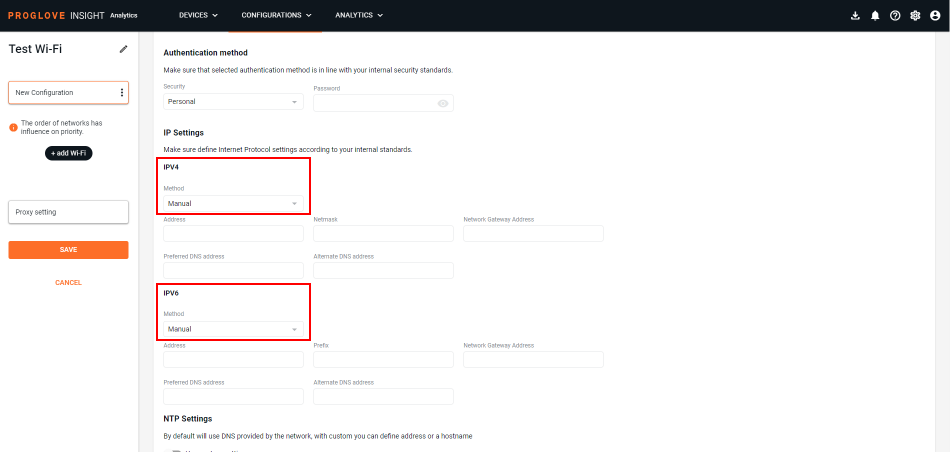
Selecting the Manual IPV method to connect to your network reveals additional fields and allows you to enter specific DNS details.
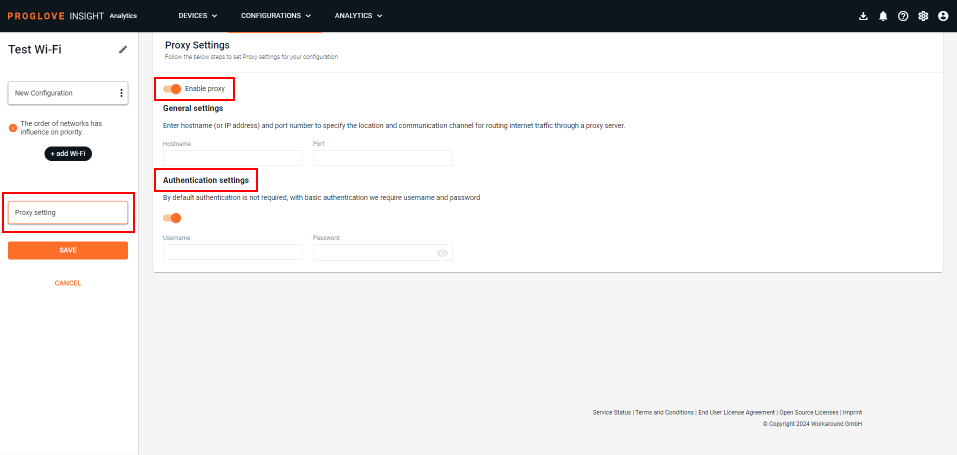
For added levels of functionality and security, you can enable Proxy settings and define a specific proxy server that should be used for internet traffic within your network. Hostname and Port are mandatory fields, and you have the option to add authentication details as required.
You can add multiple Wi-Fi networks to a single network configuration and then sort them according to the priority in which they should be used, as well as enable NTP settings by clicking the toggle button in the bottom of the screen. NTP (Network Time Protocol) servers helps you synchronize time on devices across the entire network. Enter the address or hostname and add an additional server, if needed.
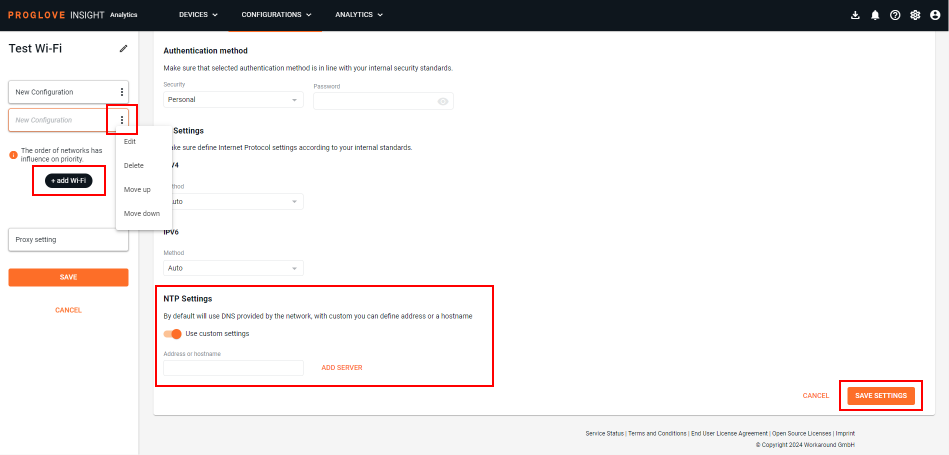
Once you've entered all the details for your Wi-Fi network, click Save settings and then Save on the left-hand side to save your configuration.
You'll be taken back to the previous screen where the newly-created configuration will be displayed.
Ethernet
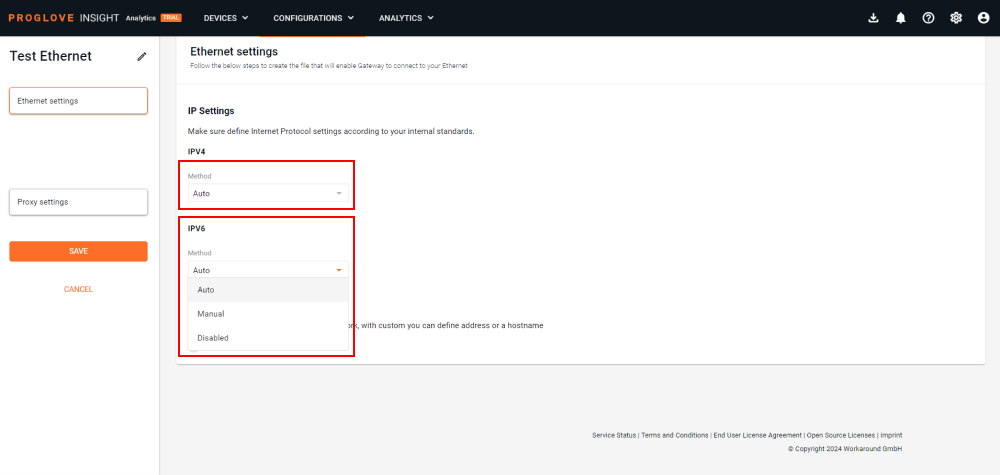
For Network type, select Ethernet Gateway & Gateway Plus and click Next.
Enter a name for your configuration. The same name will be used to name your Configuration file when downloading.
Select the Manual IPV method and enter specific DNS details to connect to your network. The default IPV Method is Auto, but you can also choose Manual, or Disable it when needed.
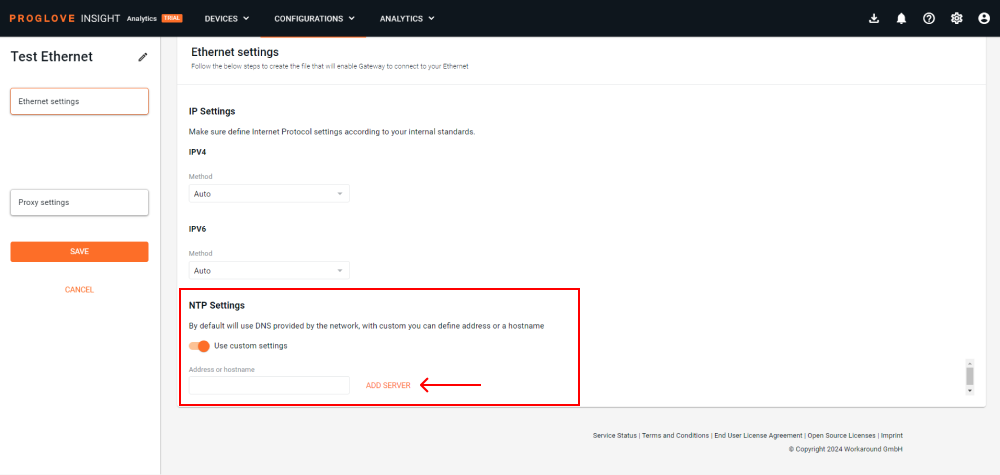
Enable NTP settings by clicking the toggle button in the bottom of the screen. Fill in the address or hostname and add an additional server, if needed.
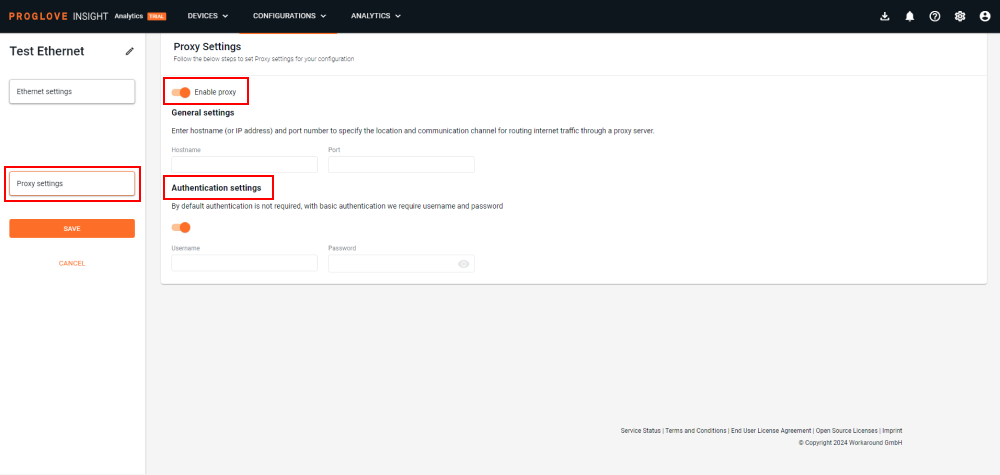
For added levels of functionality and security, you can enable Proxy settings and define a specific proxy server that should be used for internet traffic within your network. Hostname and Port are mandatory fields, and you have the option to add authentication details as required.
Once you've entered the required information of your Ethernet network, click Save on the left-hand side.
You'll be taken back to the previous screen where the newly-created configuration will be displayed.
Note
Once the
network.jsonfile is processed by the Gateway, it is no longer accessible anywhere on the Mass storage device, therefore the network details are not exposed anywhere.As ProGlove does not store any user data on INSIGHT webportal, if you re-download the provisioning package for the already connected device, you will be asked to provide the SSID password again.
Tip
When using a custom NTP, remember to add all NTP servers to the trusted list on your firewall to ensure the time of your Gateway stays synchronous with the INSIGHT webportal. For more details, see here.
Additional information
Devices | Subscription plan | Resources |
|---|---|---|
MARK Basic, MARK Display, MARK 2 - Scanner Firmware Gen1 2.8.1 LEO, MARK 3 - Scanner Firmware Gen2 1.2.1 MAI Firmware - 1.0.2 Gateway Application Firmware - 2.2.0 | INSIGHT Standard, INSIGHT Control, INSIGHT Enhance |
|