Connect Android devices
To send scanner and other data to our cloud platform, you need to connect your Android devices to Insight Webportal.
Prerequisite: Process Layout hierarchy defined.
Connect an Android device
On Insight Webportal, under Device Visibility, select Devices.
After finishing the setup of your organisational structure in the Process Layout panel, click on the Connect Devices button in the center section. Alternatively, click on the three dots next to the defined Location and select + Connect Devices.
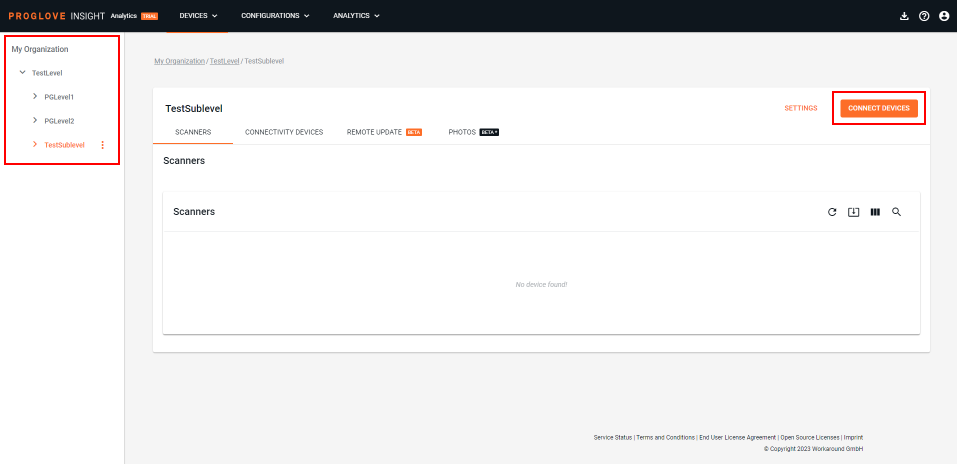
A Select a Connectivity Device window displays.
Note
Setting up your Process Layout before Provisioning new devices is mandatory. Make sure it resembles your organisational structure and consists of the hierarchical levels you need before connecting devices. This will make it easier for you to manage devices.
Select Insight Mobile (Android) and Device-based provisioning., then click Next.
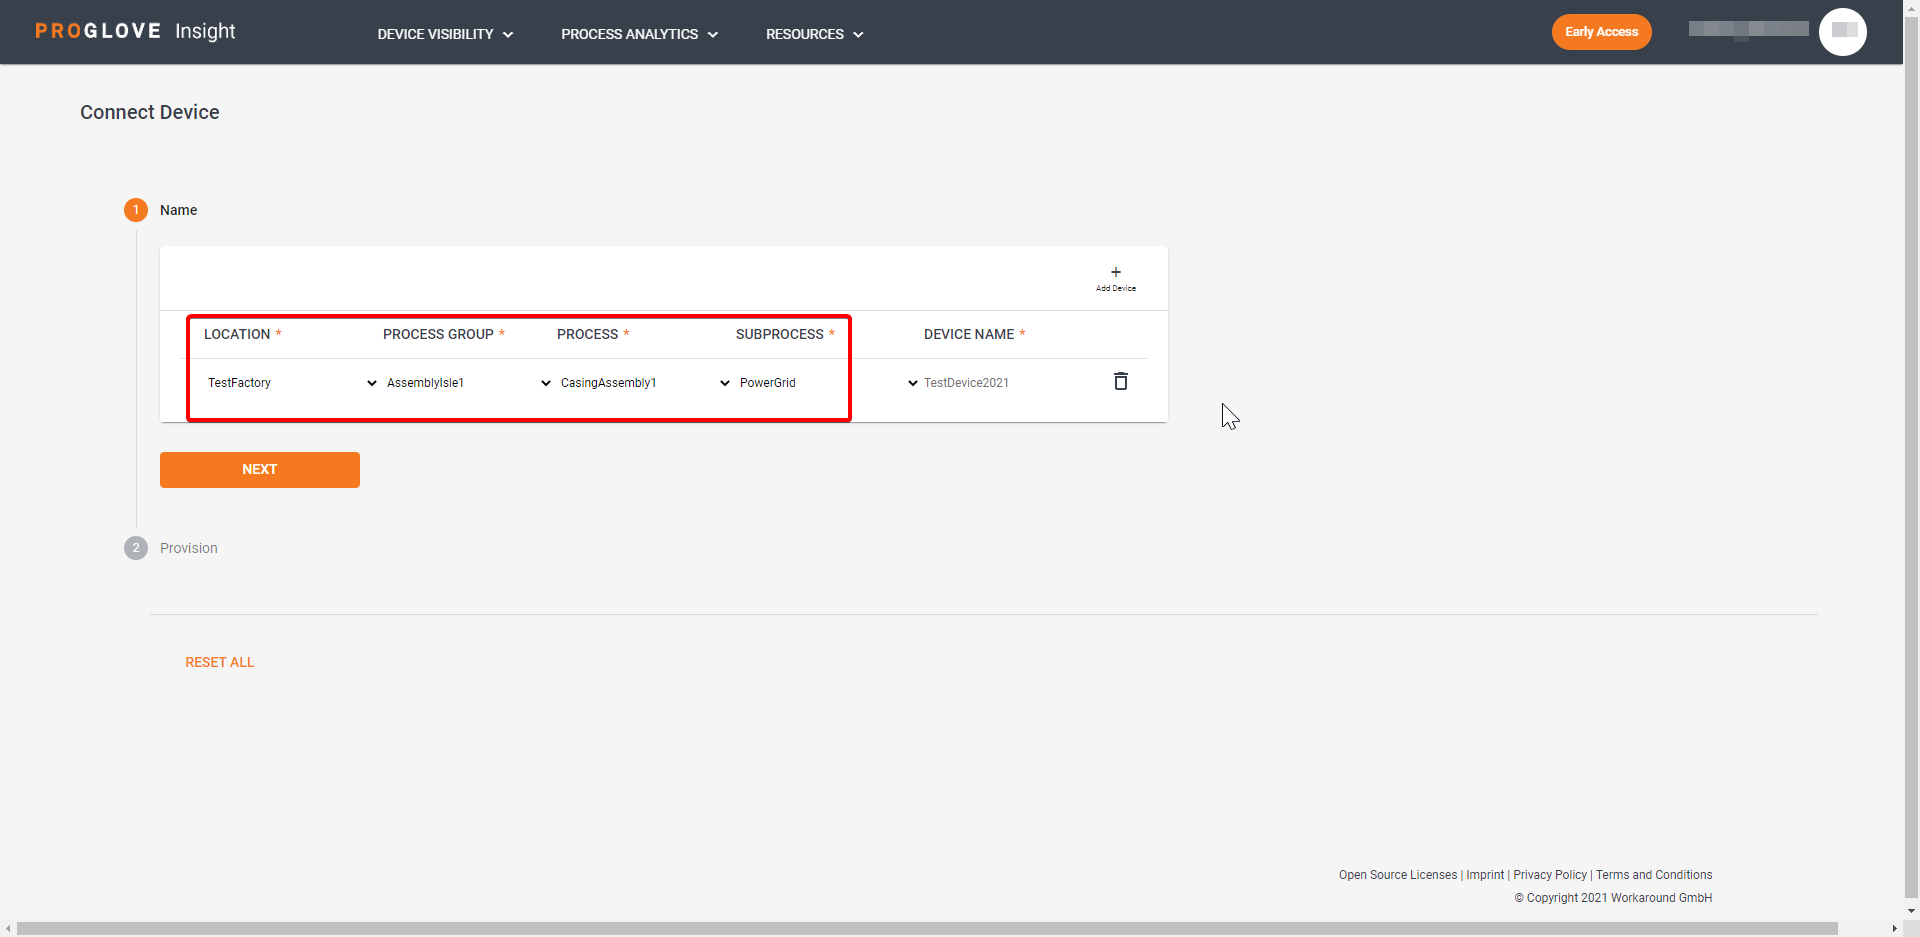
The Create Connectivity Devices section displays the defined Process Layout hierarchy.
Note
If you are connecting a device without defining the full hierarchy, leave the fields to select lower hierarchical levels empty and proceed to the next step immediately.
Enter the Device Name and click Create Device.
The Provision slide panel displays a QR code.
Open Insight Mobile on your Android device and switch to Supervisor View.
Tap Insight Registration.
Tap SCAN QR-CODE.
Scan the QR code on your desktop screen with your Android device and click Done.
Insight Mobile registers the Android device on Insight Webportal. The Android device shows in the Connectivity Devices list.
Connect an Android device manually
You can also connect your Android device by downloading the provisioning file from Insight Webportal.
On Insight Webportal, under Device Visibility, select Devices.
After you have created your Process hierarchy in the Process Layout panel, click on the Connect Devices button that appears in the center section or click on the three dots next to the desired level and select + Connect Devices.

A Select a Connectivity Device window displays.
Note
Setting up your Process Layout with at least one location is mandatory before connecting devices.
Set it up according to your organisational structure also including the lower levels. Like this, it will be easier in the future to manage your devices.
Select Insight Mobile (Android) and Device-based provisioning., then click Next.
The Create Connectivity Devices section displays the defined Process Layout hierarchy.
Enter the Device Name and click Create Device.
The Provision slide panel displays a QR code and additional options.
Click Download.
The provisioned .zip file downloads.
Click Done.
Extract the .zip file and upload the provisioning file to the /sdcard/Android/data/de.proglove.connect/files/ folder on your Android device.
Download the provisioning file from the list
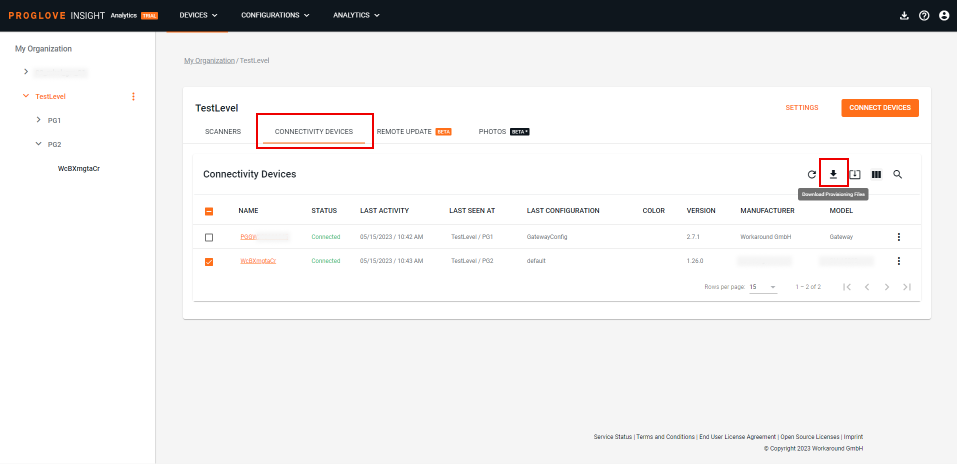
If you click Done before downloading the provisioning file, you can still download the provisioning file by selecting your device from the Connectivity Device List and clicking the Download button.
If you select multiple devices with the checkbox in the list, the downloaded .zip file will contain a provisioning file for every device selected. Continue with the steps in Distributing to finish connecting your devices to Insight Webportal.
.
Connect multiple Android devices
Multiple devices can be connected at the same time by simply adding more rows to the the Create Connectivity Devices dialogue described in Connect Android devices. Download the provisioning package in a .zip file, it contains individual certificates for each device.
Then push the provisioning package carrying the necessary certificates for each device using your MDM software solution as described below.
Prerequisite: Process Layout hierarchy is defined.
Distributing
The .zip file contains individual certificates for every Android device, with the unique Android device ID in the certificate's name.
When you upload the provisioned files back into your MDM software, you can push them to their corresponding device in your Android device fleet.
The provisioned files need to be sent to the following path of all Android devices: /sdcard/Android/data/de.proglove.connect/files/.
All your Android devices can now connect to the Insight Webportal platform.
Note
Certificates are specific to a single Android device. Pushing the same certificate to multiple Android devices will not work.
Connection status
There are five connection statuses:
Not Registered - The Connectivity Device has been created using Insight Webportal or Insight API but the Registration File has not been downloaded/retrieved or could not be created.
Registering - The Connectivity Device has been created using Insight Webportal or Insight API, and the Registration File has been downloaded.
Inactive - The Connectivity Device has not been sending any messages for the last two hours.
Active - The Connectivity Device has sent a message within the last two hours.
Unknown - The Connectivity Device is in a undefined connection state
Verify connection status
There are three ways to make sure your Android device is connected to Insight Webportal:
In Insight Mobile:
Connect your scanner.
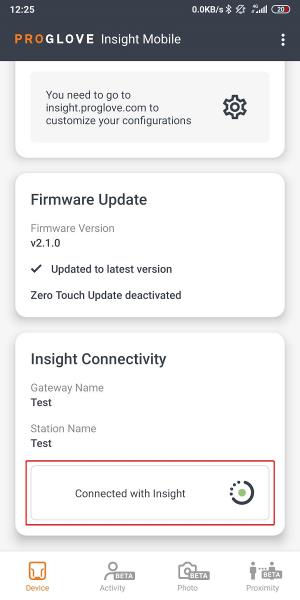
On the Device homepage, scroll down to Insight Registration.
At the bottom of Insight Registration, the Connection Status displays.
On Insight Webportal:
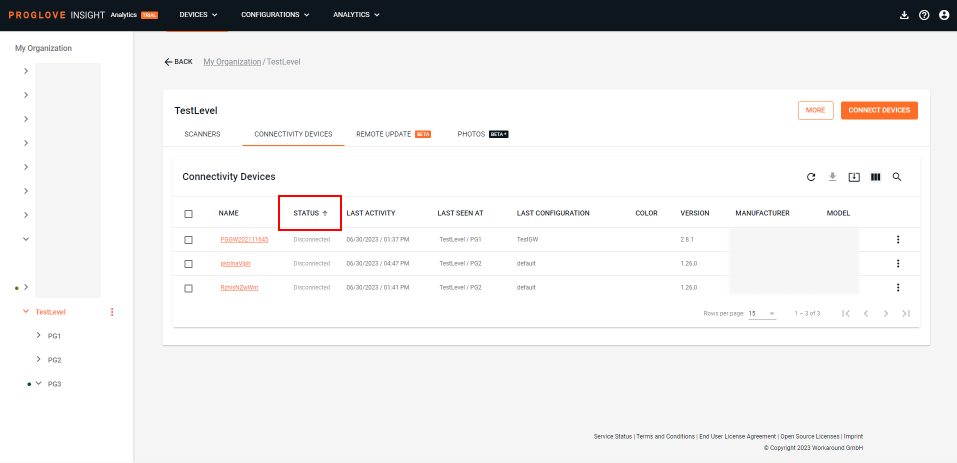
Under Device Visibility, select Devices.
The Connectivity Device List displays.
If registered, your device’s status displays in the Status column.
On Insight Webportal:
Connect your scanner to Insight Mobile.
Scan a barcode.
Open Insight Webportal.
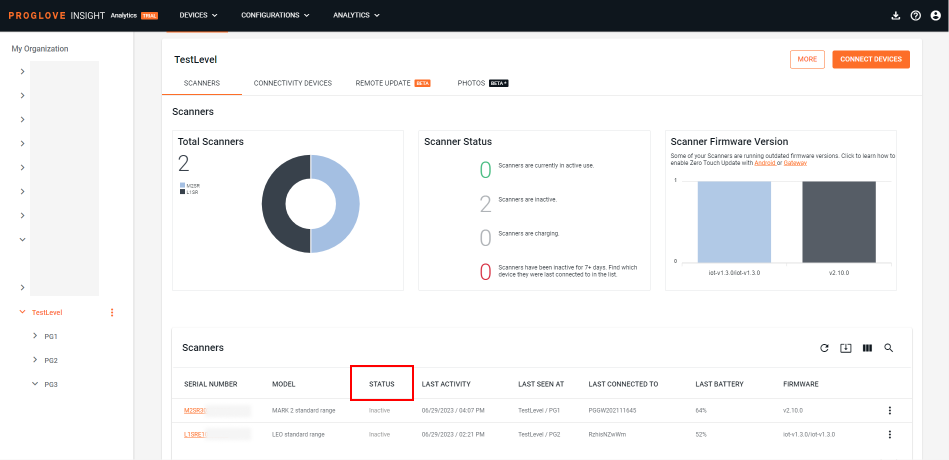
Under Device Visibility, select Devices.
The connected Scanners list displays.
If connected properly, your scanner’s status displays in the Status column.
Live Data
Use the Process Analytics section of Insight Webportal to view live scan data, and the Device Visibility section to track information on connected devices.
Note
Make sure that your device’s network connectivity is stable when trying to register it on Insight Webportal, or when sending data after the registration.