Connectivity Settings
When creating a configuration, the Connectivity Settings section allows you to select your preferred way of integrating Gateway with your system as well as configure several Gateway connectivity options.
Host platform
This drop-down allows you to select what your device's Current Host platform, i.e. operating system, is: Windows or Linux.
Scanner connectivity
The Scanner connectivity drop-down allows you to set the maximum number of scanners you can connect to one Gateway (5 or lower).
BLE Custom Channel
Any MARK connected to a Gateway with a custom channel configuration defined in the configuration file, will use the specified channels when communicating with this Connectivity Device.
The dropdown shows the available data channels and their frequencies (in MHz). In order to comply with the Bluetooth specification the 3 advertisement channels 37,38,39 cannot be deactivated by Design. A minimum of 2 data channels need to be selected from the list but It is recommended to use at least 7 channels for reliable communication between MARK and Gateway.
Note
Please note that the following custom channel configuration sets are tested and compliant according to Radio and EMC related standards.
10,22,34-36
10,22-27
9,10,21,27,28
0,20,36
1,18,36
2,6
5,20,35
16,30
17,18,19
30,32
0-36
Mass Storage Mode
The Mass Storage Mode section offers two mass storage behaviors:
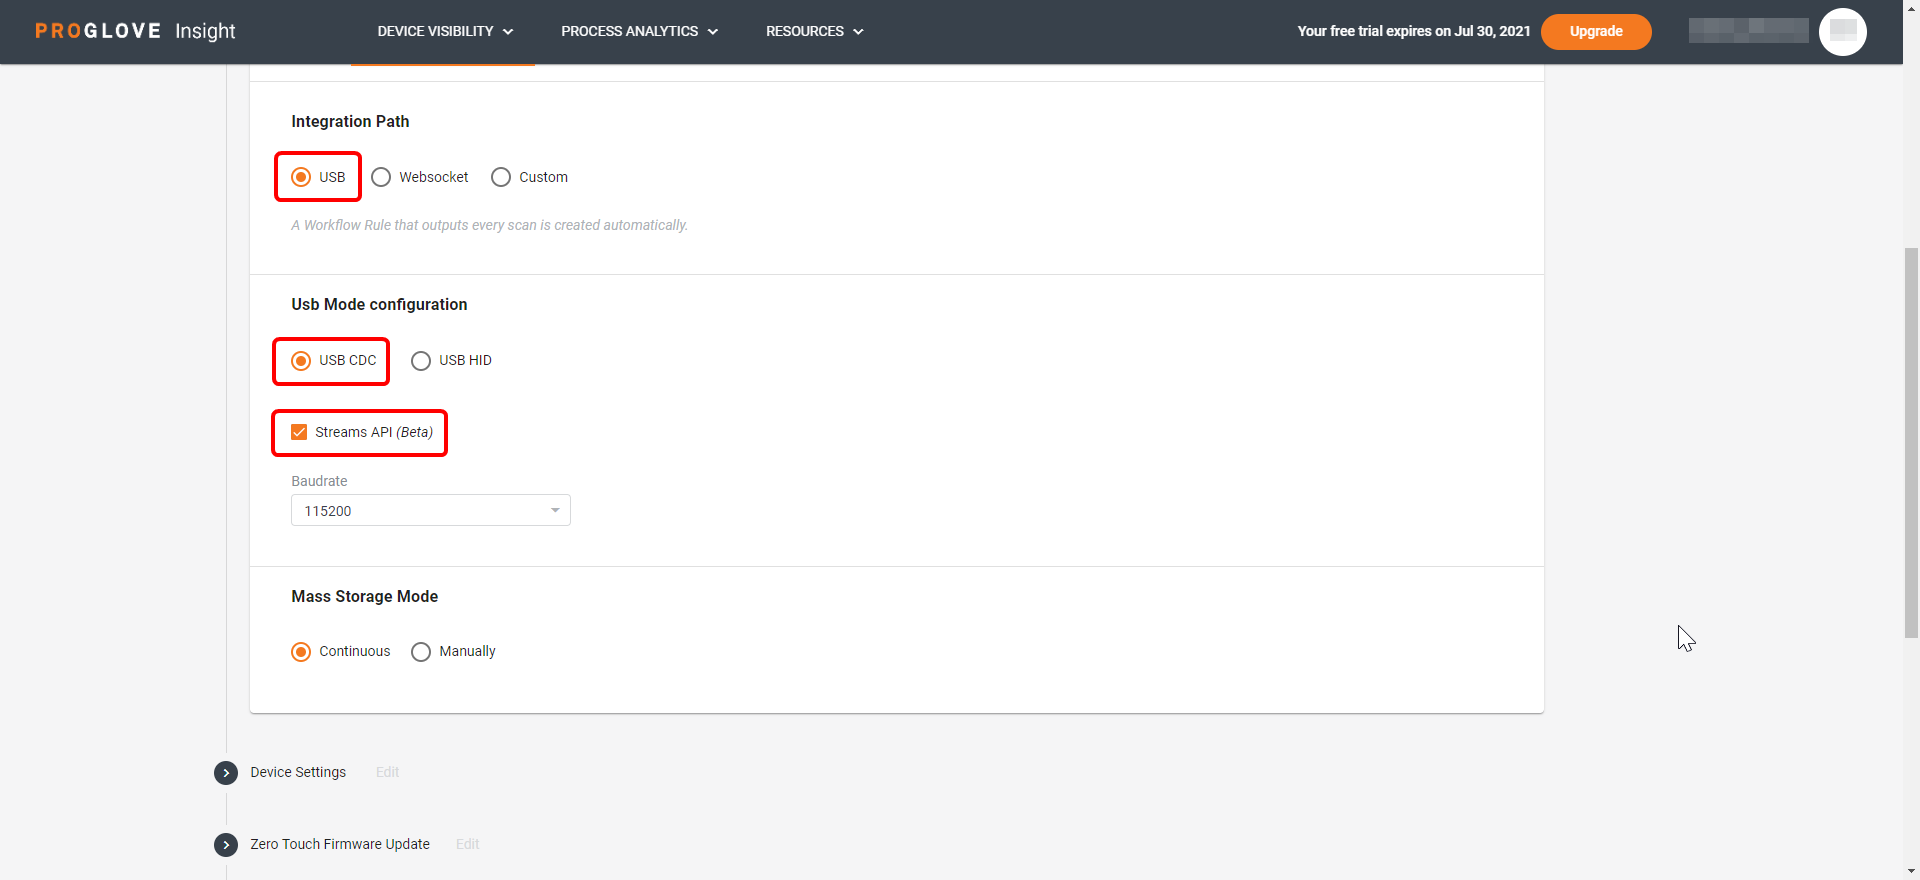
Continuous - every time a Gateway is reconnected to a desktop it automatically displays as a Mass storage device
Manually - every time a Gateway is reconnected to a desktop, it needs to be enabled as a Mass storage device manually.
Note
To enable Gateway as Mass storage device manually, connect a scanner to the Gateway and scan the barcode below:

Integration Path
The Integration Path section allows you to select how the Gateway will communicate with your system and transfer the barcode content scanner by the connected scanners.
USB HID
The USB HID option allows you to transfer the barcode content as keyboard input to the connected host.
To select this path, select USB under Integration Path and USB HID under USB Mode Configuration.
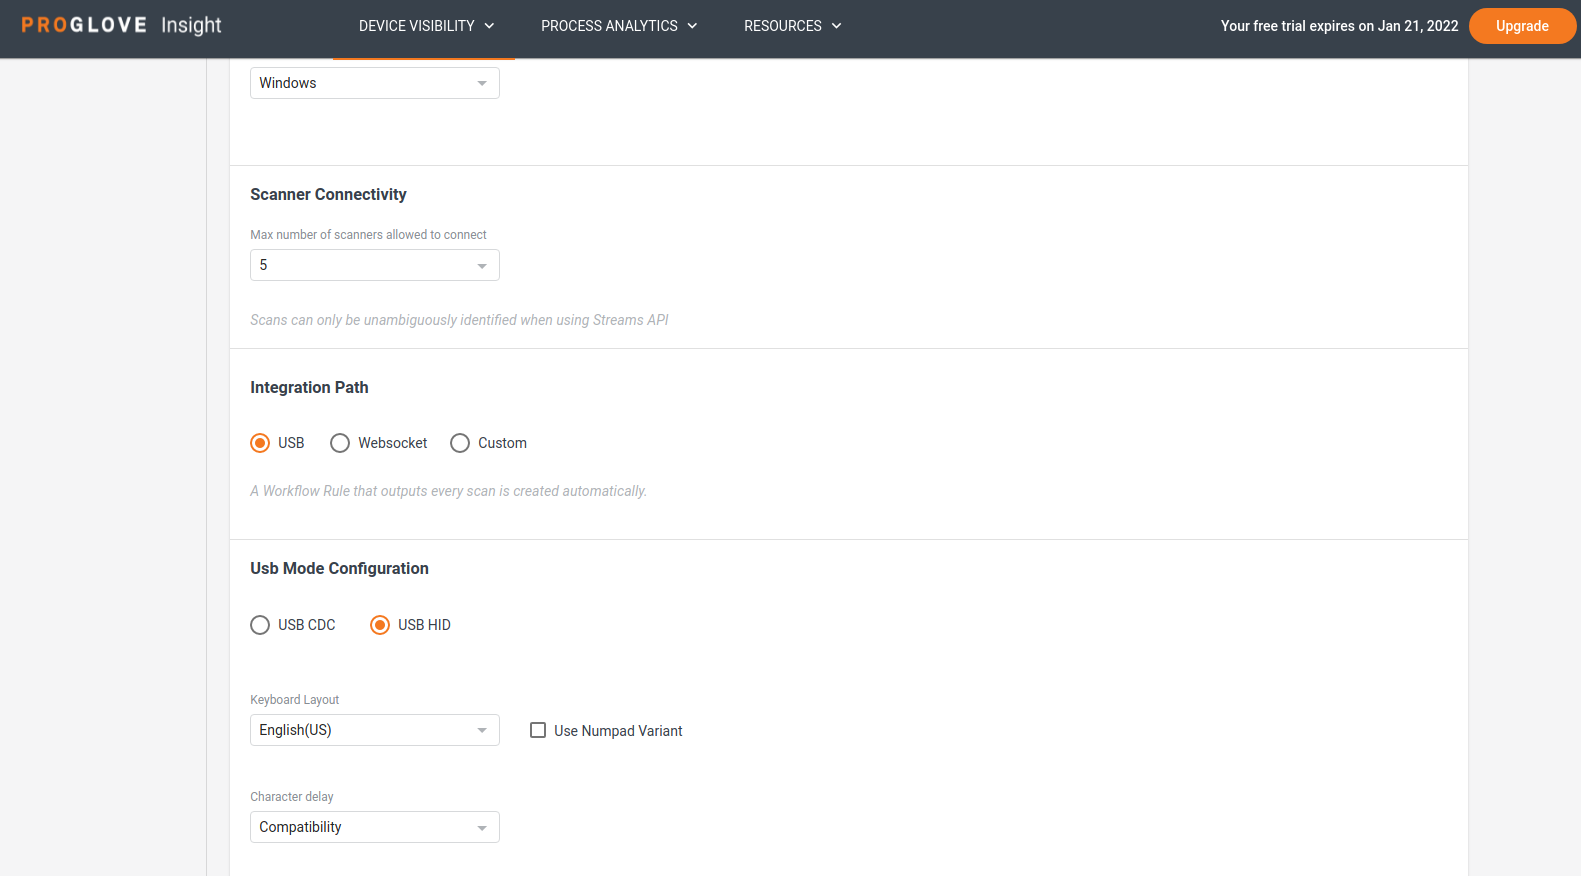
For the USB HID integration path you can select:
Keyboard Layout - default language keyboard layout (e.g. English, German, Finnish, Czech, etc.)
Character Delay - Fast, Medium, or Compatibility mode (when sending data, some apps need longer to input characters)
Numpad Variant - The numeric keypad is used for entering numbers
USB CDC
The USB CDC option allows you to transfer the barcode content through a virtual communication port (input as a string).
For this integration path you can select:
Baudrate - rate at which information is transferred in a communication channel
Streams API - select this option to enable communication using our Streams API, a two-way, message-based .JSON protocol based on the USB CDC integration path
WebSocket
The WebSocket option allows you to transfer the barcode content using WebSockets by automatically creating an output Action in the Workflow Rules.
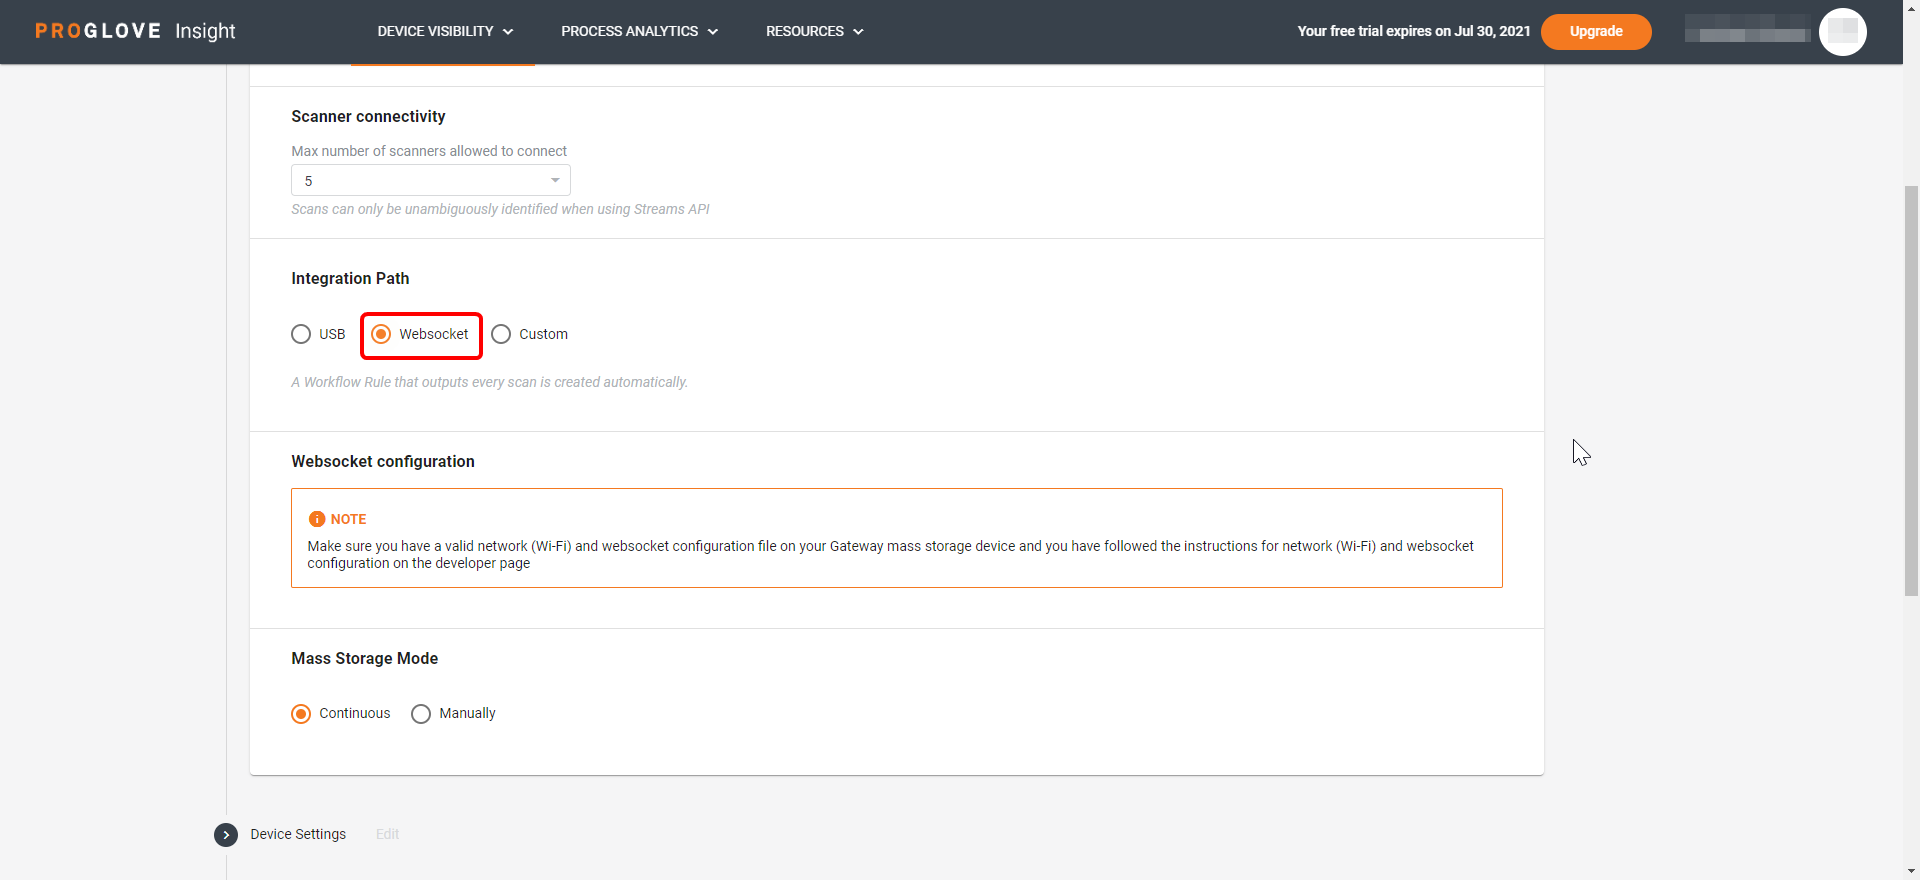
Important
The WebSocket integration path requires you to provision the Gateway with Wi-Fi network credentials and the WebSocket configuration file. To learn more, see WebSocket configuration.
Custom
The Custom option allows you to select one of the above integration paths as a way of sending barcode data and customize the output behavior by creating specific Workflow Rules.
Warning
When selecting the Custom integration path, if you do not define the output behavior manually in the Workflow Rules (i.e. Action), the barcode content will not be sent.
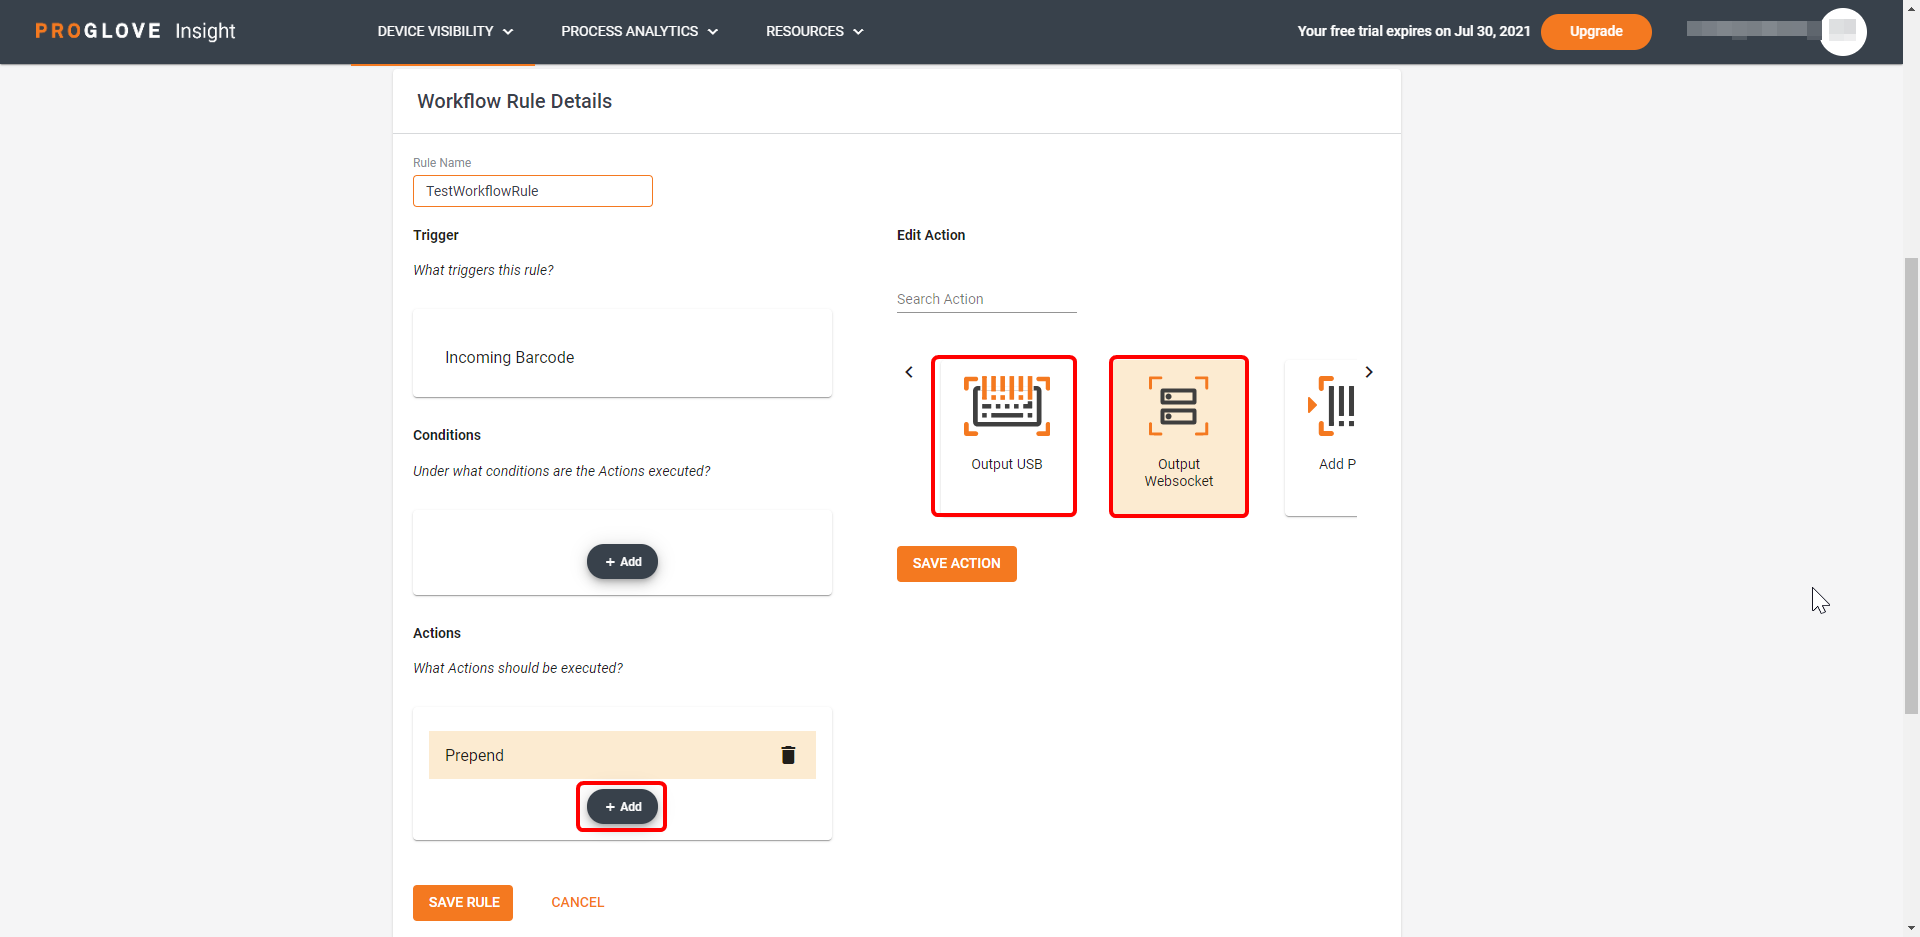
Although the main purpose of the Custom integration path is to customize what happens to the output barcode content, you can also enable sending data over both USB and WebSocket.
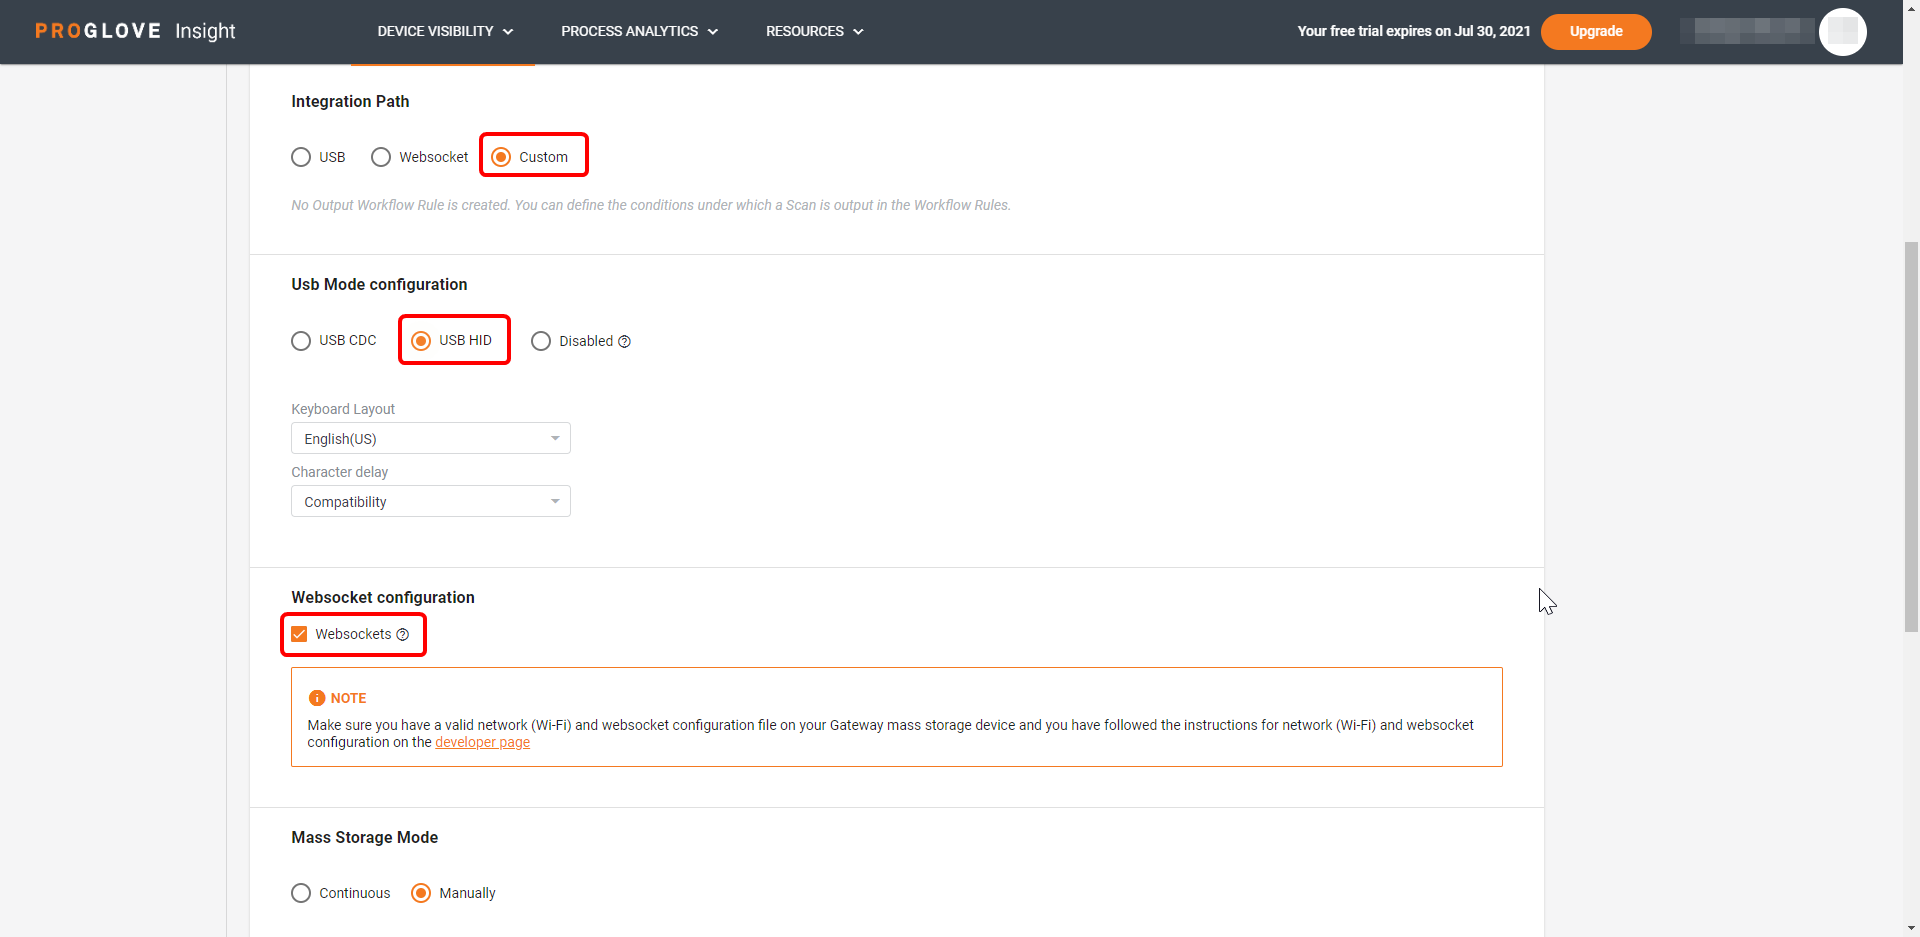
In this case, you must define a Workflow Rule for both outputs - Output USB and Output WebSocket.
Note
If the Gateway is connected via USB to a power source but not a host system, you must select Disabled under USB Mode configuration and select WebSocket under WebSocket configuration. If you leave one of the USB options enabled, the Gateway will keep trying to send data using that output and will not work.