Create a configuration file
On Insight Webportal, under Device Visibility, select Configurations.
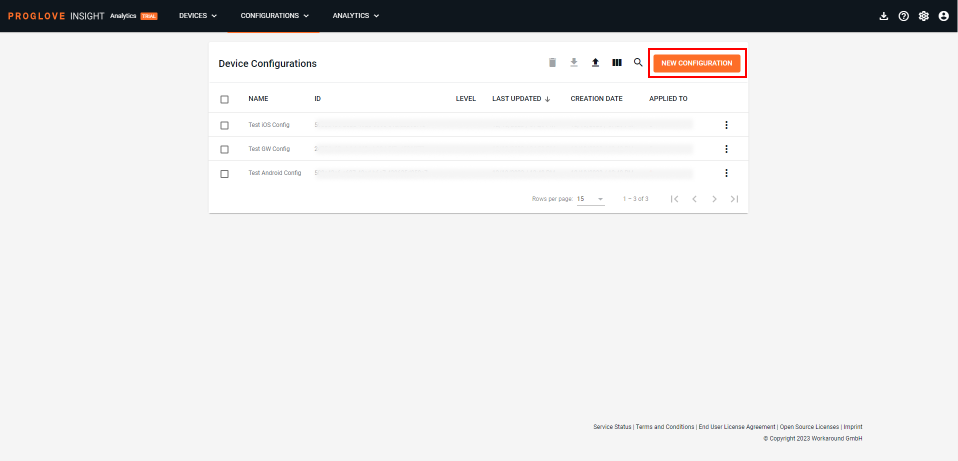
At the top right, click the New Configuration icon to add a configuration.
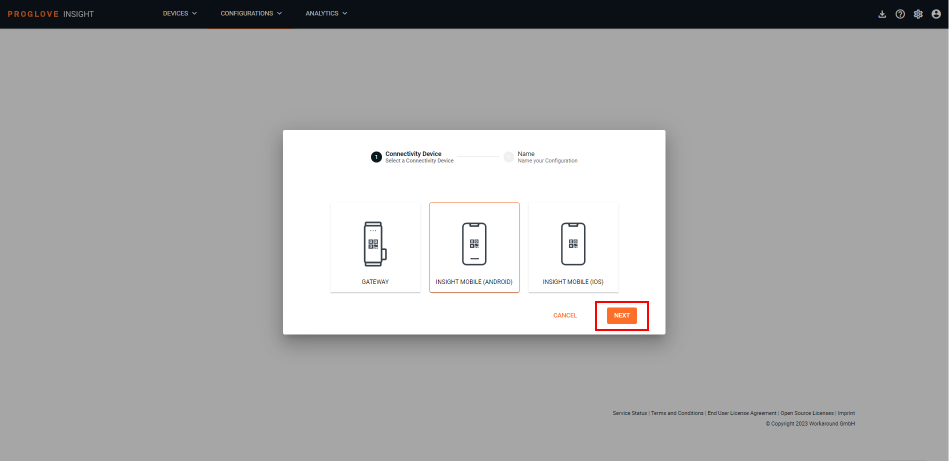
Select the device you want to connect to ProGlove Insight webportal and select Next.
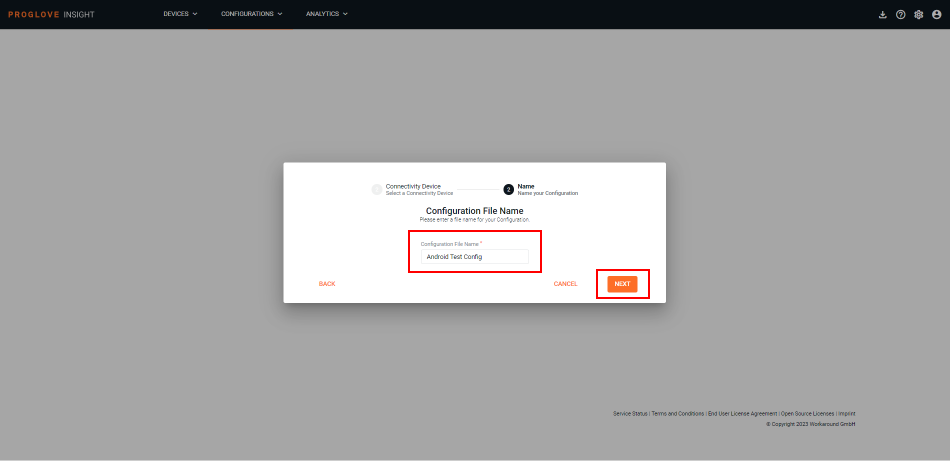
Type in a unique name for your configuration and click Next.
You can change the defined name at any time within the General configurations settings found right next to the configuration name in the upper-left corner of the screen. General configuration settings apply to all profiles within a configuration. This is also where you can disable any future configurations or staging settings from being applied to your devices via a QR code.
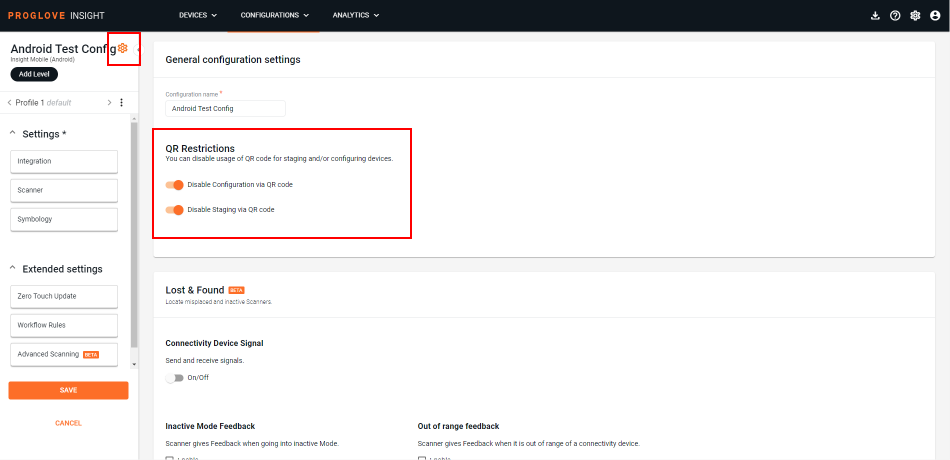
Define your settings using the Integration, Scanner and Symbology tabs in the left menu. You can also use the Zero-touch Update feature to update your scanners as soon as they are connected, as well as create your own Workflow rules.
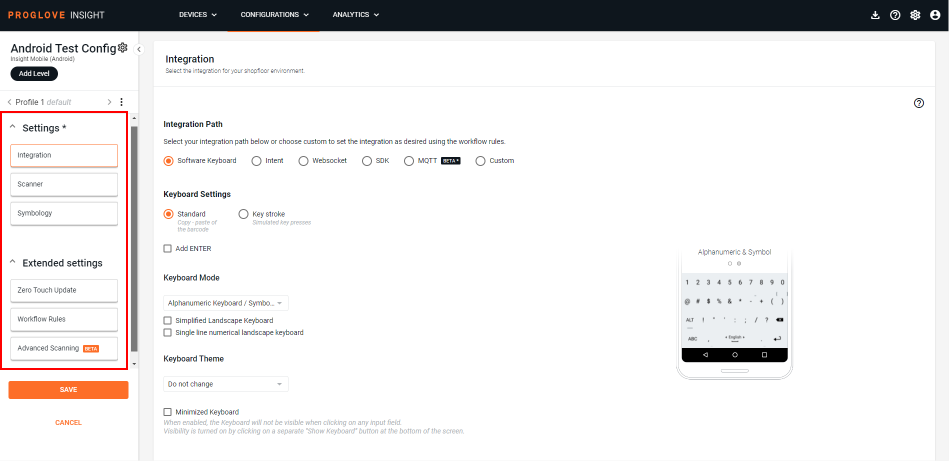
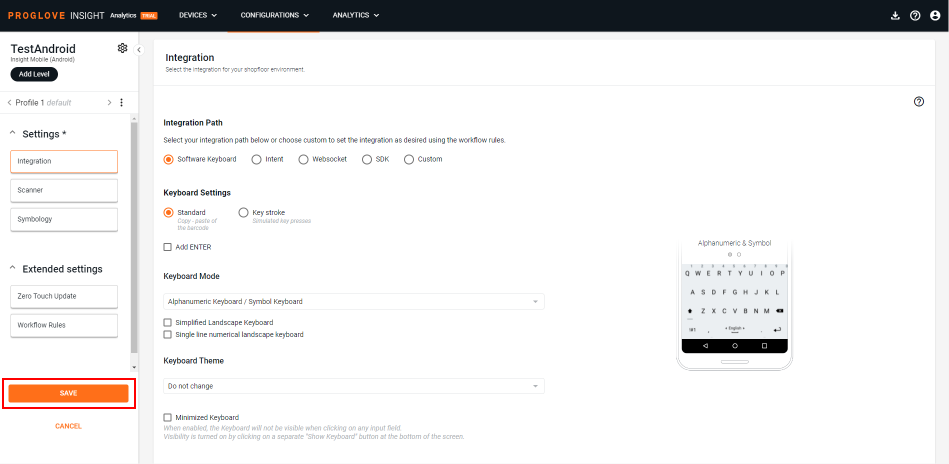
At the bottom of the left navigation pane, click Save configuration.
The modal Apply configuration window displays.
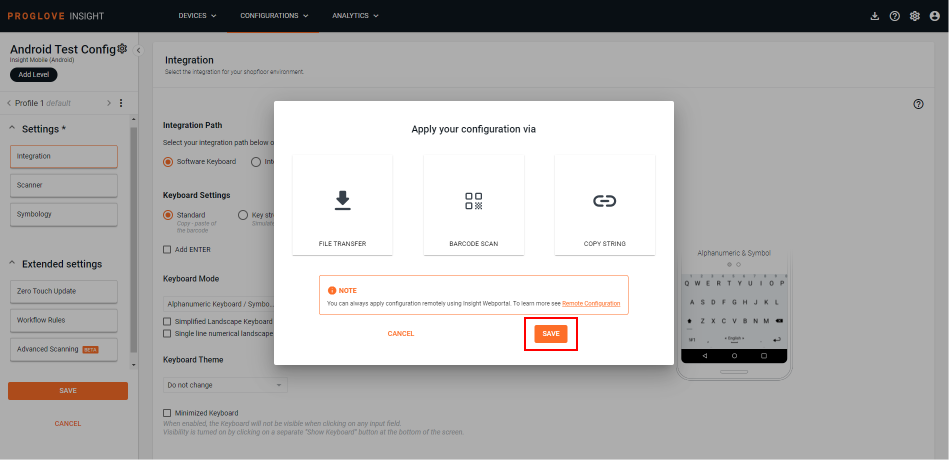
To apply the configuration to the connected device, select Barcode scan to apply it by simply scanning the configuration barcode or select File transfer to apply it manually.
Click Save.
Your configuration displays in the Configurations list.
Note
If you want to transfer the ProGlove.proconfig file manually to your device or distribute it using an MDM solution, find your configuration on the list and select Apply configuration from the menu. Then select File transfer to download the configuration file.
Note
In the Configurations list, you can select Edit from the menu button right next to your configuration to edit the existing configurations or use Copy to save it as a new configuration.
Important
The
ProGlove.proconfigconfiguration file consists of one default profile and up to 6 custom profiles.The
ProGlove.proconfigconfiguration file is not compatible with the .pgconf file from AutoConfig.The
ProGlove.proconfigconfiguration identifies a profile with a unique profile name (ID).