MAI Feature Demo
Installation and Setup
Download and install the Insight Mobile App - Download
Download and install FeatureDemoApp (minimum version 1.8.0 is required) - Download
Connecting MAI
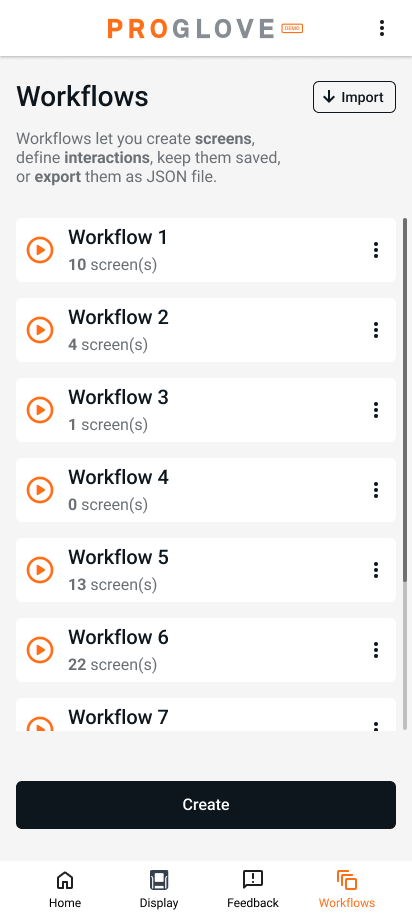
Use the Pairing Barcode to connect your scanner to the app. To learn more about pairing, see the basic and code-levelScan2Pair features. Under the Workflows tab, you can:
Create new workflows.
Open previously saved workflows.
Import/Export workflows.
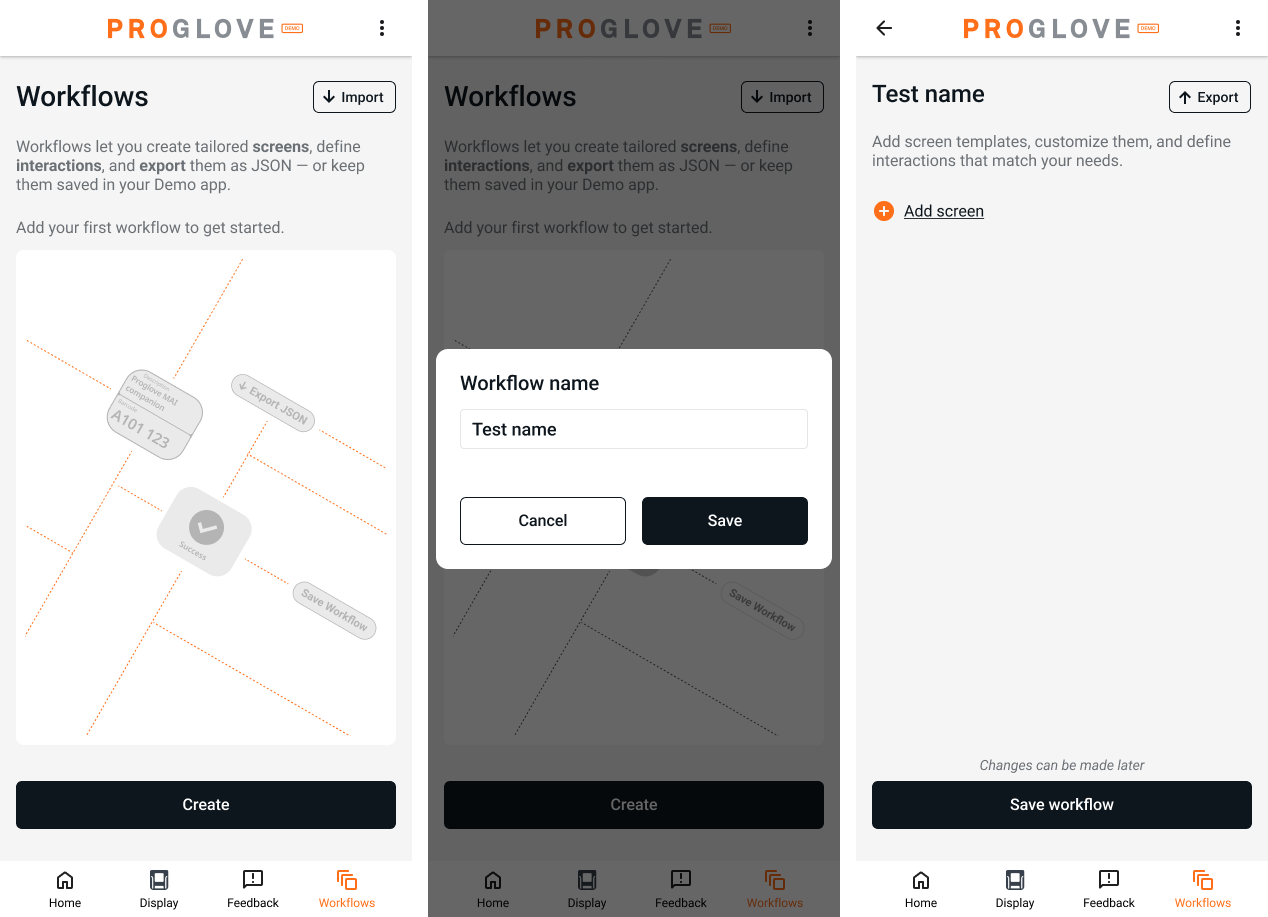
Creating a Workflow Folder
In the workflow tab press the Create button and enter the name of the folder where your workflow will be saved. Once the folder is created you can add multiple screens by pressing the Add screen button and naming your screen.
Filling in Workflows
You can select the Template Category, Forced Orientation, Pages(no. of pages), Initially active page.
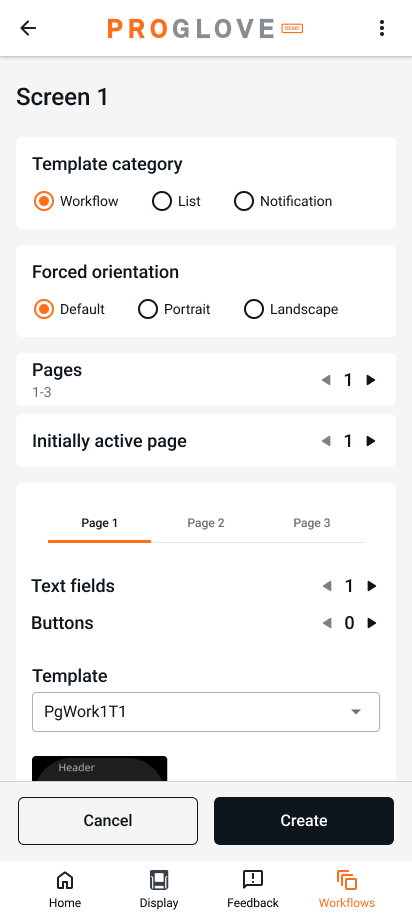
The text fields filter templates by the number of data points to be entered on the page.
Notice
If you select 2 text fields, then only templates supporting 2 data points would be available in the drop-down menu
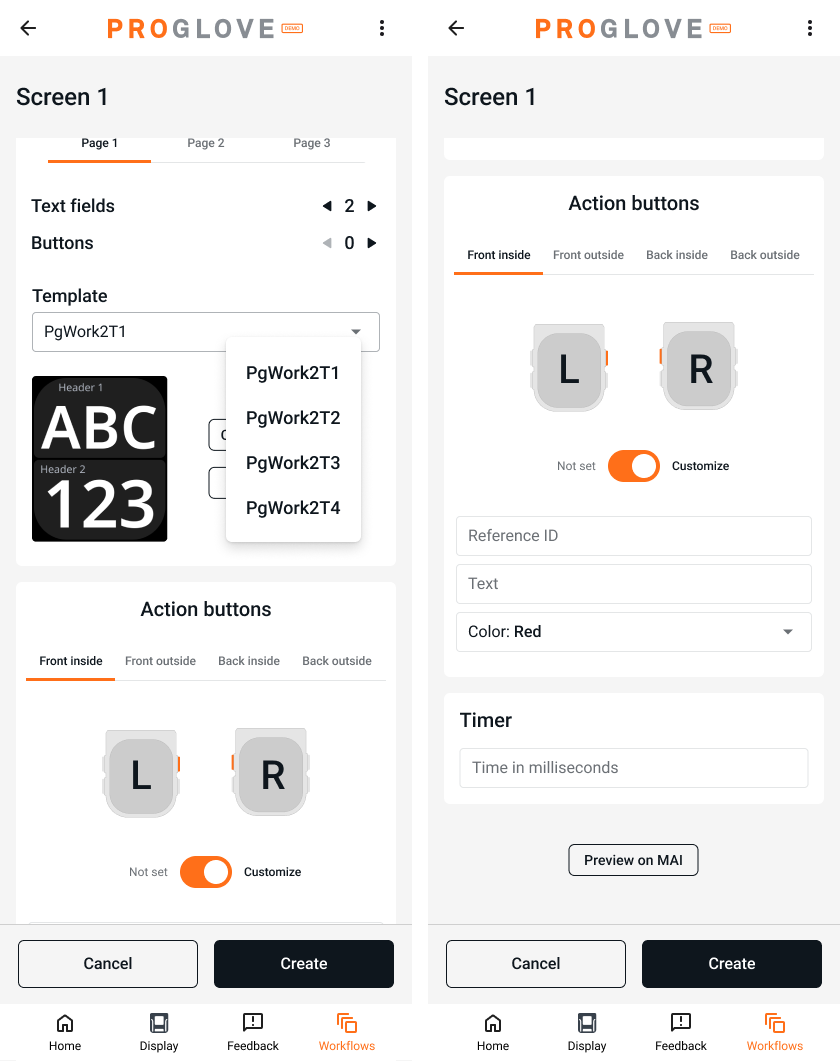
Customization of buttons is also available. You can configure button positions and behavior according to your requirements.
At the bottom of the screen, you will find the Preview on MAI button. This allows you to see how the workflow will appear on MAI before creating it.
Customize template fields
In this tab, you can define the page title and the information to be displayed.
You can fill in the Header, Content and Reference ID according to the no. of data points selected earlier. The Reference ID is optional.
Tip
Entering the Reference ID, will help you navigate to this screen when needed.
Field State
You can also define the field state, such as displaying a small icon (success, error, warning, focus) or highlighting the value. In the example shown, the small icons for success and warning are visible.
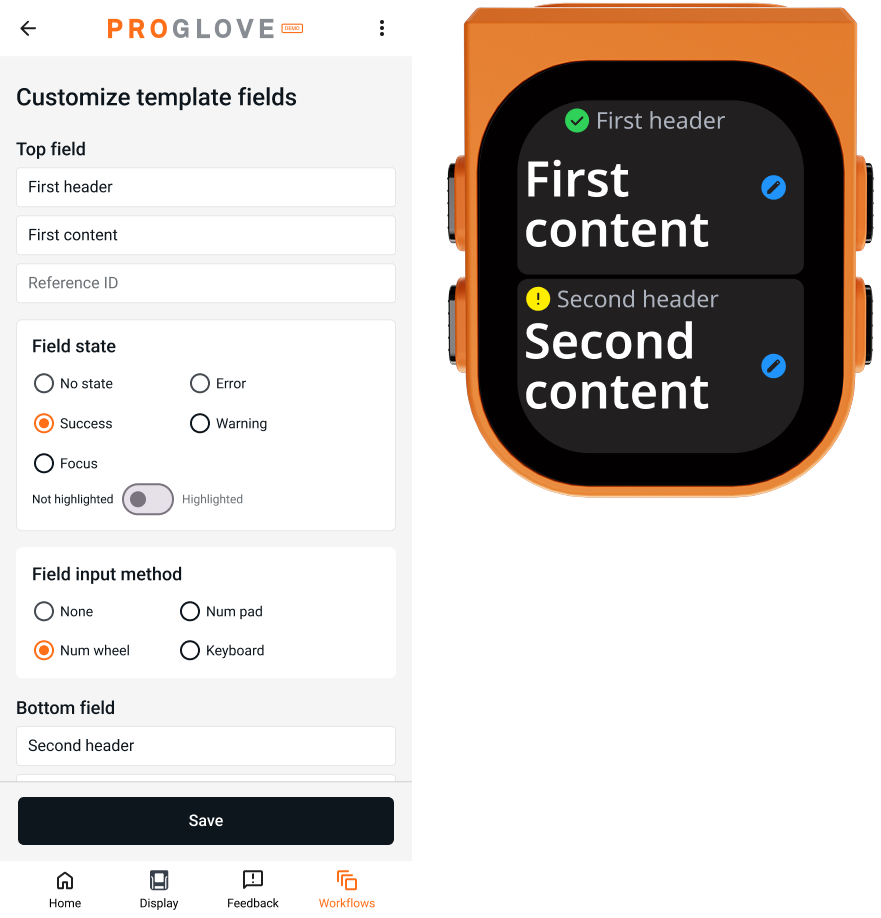
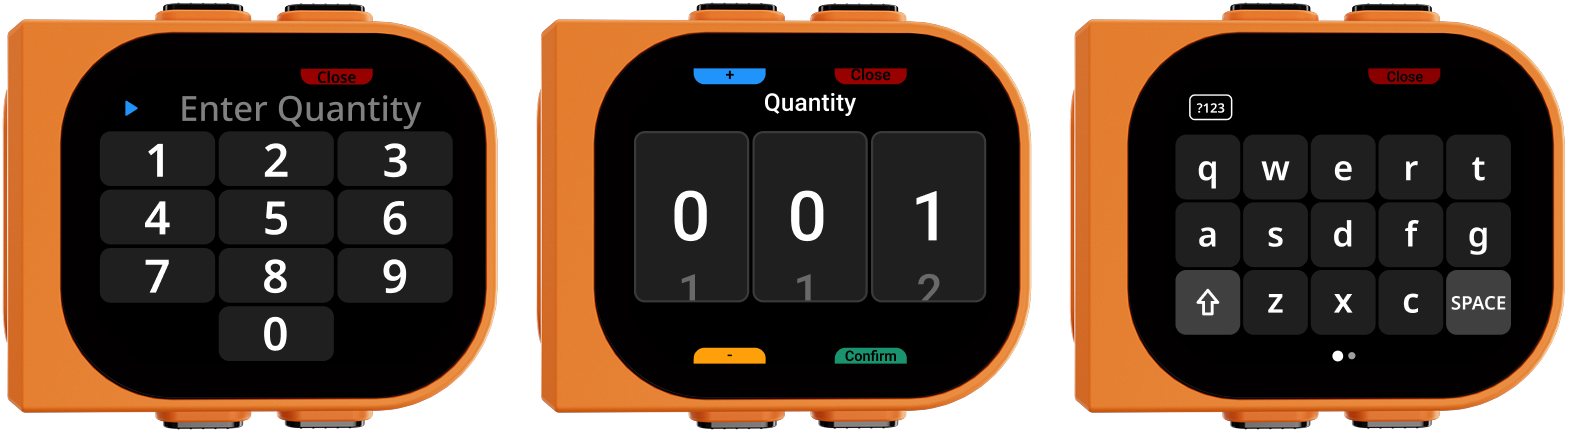
Field Input Method
You can also select the field input if you want. Currently the following input methods are supported:
Num wheel.
Num pad.
Keyboard (QWERTY, QWERTZ, AZERTY, ABC)
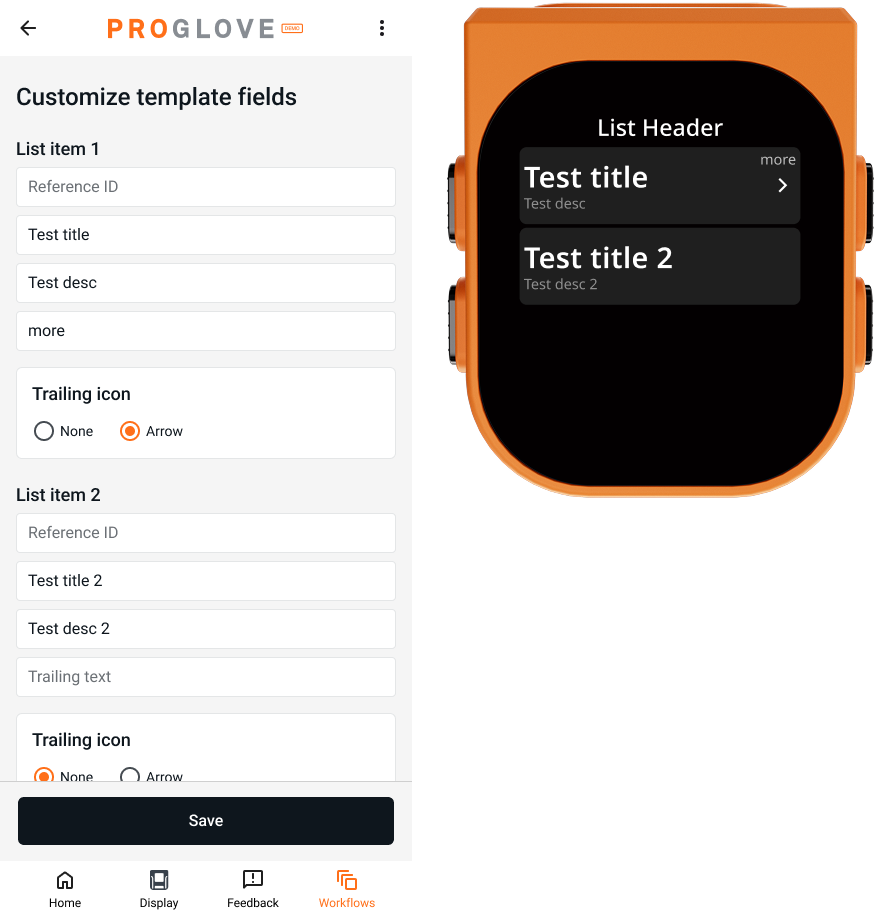
Creating Lists
For list creation, you can define the Reference ID, Title, Description, and Trailing Text, and select whether a trailing icon should be displayed.
Tip
The example shown includes one item with a trailing icon (first row) and one without a trailing icon (second row). Additional details on List templates are mentioned here https://docs.proglove.com/en/list-templates.htmlList templates
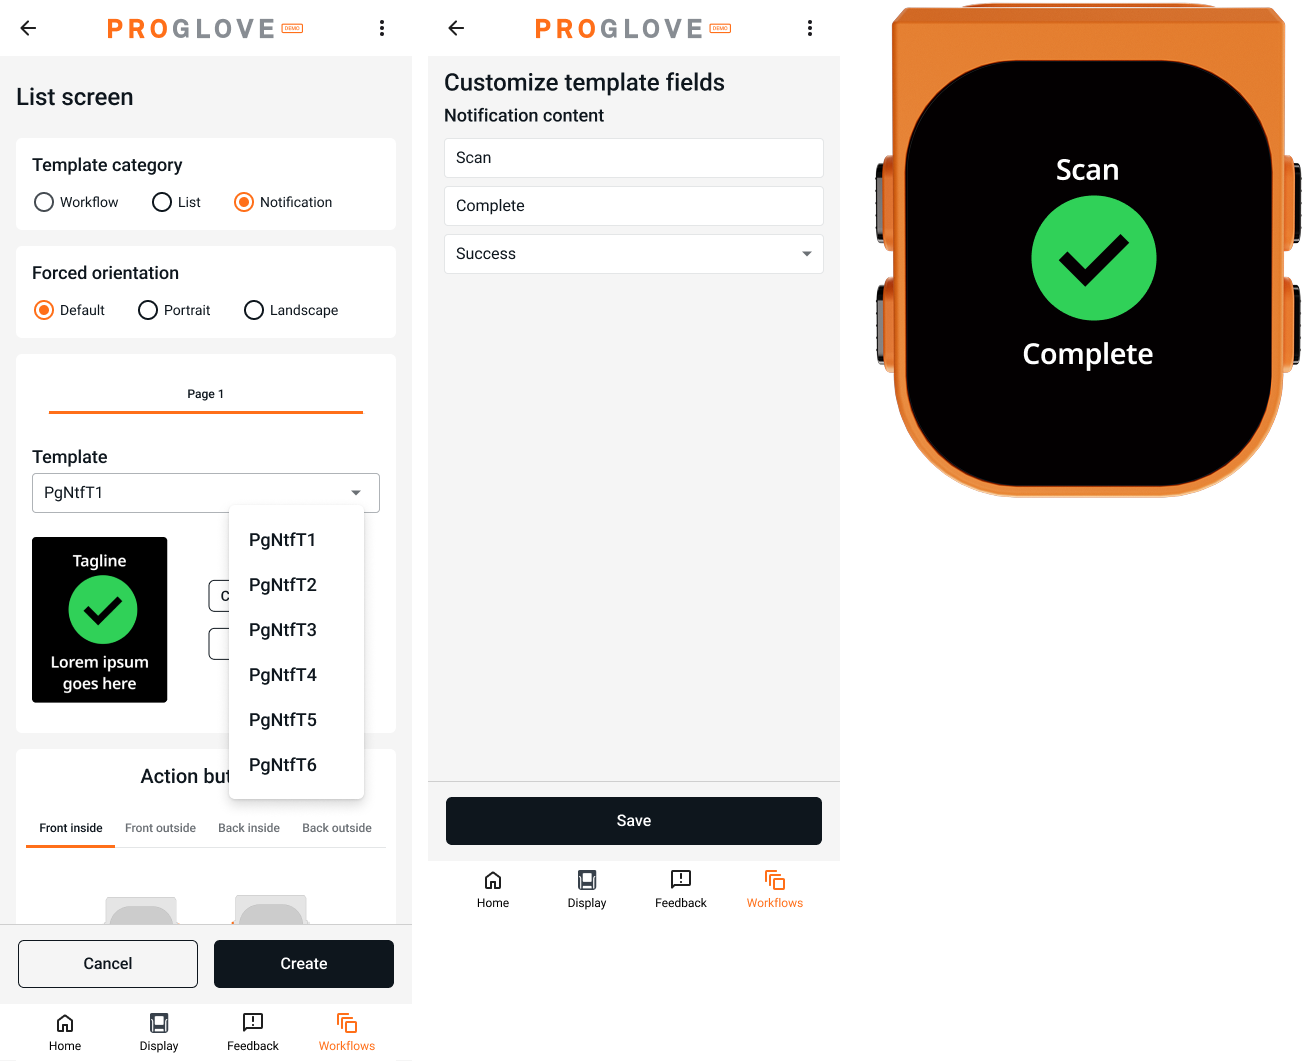
Creating Notifications
Select the Notification template, then define the title and text for the notification screen. You can also select the notification type (e.g., Success, Error, Warning, Info).
Tip
The example shown displays a Success notification on the device.Additional details are mentioned on https://docs.proglove.com/en/notification-templates.htmlNotification templates
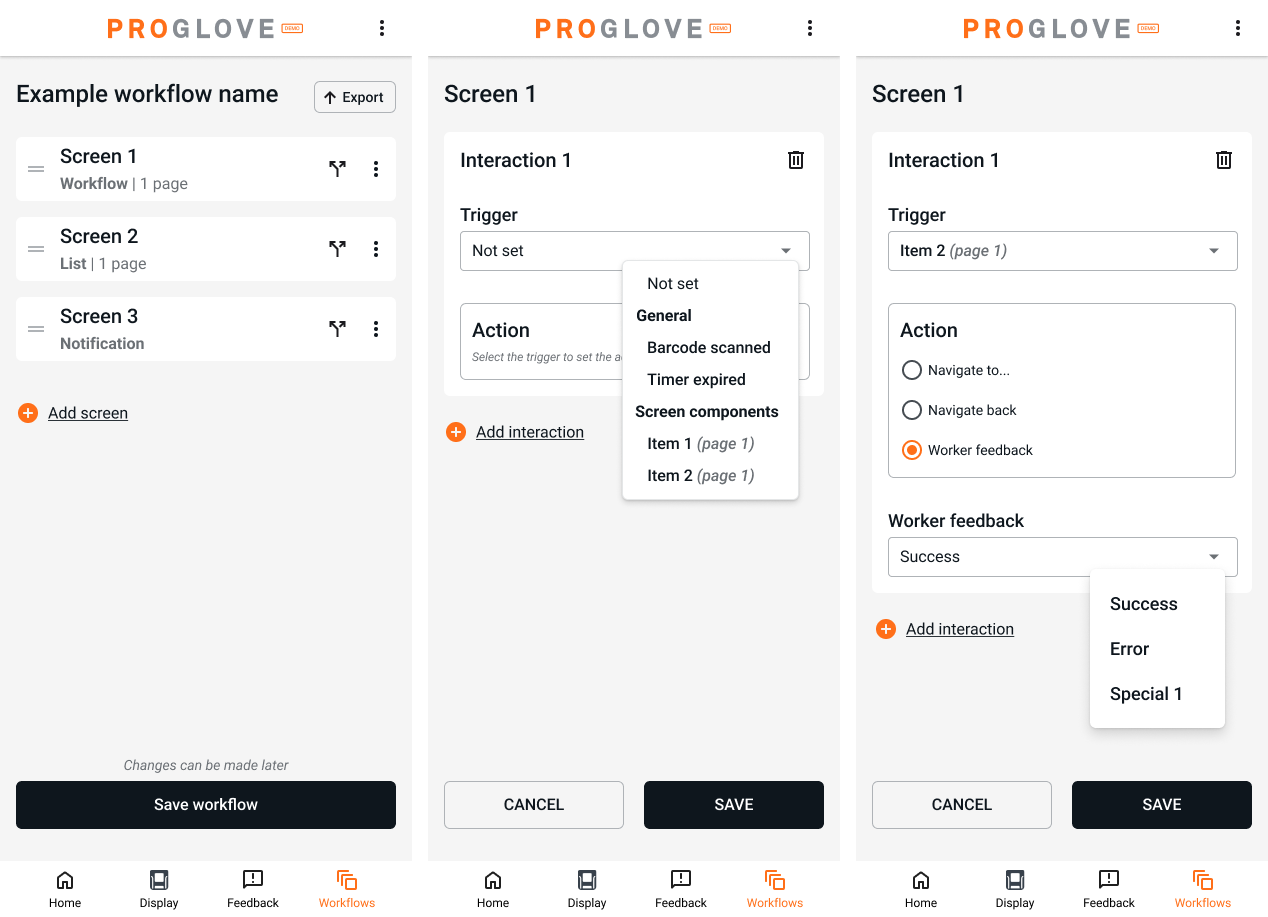
Interactions
Interactions define which screen should be displayed next based on a triggered action.
Add an interaction by selecting the split arrow next to the screen and choose Trigger. After selecting the trigger (from the drop-down menu), define the corresponding Action. If you want to navigate to a specific screen, select the respective Reference ID for that screen.
Starting the Demo
Once all workflows are created, navigate to the Workflows tab. Press the Play button next to the desired workflow to start the demo.