Photo Reporting
Introduction
Photo Reporting enables your workers to document quality issues and important process steps by taking a photo with their scanner, and then to easily share them with the process owner or device manager through INSIGHT as a photo report. You can send multiple photos in a single report using the INSIGHT Mobile (Android) app, or a single image per report when connected to a Gateway, even when using Streams API.
Access, review and manage any photo reports documented on your shop floor in INSIGHT by going to Devices, and then select the Photos tab.
Photo Reporting in INSIGHT
My Organization, as the top level, will be the default view. Select a specific level or sublevel to review the photo reports associated only to that (sub)level and its devices. You will see a default screen in case there are no reports or a grid view with the reports, in case some were already submitted to INSIGHT.
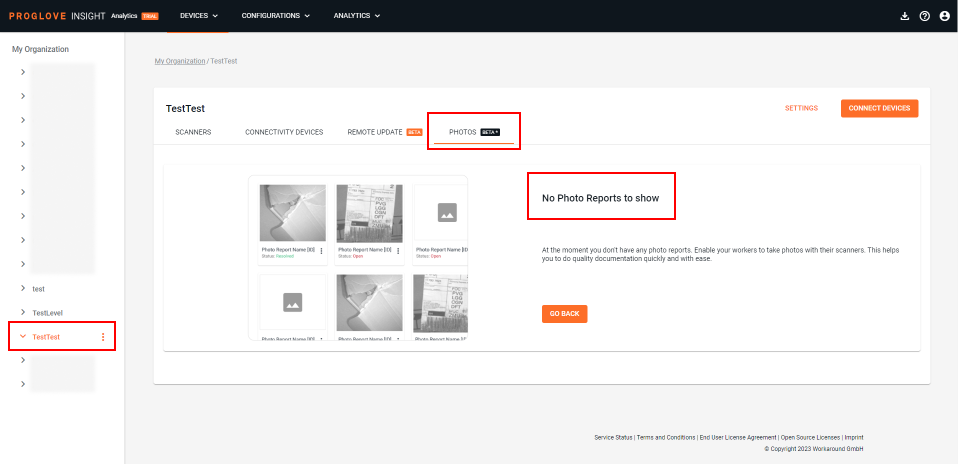
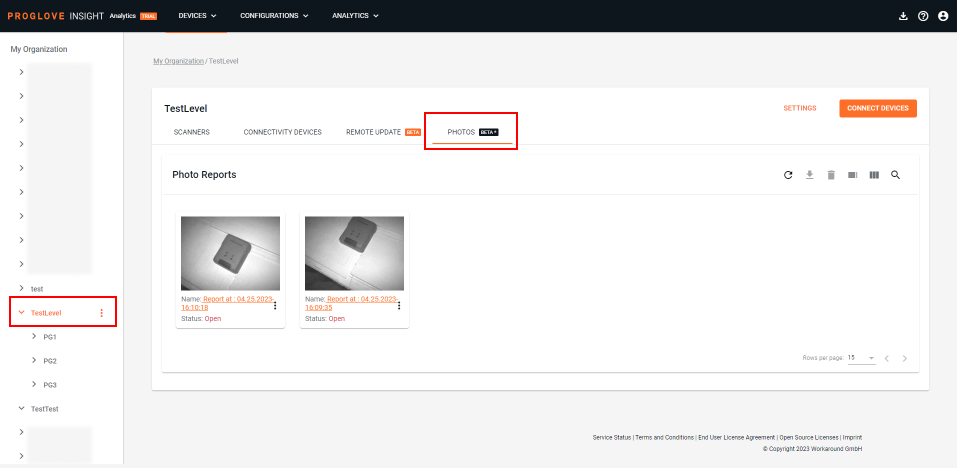
Important
Ensure your ProGlove scanners are using the minimum required firmware versions referencing the table in the bottom of the page. Pair them with your Android and/or Gateway devices and connect to a level in INSIGHT.
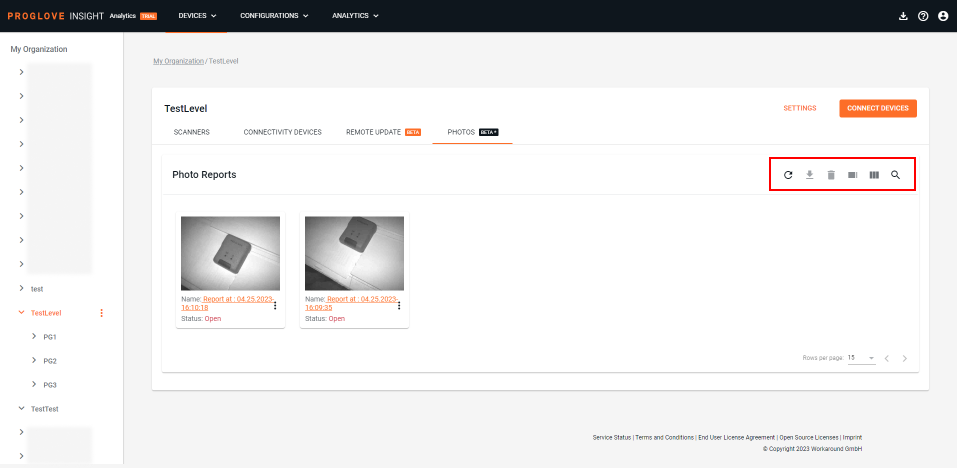
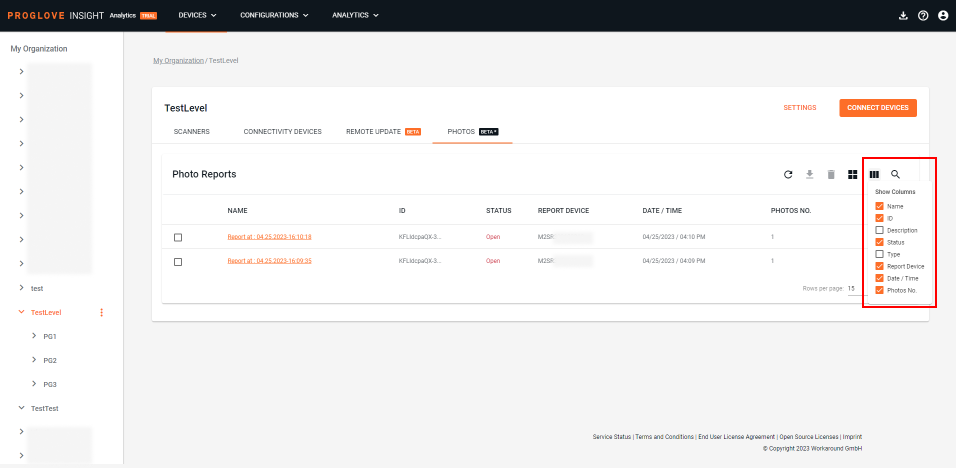
The icons displayed in the top-right corner allow you to refresh the list, download, delete, and filter through your reports by both free text and their status. Additionally, you can switch to a table view for a more detailed display, and then select the columns to view exactly the information you need.
Working with Photo Reports
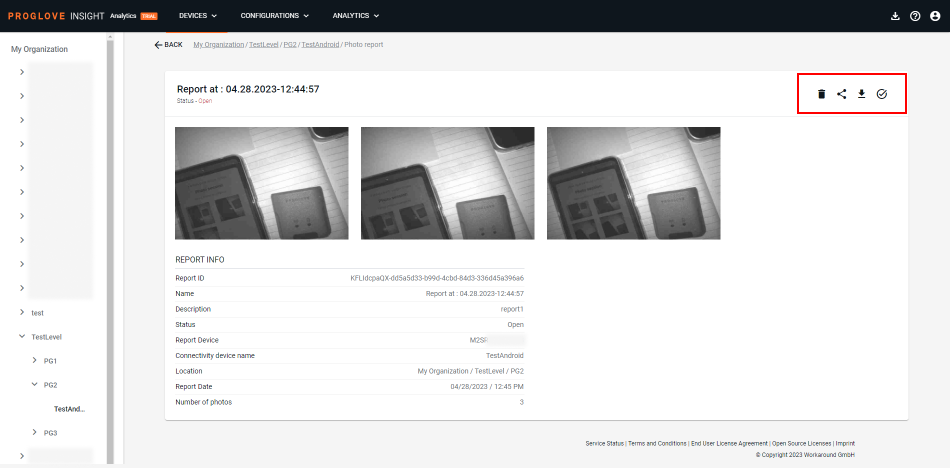
To review the photos and get the full details of your photo report, access the Report info screen either by clicking a specific report in the grid view or clicking the name of a report in the list view. Enlarge the images to full screen by clicking each one. Use the icons in the top-right corner to share the report link with others using the same INSIGHT account. For external sharing, you can download the report as a .pdf file. To finish your review, change the status of your report.
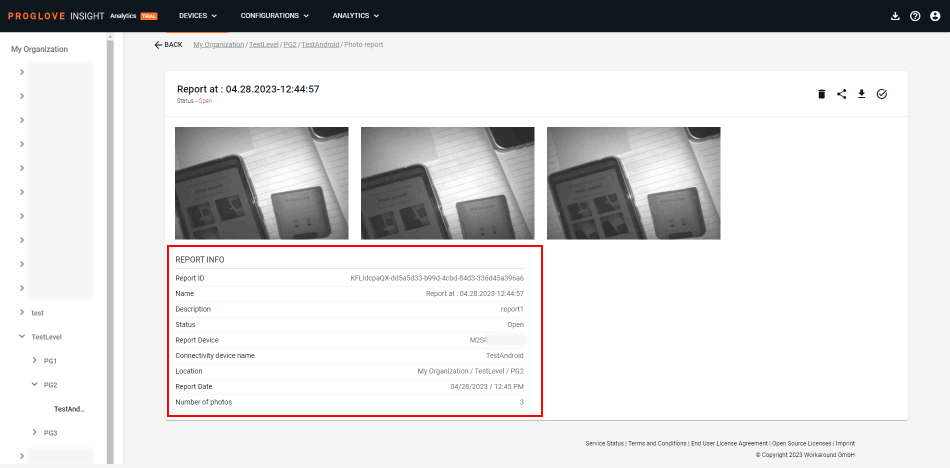
REPORT INFO screen provides the following information:
Report ID - automatically generated, unique, random string assigned to the report
Name - date and time when the report was created (default format: Report at: dd.mm.yyyy-hh:mm:ss)
Description - free text entered during creation of the report (max 240 characters)
Status - Open / Resolved (see: Reviewing Photo Reports)
Report Device - serial number of the scanner that captured the photo
Connectivity Device name - name assigned to the Connectivity Device that forwarded the report to INSIGHT
Location - the full hierarchy path from My Organization showing the exact level in which the photo was captured
Report Date - report date and time in the following format DD/MM/YYYY / HH:MM (AM/PM)
Number of photos - total number of photos contained in this particular report
Reviewing Photo Reports
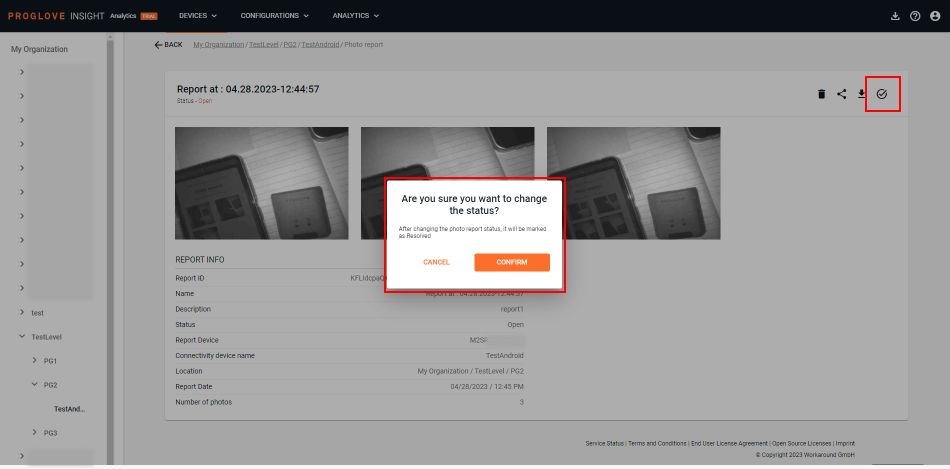
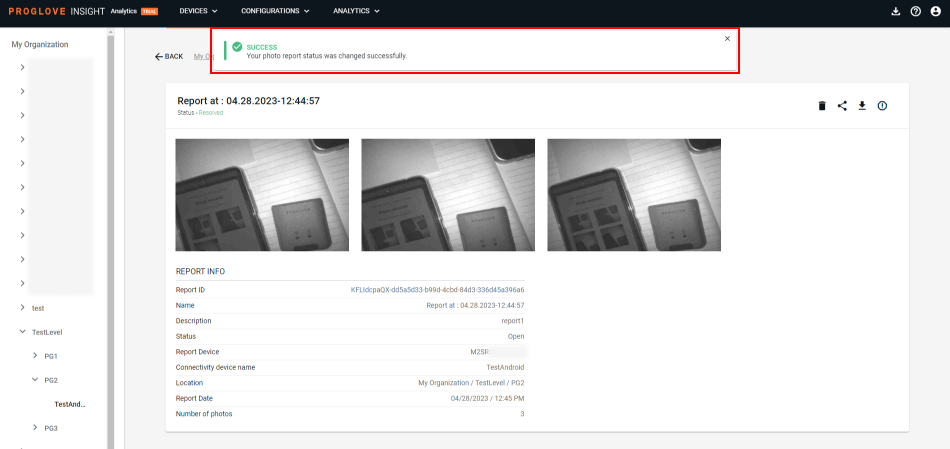
All photo reports originally get an Open status. Once you have reviewed your reports, you can use the checkmark icon to change their status to Resolved. You will see the top notification and the report status change immediately. You will then see an exclamation mark icon that can be used to revert the status back to Open if needed. Note that you can change the status of your photo reports and switch between Open and Resolved as many times as necessary.
Additional information
For detailed instructions on how to enable Photo Reporting on your scanners and Connectivity Devices, visit the Device Configuration pages relevant to your device.
The resolution and quality settings are currently configurable only for Android devices in order to achieve the best balance between quality and responsiveness when taking or transferring an image. Visit the Photo Reporting page for more details.
Maximum message size: 128 KB
Image resolution: 1280 x 960 (default), 640 x 480, 320 x 240
Jpeg quality: 90 is set as a default value. However, all values from 1 to 100 that represents the .jpeg compression level are accepted, where 1 stands for high compression (low quality and smaller size) and 100 for low compression (high quality and bigger size).
Availability and limitations:
Important
Photo Reporting is not supported on LEO scanners.
Carefully test the performance of your scanners when using both Photo Reporting and Continuous Scanning in parallel, as certain technical difficulties may occur.
Devices and firmware | Subscription plan | Lifecycle status | Resources |
|---|---|---|---|
MARK Basic, MARK Display, MARK 2 - Scanner Firmware Gen1 version 2.13.0 MARK 3 - Scanner Firmware Gen2 version 1.5.0 MAI Firmware - version 1.0.2 Gateway - version 2.11.0 INSIGHT Mobile (Android) - version 1.31.0 | INSIGHT Enhance | Full release |
FAQs
- 1. What is the size of files that can be sent through to INSIGHT?
- 2. How many photos can I send in a single report?
- 3. Is the image resolution configurable?
- 4. Can I send photos directly to INSIGHT without an Android device?
- 5. How long do my Photo Reports stay visible in INSIGHT webportal?
1. | What is the size of files that can be sent through to INSIGHT? |
Depending on the type of file, file sizes can vary. See below for some average numbers on data we currently send through the app:
| |
2. | How many photos can I send in a single report? |
There is currently no limitation on the number of photos that can be sent through in a single report, only on the message file size (128 KB). | |
3. | Is the image resolution configurable? |
The image resolution is configurable only for Android devices at the moment, visit this page for instructions. The default resolution for all devices is set to 1280 x 960. | |
4. | Can I send photos directly to INSIGHT without an Android device? |
No. An Android device is necessary for your scanners to connect with and send data to your INSIGHT account. | |
5. | How long do my Photo Reports stay visible in INSIGHT webportal? |
Photo Reports are visible in INSIGHT for 14 days. They are deleted after that period. |